Table of Contents
This chapter describes how to install the Master Server.
The following is a summary of the Master installation process.
-
Installing Master
-
Verifying Master Installation
-
Creating Master Directory Structure
-
Verifying Master Environment Configuration
-
-
Verifying Tomcat Installation
-
Master Startup and Shutdown
-
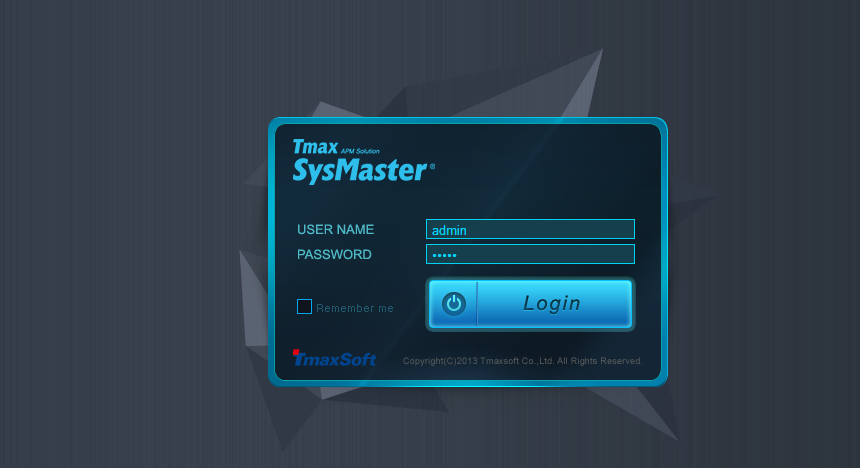
Starting Web Admin
This section describes how to install the Master server.
Note
JVM 1.6 or later must be installed on the server where SysMaster will be installed. The Provided Installer does not include the JVM.
Master is installed in the following order.
-
After granting execution permission for the SysMaster5_0_Master_Agent_Standard.bin file, execute the file.
tmaxh9:[/data1/apmqas/sysmaster/master_5x]$ ./SysMaster5_0_Master_Agent_Standard.bin
Preparing to install...
Extracting the installation resources from the installer archive...
Configuring the installer for this system's environment...

Launching installer...

Preparing CONSOLE Mode Installation...

===============================================================================
SysMaster5.0                      (created with InstallAnywhere by Macrovision)
-------------------------------------------------------------------------------


===============================================================================
Introduction
------------

InstallAnywhere will guide you through the installation of SysMaster5.0.

It is strongly recommended that you quit all programs before continuing with
this installation.

Respond to each prompt to proceed to the next step in the installation.  If you
want to change something on a previous step, type 'back'.

You may cancel this installation at any time by typing 'quit'.

PRESS <ENTER> TO CONTINUE:
-
License Agreement is displayed.
=============================================================================== License Agreement ----------------- Installation and Use of SysMaster5.0 Requires Acceptance of the Following License Agreement: SysMaster This Software is made by 'TmaxSoft Co.,Ltd.' and this software is distributed under our license agreement. Software End-User License Agreement Product : SysMaster This is a legal agreement between you (either an individual or an entity) and TmaxSoft, Incorporated. By opening the sealed software package and/or by using the software, you agree to be bound by the terms of this agreement. SysMaster Software License 1. Grant of License: This SysMaster Software License Agreement ("License") permits you to use one copy of the TmaxSoftware product Tmax, on any single computer, provided the software is in use on only one computer at any one time. If this package is a license pack, you may make and use additional copies of the software up to the number of licensed copies authorized. If you have multiple licenses for the software, then at any time you may have as many copies of the software in use as you have licenses. The software is "in use" on a computer when it is loaded into the temporary PRESS <ENTER> TO CONTINUE: -
Enter y + <ENTER> to accept the terms of the agreement.
PRESS <ENTER> TO CONTINUE:
DO YOU ACCEPT THE TERMS OF THIS LICENSE AGREEMENT? (Y/N): y
-
Select the Install Set. For Master, enter 1 + <ENTER>.
Choose Install Set ------------------ Please choose the Install Set to be installed by this installer. ->1- Master 2- Agent 3- Only Provider ENTER THE NUMBER FOR THE INSTALL SET, OR PRESS <ENTER> TO ACCEPT THE DEFAULT : -
Select the platform where SysMaster will be installed.
===========================================================================
Choose Platform
---------------
Choose current system ( platform-architecture )

1)HP-UX PA-RISC
2)HP-UX ITANIUM
3)AIX 5L
4)AIX 6L
5)AIX 7L
6)Solaris Sparc 7~10
7)Linux i386
8)Linux ITANIUM
9)Linux x86_64
Quit) Quit Installer

Choose Current System (DEFAULT: ):
-
Select the Web UI language.
=============================================================================== Choose the SysMaster Web UI language ------------------------------------ Please Choose the SysMaster Web UI language. (The language can be changed after installation.) ->1- English 2- Korean 3- previous ENTER THE NUMBER OF THE DESIRED CHOICE, OR PRESS <ENTER> TO ACCEPT THE DEFAULT: -
Select the kernel bit.
=========================================================================== Choose Kernel Bit Please Choose Kernel Bit? ->1- 32bit 2- 64bit 3- previous ENTER THE NUMBER OF THE DESIRED CHOICE, OR PRESS <ENTER> TO ACCEPT THE DEFAULT: -
Enter JDK directory path. (JDK 1.6 or later)
===============================================================================
Choose JDK Folder
-----------------

Please Choose a Folder:

Input User JDK Folder (DEFAULT: /opt/java1.5): /opt/java6_13
-
Configure the Master Server.
=============================================================================== Choose Install Master Folder ---------------------------- Where would you like to install? (DEFAULT: /data1/apmqas/sysmaster) : /data1/apmqas/sysmaster/master_5x/ =============================================================================== Directory Check --------------- User Specified Directory exists. To overwrite SysMaster5.0, click 'Overwrite'. To choose a Different directory, click 'Change'. To cancel the installation, click 'Cancel'. ->1- Overwrite 2- Change... 3- Cancel ENTER THE NUMBER OF THE DESIRED CHOICE, OR PRESS <ENTER> TO ACCEPT THE DEFAULT =========================================================================== Choose Master Infomation ------------------------ Master IP (DEFAULT: 192.168.1.34): Master BASE PORT (DEFAULT: 22000): WEB BASE PORT (DEFAULT: 8080): WEB SERVER PORT (DEFAULT: 8005): AJP/1.3 PORT (DEFAULT: 8009): -
Enter whether to install the Provider.
=============================================================================== Install Provider ---------------- Do you wish to install Provider file? ->1- YES 2- NO ENTER THE NUMBER OF THE DESIRED CHOICE, OR PRESS <ENTER> TO ACCEPT THE DEFAULT: -
Select the Provider to install. When installing multiple Providers, use a comma-separated list.
The following is an example of installing WAS as the Provider.
================================================================ Choose Provider --------------- 1- was ENTER A COMMA-SEPARATED LIST OF NUMBERS REPRESENTING THE DESIRED CHOICES, OR PRESS <ENTER> TO ACCEPT THE DEFAULT: 1 -
Confirm the selected provider(s).
=============================================================================== Install Provider Change ----------------------- You Choose was Do you wish to change Provider file? Choose Yes or No ->1- NO 2- YES ENTER THE NUMBER OF THE DESIRED CHOICE, OR PRESS <ENTER> TO ACCEPT THE DEFAULT: -
Pre-installation summary is displayed. Press <ENTER> to start the installation.
=============================================================================== Pre-Installation Summary ------------------------ Please Review the Following Before Continuing: Product Name: SysMaster5.0 Disk Space Information (for Installation Target): Required: 57,583,190 bytes Available: 287,039,488 bytes PRESS <ENTER> TO CONTINUE: -
The following screen is displayed when installation is completed.
===============================================================================
Installing...
-------------

 [==================|==================|==================|==================]
 [------------------|------------------|------------------|------------------]


===============================================================================
Installation Complete
---------------------

Congratulations. SysMaster5.0 has been successfully installed to:

   /data1/apmqas/sysmaster/master_5x/

PRESS <ENTER> TO EXIT THE INSTALLER:
[Note]
If there is a blank space in the path that is entered during the installation in Windows, modify the path as in the following. Up to 8 characters can be used for a path by entering 6 characters followed by '~1' or '~2'.
-
Example 1
C:\Program Files\Java\jdk1.5.0_12 --> C:\Progra~1\Java\jdk1.5.0_12
-
Example 2
When both C:\Program Files and C:\Program Files (x86) exist, and Java is installed in C:\Program Files (x86) --> C:\Progra~2\Java\jdk1.5.0_12
-
Example 3
C:\Documents and Settings\Java\jdk1.5.0_12 --> C:\Docume~1\Java\jdk1.5.0_12
When the installation of Master is complete, verify that the installation was successful. This section describes how to verify the installation of the Master server.
The following directory is created when the Master has been installed successfully. (In the following example, the installation directory for the Master server has been set to 'sysmaster'.)
$sysmaster
    +- master
        +- bin
        +- config
        +- h2
        +- license
        +- logs
        +- provider
        +- tomcat
        +- update
- bin
-
Contains executable files like smdown, smmaster, etc.
- config
-
Contains property files needed for the Master Server operation.
- h2
-
Contains File DB related files such as sysmaster.h2.db.
- license
-
Contains license files.
- logs
-
Contains log files.
- provider
-
Contains *.zip,* sql, and console files for Providers supplied by SysMaster.
- tomcat
-
Contains files that are needed to start SysMaster WEB UI.
- update
-
Contains latest files for the automatic update of Master, Agent, and Console.
This section describes environment configurations of the Master server.
Some of the modified settings during installation are saved in the following files. The configuration settings can be checked in each file (smdown file cannot be modified).
.profile or .bash_profile
Check that the environment variable settings have been correctly saved.
If the value is not displayed when executing echo $CATALINA_HOME even though the environment variable is set, execute the environment variable.
CATALINA_HOME=/data1/apmqas/sysmaster/master_5x/tomcat
export CATALINA_HOME
$SYSMASTER_HOME/config/sysmaster.properties
$SYSMASTER_HOME/bin/smmaster
The previous files define the basic settings required to operate the Master Server. Refer to "2.4. Verifying Tomcat Installation" for detailed information about configuring Tomcat environment settings.
Note
If the timezones between Master, Web Admin, and Agent are different, the same time value can be displayed differently on each. Note that the time setting cannot be reset while Master is running. Since time setting varies by OS, refer to each OS manual.
sysmaster.properties
Check that the database settings and hostname have been correctly saved.
# DB for General
db.vendor=H2
db.datasource.refname=system
#db.client.charset=
#db.server.charset=
#db.encode=false

.................omitted

##############################################################################################
#   [ NETWORK ]
#
#   master.hostname            Master Hostname(IPAddress)
#
##############################################################################################
master.hostname=192.168.1.34

.................omitted

##############################################################################################
#
#   [ LOGGING ]
#
#   log.level                  Log Level(debug|info|warn|error|fatal|off)
#   log.format                 Log Format([%c:%-5p] %m {%C{1}.%M(%L)}%n)
#   log.redirect               false if u don't want to redirect logs to smlog file
#
##############################################################################################
log.level=debug
log.format=%d{HH:mm:ss} [%c{1}] [%-5p] %m%n
log.redirect=true
log.retention=7

ui.workinglist.max.cnt=40
ui.was.dashboard.lite=true
ui.analysis.max.cnt=40
...
The following is description of the properties.
| Property | Description |
|---|---|
| db.vendor | Use to check whether the database vendor setting has been applied correctly. db.vendor must be set to H2. |
| master.hostname | Use to check whether Master Server's IP address has been applied correctly. (Master IP) |
| log.retention | Expiration date for deleting the logs. |
| ui.workinglist.max.cnt | Number of containers that can be selected from a dashboard. Up to 40 different colors can be displayed. |
| ui.was.dashboard.lite | If set to "true", up to 15 (1 line) active service bars can be displayed on a dashboard. This has higher priority than ui.workinglist.max.cnt. |
| ui.analysis.max.cnt | Number of containers that can be selected from an analysis screen. Maximum value is 40. |
[Note]
Refer to the following configuration items to improve the performance of the Master server.
The transmitted data can be categorized into the following data types collected by the Master server.
| Data Type | Description |
|---|---|
| Statistics data | Statistics (Stat) refer to the statistics data that are collected every 10 seconds. The target data is saved in Repository DB tables with 'ST' in their name, such as SMWS_ST_SERVICE_S table for WAS Provider. |
| Trace data | Transaction-specific data, such as SMWS_TX_HEADER_S table for WAS Provider. |
The performance of the Master server can be improved by configuring the following properties in 'MASTER_HOME/config/sysmaster.properties'.
....
stat.thread.size=3
stat.max.data.size=5000
trace.thread.size=5
trace.max.data.size=10000
....
The following is description of the properties.
| Property | Description |
|---|---|
| stat.thread.size | Number of threads used to insert statistics data. (default value: 3) Controls threads that extract statistics data to insert into a statistics table (ST). |
| stat.max.data.size | Max data size used to prevent Master from generating an OOM(Out Of Memory) error due to the accumulation of statistics data (default value: 5000). |
| trace.thread.size | Number of threads used to insert trace data. (default value: 5) Controls threads that extract trace data to insert into a transaction table (TX). |
| trace.max.data.size | Max data size used to prevent Master from generating an OOM(Out Of Memory) due to the accumulation of trace data (default value: 10000) |
The performance of the Master server can be improved by configuring the following properties according to each environment. Modify the settings for the heaviest load. If MAX TPS is 1000 TPS or less, the system can operate under the default settings.
-
When the number of DB connections is sufficient or the load is heavy.
Increase the stat.thread.size or trace.thread.size value.
....
stat.thread.size=7
stat.max.data.size=5000
trace.thread.size=10
trace.max.data.size=10000
....
-
When the Master server memory is relatively small compared to the load.
Decrease the stat.max.data.size or trace.max.data.size value.
....
stat.thread.size=3
stat.max.data.size=1000
trace.thread.size=5
trace.max.data.size=2000
....
smmaster
Verify that the SYSMASTER_HOME value that was specified during the installation has been configured properly.
#!/bin/sh

SYSMASTER_HOME=/data1/apmqas/sysmaster/master_5x/
BOOTSTRAP_CLASSPATH=$CATALINA_HOME/lib/sysmaster-base-bootstrap.jar:$CATALINA_HOME/lib/oro.jar
echo $JAVA_HOME/bin/java -classpath $BOOTSTRAP_CLASSPATH -Dsysmaster.home=$SYSMASTER_HOME -Dwas.home=$CATALINA_HOME sysmaster.startu
p.master.UpdateBootstrap F*
$JAVA_HOME/bin/java -classpath $BOOTSTRAP_CLASSPATH -Dsysmaster.home=$SYSMASTER_HOME -Dwas.home=$CATALINA_HOME sysmaster.startup.mas
ter.UpdateBootstrap F*
$CATALINA_HOME/bin/catalina.sh run &
Save the license file and license related library files from the following location under the Master directory.
-
License file(license.dat)
$SYSMASTER_HOME/license
-
License Related Library files
-
For Unix: libsmlic.so, libsmlic64.so
-
For Windows: Microsoft.VC90.CRT.manifest, msvcm90.dll, msvcp90.dll, msvcr90.dll, smlic.dll
$CATALINA_HOME/lib (e.g: /data1/user/master5/tomcat/lib)
-
$MASTER_HOME
    +- tomcat
        +- bin
        +- conf
        +- lib
        +- logs
        +- webapps
Note
For description of each directories, refer to http://tomcat.apache.org/tomcat-7.0-doc/index.html.
Check the files in the 'CATALINA_HOME/lib' directory
Check that the following files are in the 'CATALINA_HOME/lib' directory.
US_export_policy.jar           commons-httpclient.jar      javassist.jar
sysmaster-base-bootstrap.jar   activation.jar              commons-io.jar
jmxri.jar                      sysmaster-base.jar          annotations-api.jar
commons-lang.jar               json_simple.jar             tomcat-api.jar
catalina-ant.jar               commons-lang3.jar           jsp-api.jar
tomcat-coyote.jar              catalina-ha.jar             commons-logging.jar
local_policy.jar               tomcat-dbcp.jar             catalina-tribes.jar
commons-net.jar                log4j.jar                   tomcat-i18n-es.jar
catalina.jar                   commons-pool.jar            mail.jar
tomcat-i18n-fr.jar             common-util.jar             commons-primitives.jar
ognl.jar                       tomcat-i18n-ja.jar          commons-cli.jar
ecj-4.2.2.jar                  oro.jar                     tomcat-jdbc.jar
commons-codec.jar              el-api.jar                  poi.jar
tomcat-util.jar                commons-collections.jar     freemarker.jar
servlet-api.jar                webt30.jar                  commons-configuration.jar
h2-1.3.173.jar                 sqlbuilder.jar              xwork-core.jar
commons-dbcp.jar               jasper-el.jar               struts2-core.jar
commons-fileupload.jar         jasper.jar                  struts2-json-plugin.jar
Check the webhome directory
Check the sysmaster directory after starting the Master server.
$SYSMASTER_HOME/tomcat/webapps/sysmaster
The following are the SysMaster 5.0 port settings that are applied to the Tomcat environment configuration file. The settings are set using the information entered by the user during the installation, and they can be modified as needed.
User Port Summary (Refer to this when modifying the port)
Change the port information in the following two files.
-
CATALINA_HOME/bin/setenv.sh
SYSMASTER_PORT=22000
Variable Description SYSMASTER_PORT
Set the port number by referring to the following:
-
masterPortRmiRegistry = basePort
Set automatically under the Master's base port
-
masterPortJrmpAdaptor = basePort + 1
Port for Java Remote Method Protocol
-
masterPortRequest = basePort + 2
Port for real-time user requests.
-
masterPortStatServerDefault = basePort + 6
Port for receiving statistical data from Agent and DC.
-
masterPortTXServerDefault = basePort + 7
Port for receiving transaction data from Agent and DC.
-
-
$CATALINA_HOME/conf/server.xml
Server Port=8005
Http Port=8080
Variable Description Server Port Tomcat server port information. Http Port Http Connector port information.
Check setenv.sh file
The following is the location of the setenv.sh file.
$CATALINA_HOME/bin/setenv.sh
The following is the content of the setenv.sh file. Check the SYSMASTER_PORT setting.
#!/bin/sh

export SYSMASTER_HOME="/data1/apmqas/sysmaster/master_5x/"
export LIBRARY_PATH="$CATALINA_HOME/lib"
export SYSMASTER_PORT=22000
export CATALINA_OPTS="$CATALINA_OPTS -Xms128m -Xmx256m -Dwas.home=$CATALINA_HOME"
export CATALINA_OPTS="$CATALINA_OPTS -Dsysmaster.home=$SYSMASTER_HOME
                      -Dsysmaster.path.library=$LIBRARY_PATH
                      -Dsysmaster.port=$SYSMASTER_PORT
                      -Dsysmaster.master.trace.sql=3"
Note
SYSMASTER_PORT: Automatically set to BASEPORT(Default: 22000) +1, +2, +6, and +7 ports.
The following is description of the SYSMASTER_PORT. Communication port with the Agent must be open both ways.
masterPortRmiRegistry = basePort;
masterPortJrmpAdaptor = basePort + 1;
masterPortRequest = basePort + 2;
masterPortStatServerDefault = basePort + 6;
masterPortTXServerDefault = basePort + 7;
Check context.xml
Check the access information for the Repository DB in context.xml.
The following is the location of the context.xml file.
$CATALINA_HOME/conf/context.xml
The following is from the context.xml file. Do not modify the following settings since they are also saved in the File DB.
<Context>
    <!-- Default set of monitored resources -->
    <WatchedResource>WEB-INF/web.xml</WatchedResource>

    <!-- Uncomment this to disable session persistence across Tomcat restarts -->
    <!--
    <Manager pathname="" />
    -->

    <!-- Uncomment this to enable Comet connection tacking (provides events
         on session expiration as well as webapp lifecycle) -->
    <!--
    <Valve className="org.apache.catalina.valves.CometConnectionManagerValve" />
    -->

    <Resource name="system" auth="Container"
              type="javax.sql.DataSource" driverClassName="org.h2.Driver"
              url="jdbc:h2:file:/data1/apmqas/sysmaster/master_5x/h2/bin/sysmaster"
              username="sysmaster" password="sysmaster" maxActive="20" maxIdle="10"
              maxWait="-1"/>
</Context>
Check server.xml
Check the Server Port and Http Connector Port settings in server.xml.
The following is the location of the server.xml file.
$CATALINA_HOME/conf/server.xml
The following is an excerpt from the server.xml file.
.................omitted
<Server port="8005" shutdown="SHUTDOWN">
.................omitted
<Connector port="8080" protocol="HTTP/1.1"
           connectionTimeout="20000"
           redirectPort="8443" />
Check web.xml
The following is the location of db.url in the web.xml file.
$CATALINA_HOME/conf/web.xml
The following is an excerpt from the web.xml file.
.................omitted

<listener>
     <listener-class>org.h2.server.web.DbStarter</listener-class>
</listener>
<listener>
     <listener-class>sysmaster.master.BootContextListener</listener-class>
</listener>
<context-param>
     <param-name>db.url</param-name>
     <param-value>
          jdbc:h2:file:/data1/apmqas/sysmaster/master_5x/h2/bin/sysmaster;
          LOCK_TIMEOUT=30000;LOCK_MODE=0
     </param-value>
</context-param>
<context-param>
     <param-name>db.user</param-name>
     <param-value>sysmaster</param-value>
</context-param>
<context-param>
     <param-name>db.password</param-name>
     <param-value>sysmaster</param-value>
</context-param>
<context-param>
     <param-name>db.tcpServer</param-name>
     <param-value>-tcpAllowOthers</param-value>
</context-param>

.................omitted
This section describes how to start and terminate the Master Server.
The following are the steps for starting the Master Server.
-
Execute smmaster from the '$SYSMASTER_HOME/bin' directory.
$ SYSMASTER_HOME/bin
$ smmaster
-
If the Master Server starts successfully, the following log is displayed.
************************************************************** MASTER [container1] READY... - server : Default Managed Server started - server : SysMaster JMX Server started - server : NioRequestServerManager started - server : NioEventServerManager started - server : EventReceiverServerManager started - server : File Job Master Server started - server : NioStatisticServerManager started - server : NioTransactionServerManager started ************************************************************** SysMaster master boot success... [16:56:22] All stdout,stderr will be redirect to: /data1/apmqas/sysmaster/master_5x/logs/smlog Oct 24, 2013 4:56:43 PM org.apache.catalina.util.SessionIdGenerator createSecureRandom INFO: Creation of SecureRandom instance for session ID generation using [SHA1PRNG] took [20,471] milliseconds. Oct 24, 2013 4:56:43 PM org.apache.coyote.AbstractProtocol start INFO: Starting ProtocolHandler ["http-bio-8080"] Oct 24, 2013 4:56:43 PM org.apache.coyote.AbstractProtocol start INFO: Server startup in 24874 ms -
If the Master starts successfully, the following process can be viewed.
Dsysmaster, tomcat

ps -ef|grep Dsysmaster |grep tomcat
Terminating the SysMaster server is same as terminating an active process of a Tomcat server.
The following are the steps for terminating the Master Server.
-
Execute smdown from the '$SYSMASTER_HOME/bin' directory.
$ SYSMASTER_HOME/bin
$ smdown
-
If the Master Server is terminates successfully, the following log is displayed.
Using CATALINA_BASE:   /home/daehun/sysmaster/master_5x/20131023/tomcat
Using CATALINA_HOME:   /home/daehun/sysmaster/master_5x/20131023/tomcat
Using CATALINA_TMPDIR: /home/daehun/sysmaster/master_5x/20131023/tomcat/temp
Using JRE_HOME:        /usr/java/jdk1.6.0_26
Using CLASSPATH:       /home/daehun/sysmaster/master_5x/20131023/tomcat/bin/
                        bootstrap.jar:/home/daehun/sysmaster/master_5x/
                        20131023/tomcat/bin/tomcat-juli.jar
This section describes how to use smpwd.
Smpwd is a module that encrypts and decrypts the password of a SysMaster admin account or a user account by using a DESede key. For more information, refer to the following URL.
http://docs.oracle.com/javase/6/docs/technotes/guides/security/SunProviders.html
The following describes how to use the BASE64 encoding for a value created by using the key.
The verified password can be used after updating it in the USER_PWD column of the SMB_USR_USER table in the SysMaster Repository DB.
-
Encryption
encrypt : smpwd -e admin
-
Decryption
decrypt : smpwd -d EhT***