리모트 에이전트 설치 및 제거
본 절에서는 UNIX/Linux와 Windows 환경에서 리모트 에이전트를 설치하는 방법에 대해서 설명한다.
1. Unix/Linux 환경에서 설치
1.1. 설치
Unix/Linux 환경에서 제품을 설치하기 위해서 Console Installer를 실행해야 한다. Console Installer는 설치 과정에서 값을 입력받을 때 기본값을 제시한다. 셸은 이전 단계로 돌아가는 것이 기본적으로 불가능하므로 설치가 완료된 후에 값을 변경한다.
다음은 Unix/Linux 환경에서 AnyLink를 설치하는 과정에 대한 설명이다.
-
AnyLink 리모트 에이전트 설치 파일(AnyLink_RemoteAgent.bin)을 서버에 업로드하고 파일이 위치한 디렉터리로 이동한다.
-
설치 Console Installer가 실행이 가능하도록 설치 파일의 실행 권한을 다음과 같이 부여한다.
chmod u+x AnyLink_RemoteAgent.bin
-
콘솔에서 설치 파일명을 입력한 후 <ENTER> 키를 누른다.
anylink@node:~$ ./AnyLink_RemoteAgent.bin
Preparing to install...
Extracting the installation resources from the installer archive...
Configuring the installer for this system's environment...
strings: '/lib/libc.so.6': No such file

Launching installer...

Preparing CONSOLE Mode Installation...

===============================================================================
AnyLink_RemoteAgent           (created with InstallAnywhere by Macrovision)
-------------------------------------------------------------------------------
-
인스톨러에 대한 간략한 소개 화면이 나타난다. 다음 과정을 수행하기 위해 <ENTER> 키를 누른다.
===============================================================================
Introduction
------------

InstallAnywhere will guide you through the installation of AnyLink_RemoteAgent.

It is strongly recommended that you quit all programs before continuing with
this installation.

Respond to each prompt to proceed to the next step in the installation.
If you want to change something on a previous step, type 'back'.

You may cancel this installation at any time by typing 'quit'.

PRESS <ENTER> TO CONTINUE:
-
AnyLink 리모트 에이전트 라이선스 준수 화면이 나타난다.
===============================================================================
License Agreement
-----------------

Installation and Use of AnyLink_RemoteAgent Requires Acceptance of the
Following License Agreement:

Installation and Use of AnyLink Remote Agent(hereafter, Software) Requires
Acceptance of the Following License Agreement:

TmaxSoft Co., Ltd. (hereafter, TmaxSoft) License Agreement (hereafter,Agreement)
Product : AnyLink Remote Agent

This is a legal agreement between you (either an individual or an entity) and
TmaxSoft, Incorporated.
By opening the  sealed software package and/or by using the software, you agree
to be bound by the terms of this agreement.

AnyLink Software License

1.  Grant of license:  TmaxSoft hereby grants you a non-exclusive,
non-transferable, non-sublicensable limited license to the Software and any
intellectual property related to the Software including, but not limited to,
user manuals and implementation instructions. You should read this Agreement
carefully before opening the Software package, installing or using the Software.
Once you open the Software package, install
or use the

PRESS <ENTER> TO CONTINUE:
-
라이선스 동의 여부를 결정한다.
동의를 하면 'y’를 입력한 후 <ENTER> 키를 누르고, 아니면 'n’을 입력한 후 <ENTER> 키를 누른다.
Software, you are deemed to have agreed to the contents of this Agreement.

2. Copyright:  The Software and all related intellectual property is owned by
TmaxSoft and protected by copyright laws and international treaty provisions.
You shall not use or copy the Software without usage  authorization of TmaxSoft.
You also shall not copy the printed materials accompanying the Software, nor
print copies of any user documentation provided in online or electronic form.

3. Other restrictions: You shall not rent, lease, or lend the Software and
accompanying materials on a permanent basis to any individual or company.
You shall not, nor permit any third party to reverse engineer, decompile,
disassemble, modify, adapt, create derivative works from or otherwise attempt
to derive source code from the Software provided.

TmaxSoft Co., Ltd.

DO YOU ACCEPT THE TERMS OF THIS LICENSE AGREEMENT? (Y/N): y
-
설치 디렉터리를 선택한다. 기본적으로 제공되는 값을 사용하려면 <ENTER> 키를 누르고, 디렉터리 변경을 원하면 설치 경로를 입력한다.
=============================================================================== Choose Install Folder ------------------- Where would you like to install? Default Install Folder: /home/anylink/AnyLinkRA ENTER AN ABSOLUTE PATH, OR PRESS <ENTER> TO ACCEPT THE DEFAULT : -
입력된 디렉터리 정보를 다시 확인한다. 다른 디렉터리로 변경하려면 '2 - Change…'를 선택하고 <ENTER> 키를 누른다.
=============================================================================== Directory Check --------------- User Specified Directory exists. To overwrite AnyLink_RemoteAgent, click 'Overwrite'. To choose Different directory, click 'Change'. To cancel the installation, click 'Cancel'. ->1- Overwrite 2- Change... 3- Cancel ENTER THE NUMBER OF THE DESIRED CHOICE, OR PRESS <ENTER> TO ACCEPT THE DEFAULT: -
JDK의 위치를 입력한다. <ENTER> 키를 누르면 자동으로 인식한 JDK의 위치를 사용한다. 디렉터리를 변경하려면 설치 경로를 입력한다.
===============================================================================
Choose JDK Folder
-----------------

Please Choose a Folder:

Input User JDK Folder (DEFAULT: /home/anylink/jdk1.7.0_79):
-
AnyLink 리모트 에이전트가 설치된 환경의 IP 정보를 입력한다. (xxx.xxx.xxx.xxx)
===============================================================================
Input User RemoteAgent IP
-----------------------

Enter requested information

Agent IP (DEFAULT: 127.0.0.1):
-
AnyLink 리모트 에이전트가 사용할 포트 정보를 입력한다.
===============================================================================
Input User RemoteAgent Port
-------------------------

Enter requested information

Agent Port (DEFAULT: 25100):

File Send Port (DEFAULT: 25110):

Manager Port (DEFAULT: 25120):
-
다음 화면은 설치에 관련한 요약정보를 보여준다. <ENTER> 키를 누르면 설치가 진행된다.
=============================================================================== Pre-Installation Summary ------------------------ Please Review the Following Before Continuing: Product Name: AnyLink_RemoteAgent Install Folder: /home/anylink/AnyLinkRA Disk Space Information (for Installation Target): Required: 30,906,755 bytes Available: 916,017,520,640 bytes PRESS <ENTER> TO CONTINUE: -
진행 바와 함께 설치가 진행된다.
===============================================================================
Installing...
-------------

 [==================|==================|==================|==================]
 [------------------|------------------|------------------|------------------]
-
설치가 완료되면 설치 결과를 조회할 수 있다.
===============================================================================
Installation Complete
---------------------

Congratulations. AnyLink_RemoteAgent has been successfully installed to:

   /home/anylink/AnyLinkRA

PRESS <ENTER> TO EXIT THE INSTALLER:
1.2. 설치 확인
본 절에서는 설치가 완료된 후 설치된 정보를 확인하고 서버를 기동하는 방법에 대해서 설명한다.
디렉터리 구조
AnyLink 리모트 에이전트가 정상적으로 설치되면 다음과 같은 디렉터리가 생성된다.
$AnyLink_RemoteAgent_HOME
   +---- bin
   +---- config
   |---- lib
           +---- agent
           +---- common
           +---- manager
   |---- logs
- bin
-
서버의 시작 및 종료 스크립트인 star, stop 실행 파일들이 위치한다.
- config
-
agent.xml, manager.xml. logging.properties 파일이 위치한 곳으로 서버의 환경정보가 위치한다.
- lib
-
에이전트와 매니저의 라이브러리가 존재한다.
- logs
-
AnyLink 리모트 에이전트 로그 파일들이 위치한다.
기동 확인
AnyLink 리모트 에이전트 HOME에서 start.sh를 실행하면 리모트 에이전트를 기동할 수 있다.
anylink@po3:~/AnyLinkRA/bin$ ./start.sh
***************************************************************
  - AGENT Home        : /home/anylink/AnyLinkRA
***************************************************************
+ /home/anylink/jdk1.7.0_79/bin/java -Xmx512m -server -Djava.util.logging.config.file=
/home/anylink/AnyLinkRA/config/logging.properties -Djava.class.path=
/home/anylink/AnyLinkRA/lib/common/*:/home/anylink/AnyLinkRA/lib/manager/* -Dagent.home=
/home/anylink/AnyLinkRA -cp /home/anylink/AnyLinkRA/lib/common/*:
/home/anylink/AnyLinkRA/lib/manager/* com.tmax.AnyLink.agent.manager.AgentManagerMain start
========================= INIT LOGGER =========================
DailyRollingFileHandler(version:2.1.6). Setting level=FINEST,
formatter=com.tmax.AnyLink.util.logging.CompactFormatter@63acd9bf, filter=null,
errorManager=java.util.logging.ErrorManager@690bbdb8, encoding=null, valid-day=1, valid-hour=0,
valid-minute=0, pattern=/home/anylink/AnyLinkRA/logs/agent_%d{1}.log(/home/anylink/AnyLinkRA/logs/agent_%d{1}.log),
append=true, keepDays=1, async=false
[com.tmax] named logger is j.u.l.Logger
DailyRollingFileHandler.applyProperties(version:2.1.6). Setting level=FINEST,
formatter=com.tmax.AnyLink.util.logging.CompactFormatter@5c52fbe5, filter=null,
errorManager=java.util.logging.ErrorManager@4c17a6bd, encoding=null, valid-day=1, valid-hour=0, valid-minute=0,
pattern=/home/anylink/AnyLinkRA/logs/agent_%d{1}.log(/home/anylink/AnyLinkRA/logs/agent_%d{1}.log),
append=true, keepDays=1, async=false
2. Windows 환경에서 설치 및 제거
본 절에서는 Windows 환경에서 리모트 에이전트를 설치하고 제거하는 과정에 대해서 설명한다.
2.1. 설치
다음은 Windows 환경에서 설치하는 과정에 대한 설명이다.
-
AnyLink 리모트 에이전트 인스톨러(AnyLink_Remote_Agent.exe)가 위치한 디렉터리로 이동해서 파일을 실행한다.
-
AnyLink 리모트 에이전트 소개 화면이 나타난다.
제품에 대한 소개를 읽고 [Next] 버튼을 클릭하여 다음 단계를 진행한다. 설치하는 도중 언제라도 [Cancel] 버튼을 클릭하면 설치를 종료할 수 있으며, [Previous] 버튼을 클릭하여 이전 단계로 이동할 수 있다.
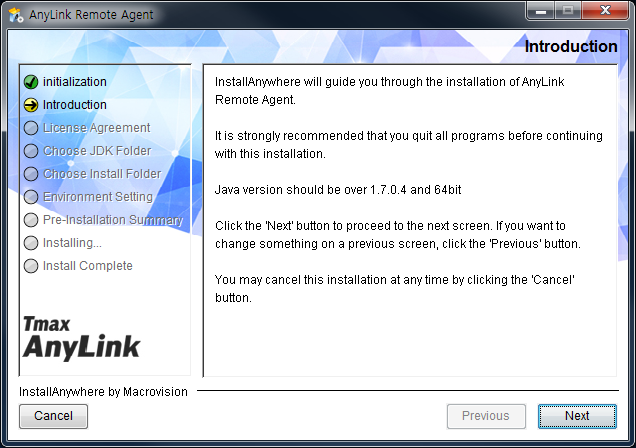 AnyLink 리모트 에이전트 Installer - Introduction
 -
TmaxSoft의 라이선스 동의를 요청하는 화면이 나타난다. 라이선스 내용을 주의 깊게 읽고 약관에 동의한다면 ‘I accept the terms of the License Agreement’를 선택하고 [Next] 버튼을 클릭한다. 만약 약관에 동의하지 않는다면 더 이상 진행할 수 없다.
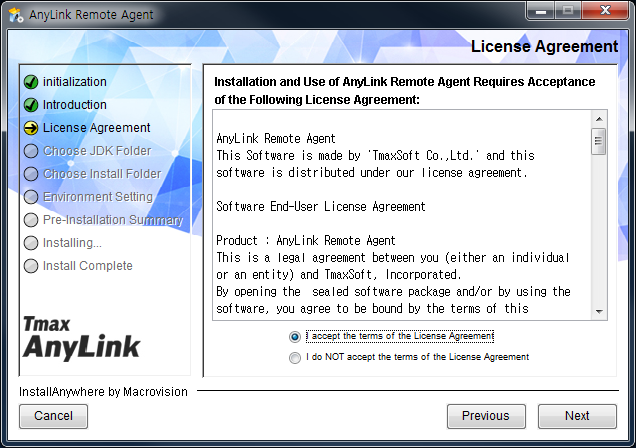 AnyLink 리모트 에이전트 Installer - License Agreement
 -
JDK가 설치된 디렉터리를 선택하고 [Next] 버튼을 클릭한다. 기본으로 설정된 디렉터리에 JDK가 설치되어 있지 않을 경우에는 [Choose...] 버튼을 클릭해서 JDK 디렉터리 위치를 변경한다. JDK 기본 설치 디렉터리로 복원하고자 하는 경우 [Restore Default Location] 버튼을 클릭한다.
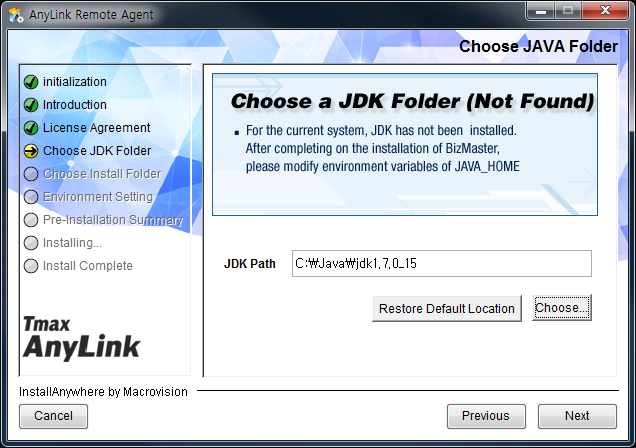 AnyLink 리모트 에이전트 Installer - Choose JAVA Folder (1)
 -
AnyLink 리모트 에이전트를 설치할 디렉터리를 지정하고, [Next] 버튼을 클릭한다. 기본 설치 디렉터리는 [Choose...] 버튼을 클릭하여 변경할 수 있다.
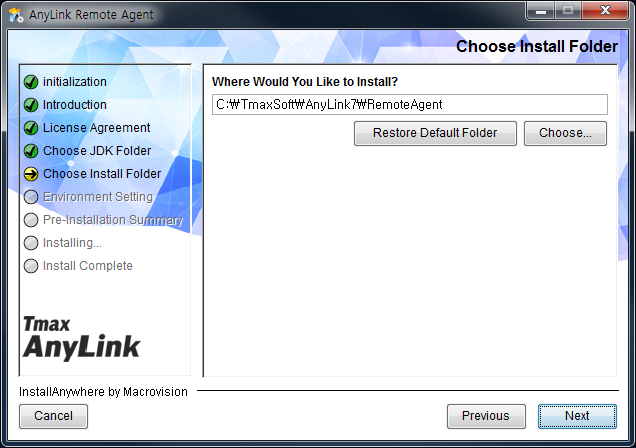 AnyLink 리모트 에이전트 Installer - Choose JAVA Folder (2)
 -
서버와 통신하기 위한 포트를 설정한다.
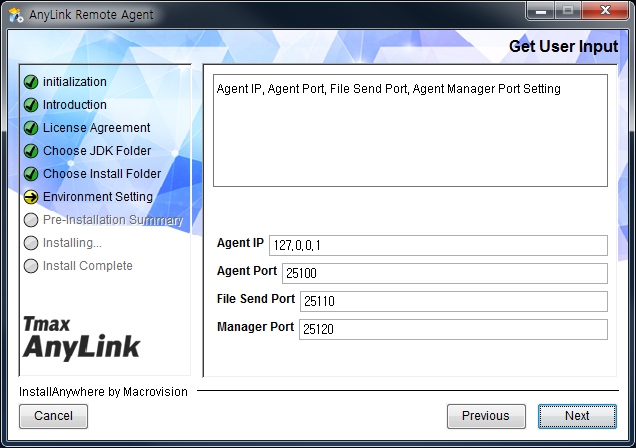 AnyLink 리모트 에이전트 Installer - Environment Setting
 -
설치를 시작하기 전에 지금까지 설정한 설치 정보를 확인할 수 있도록 요약 정보를 보여준다. 설치 경로 등 설정이 올바른지 확인한 후 [Install] 버튼을 클릭해서 리모트 에이전트 설치를 진행한다. 설정을 수정하고 싶은 경우 [Previous] 버튼을 클릭해서 원하는 화면으로 이동한 후에 설정 내용을 변경할 수 있다.
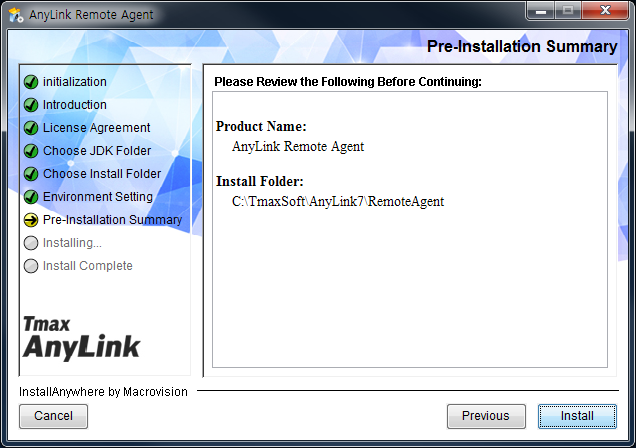 AnyLink 리모트 에이전트 Installer - Pre-Installation Summary (1)
 -
AnyLink 리모트 에이전트 설치를 진행한다. 진행바를 통해 진행 상황을 알 수 있다.
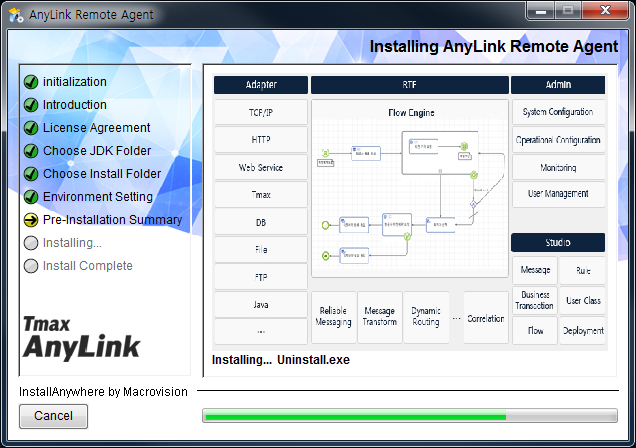 AnyLink 리모트 에이전트 Installer - Pre-Installation Summary (2)
 -
AnyLink 리모트 에이전트 설치 종료를 확인하고 [Done] 버튼을 클릭하면 모든 설치 작업이 종료된다.
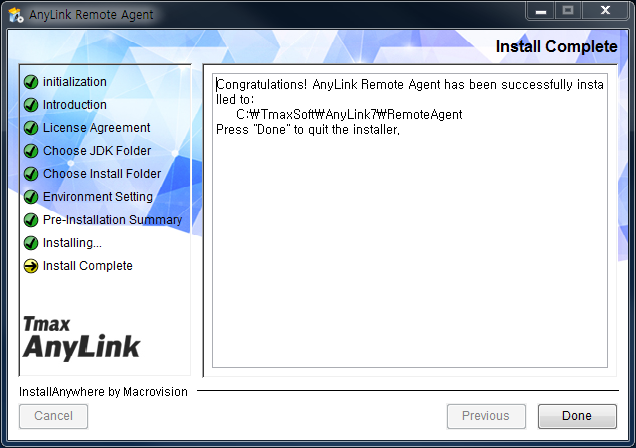 AnyLink 리모트 에이전트 Installer - Installation Complete
2.2. 설치 확인
본 절에서는 설치가 완료된 후 설치된 정보를 확인하고 서버를 기동하는 방법에 대해서 설명한다. AnyLink 리모트 에이전트가 정상적으로 설치된 후 디렉터리 구조에 대한 설명은 "디렉터리 구조"를 참고한다.
기동 확인
리모트 에이전트의 설치가 완료되면 Windows에서 [시작] > [프로그램] > [TmaxSoft] > [AnyLink7] > [RemoteAgent] > [start] 메뉴를 선택해서 리모트 에이전트를 기동한다.
2.3. 제거
AnyLink 리모트 에이전트를 제거하는 과정은 다음과 같다.
-
[시작] > [프로그램] > [TmaxSoft] > [AnyLink7] > [RemoteAgent] > [Uninstall]을 실행한다.
-
제거 확인 화면이 나타난다. 제거 경고 메시지를 확인하고 리모트 에이전트를 제거하려면 [Uninstall] 버튼을 클릭한다.
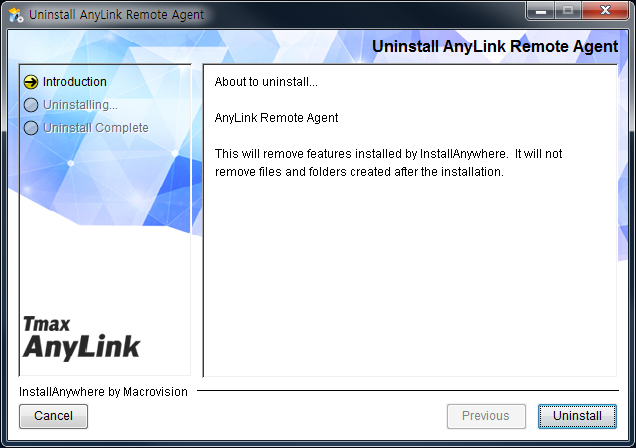 AnyLink 리모트 에이전트 Uninstall
 -
리모트 에이전트 제거가 진행된다.
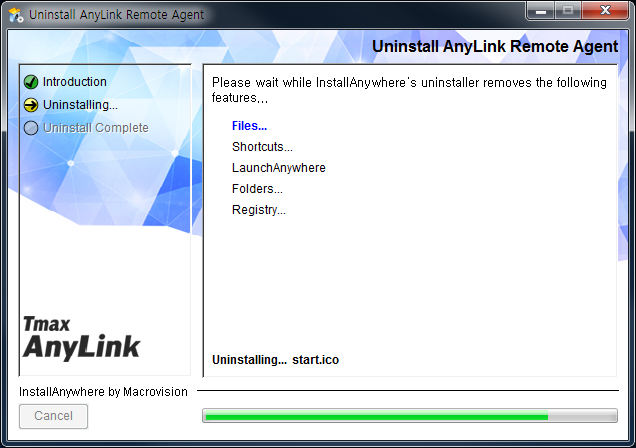 AnyLink 리모트 에이전트 Uninstalling
 -
AnyLink 리모트 에이전트 제거가 완료되면 설치 제거가 완료되었음을 알리는 메시지가 나타난다. [Done] 버튼을 클릭하면 제거 작업이 종료된다.
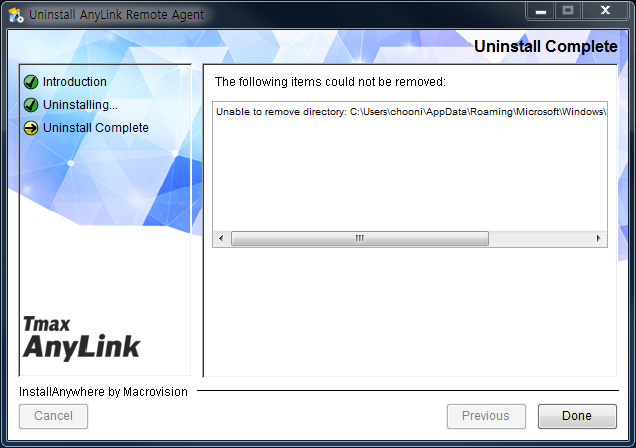 AnyLink 리모트 에이전트 Uninstall Complete