Installation Verification
This appendix describes the OSC Installation Verification Procedure (OIVP) to check that OSC is installed and running properly using the COBOL compiler.
1. Overview
The OIVP has been developed to verify that the OSC system is installed and running properly. Using the OIVP, the administrator can identify any error in installation faster and more accurately than before.
2. OSC Installation Verification Procedure (OIVP)
OIVP is installed using an OSC installer. A sample file is available in the ${OPENFRAME_HOME}/osc/oivp directory.
The following describes setting the OIVP region, registering the application server, and running the OIVP.
2.1. Configuring OSC Region
Before configuring a region, the administrator must prepare application server binaries, create application server data sets, and define application server resources. These prerequisite tasks are completed by the installer.
The following steps show how to configure the region.
-
Prepare application server binaries
Use the oscbuild tool to create binaries.
-
Create application server data sets and file resources
Create OSC SD table, TDQ table, and TSQ table that are defined in the application server. Also create file resources for OIVP.
-
Define Resources
Use the oscdgen tool to define the application server and OIVP resources in the OSC SD. The macro containing resource definitions is available in the ${OPENFRAME_HOME}/osc/resource and ${OPENFRAME_HOME}/osc/oivp/resource directories.
|
2.2. Registering Application Server
After configuring the OSC region, compile and register maps and COBOL source codes.
The following steps explain how to compile and register maps and COBOL source codes. These tasks are completed by the installer.
-
Compile maps
Copy and compile maps. There are currently seven maps.
-
Compile COBOL source codes
Copy and compile COBOL source codes. There are eight COBOL source codes used now.
-
Deploy the compilation results
To use the OIVP, use the osctdlinit tool or the osctdlupdate tool to deploy the compilation results.
-
Boot OSC and the application server.
|
2.3. Running OIVP
The OIVP uses an application that manages user information and verifies OSC resources and commands.
The following steps show how to call the OIVP to verify OSC resources and commands.
-
Log into the system and open a terminal to connect to the OIVP region (OSCOIVP1). Enter the following command.
LOGON APPLID(OSCOIVP1) <ENTER>
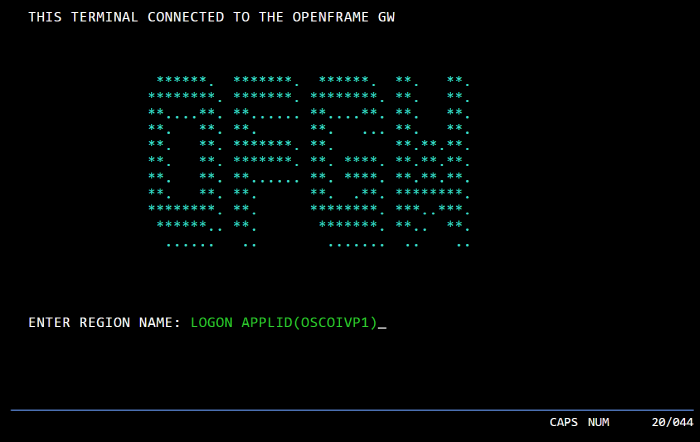 Connecting to OpenFrame GW
 -
When the OSC logo screen is displayed, enter <CLEAR> to clear the display, and call the OIVP transaction by entering the following command.
<CLEAR>
OIVP <ENTER>
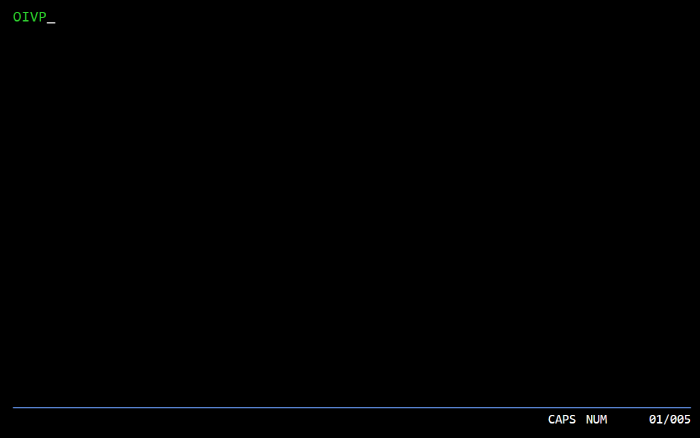 Calling OIVP Transaction
OIVP Function Keys
The following describes keys, their functions, and the application displays they can be used on.
| Key | Function | Application Display |
|---|---|---|
CLEAR |
Exit OIVP |
All |
ENTER |
Proceed |
All |
PF1 |
Display the start screen |
All |
PF2 |
Move to the previous page |
BROS |
PF3 |
Move to the next page |
BROS |
OIVP Screens
The following shows the OIVP home screen.
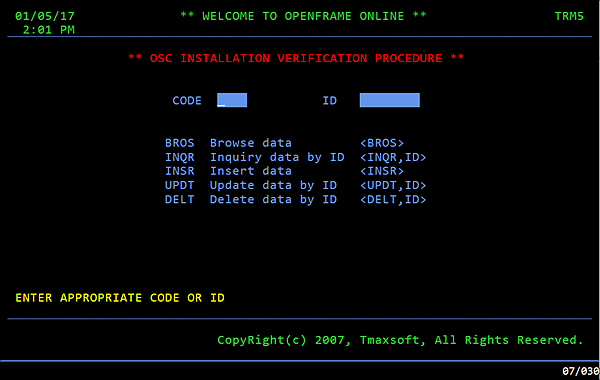
The OIVP screen is divided into three regions.
-
Top region
Displays the date, time, and terminal information.
-
Top region
Displays the OIVP application output.
-
Bottom region
Displays the license information.
There are five menus in the OIVP server: BROS, INQR, INSR, UPDT, and DELT. Accessing each menu requires a CODE or both CODE and ID.
|
-
BROS
The BROS screen displays all records stored in the file. Up to five records per page are displayed.
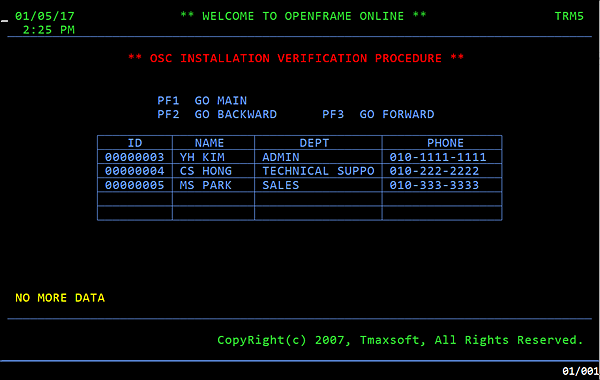 OIVP BROS Screen
 -
INQR
The INQR screen displays information about a specific record stored in the file.
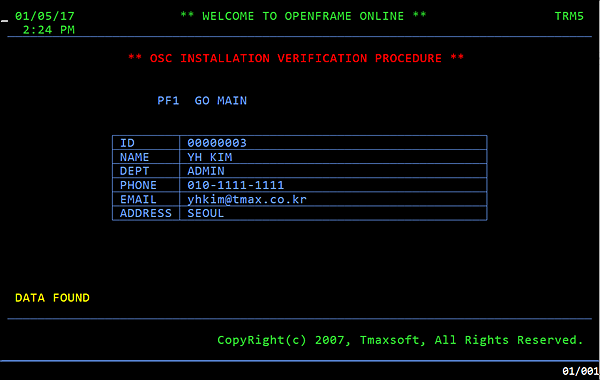 OIVP INQR Screen
 -
INSR
The INSR screen is used to create a new record. The ID field is filled by the OSC Named Counter. The NAME and DEPT fields must be filled manually. Note that each field allows a specific number of characters. NAME allows up to 10 characters; DEPT 15 characters; PHONE 15 characters; EMAIL 20 characters; and ADDRESS 40 characters.
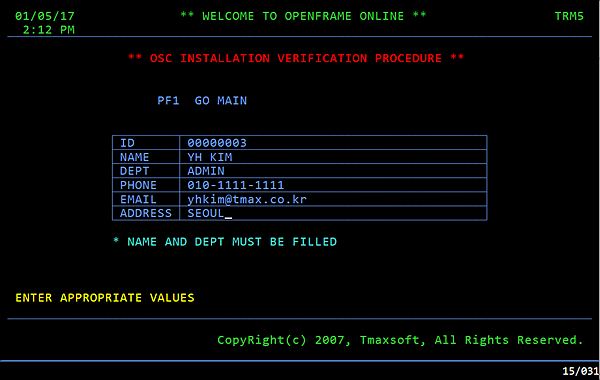 OIVP INSR Screen
 -
UPDT
The UPDT screen allows modification of existing records.
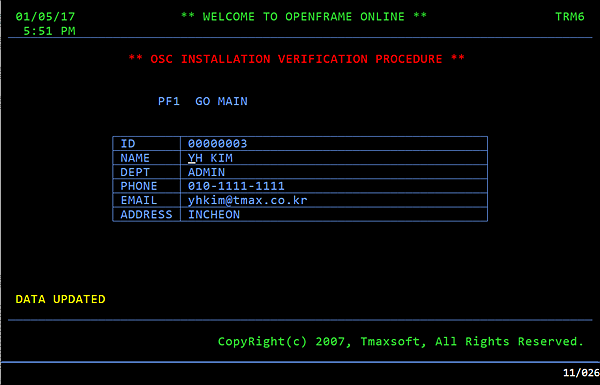 OIVP UPDT Screen
 -
DELT
The DELT screen allows deletion of existing records.
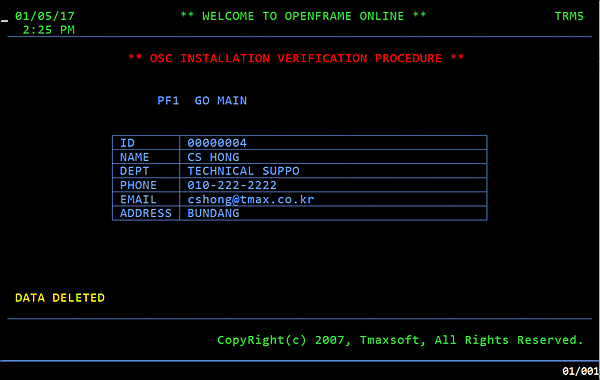 OIVP DELT Screen
 -
QUIT
The QUIT screen shows that the OSC OIVP is terminated. After the QUIT screen, OpenFrame executes ISSUE DISCONNECT, and the OpenFrame GW screen is displayed.
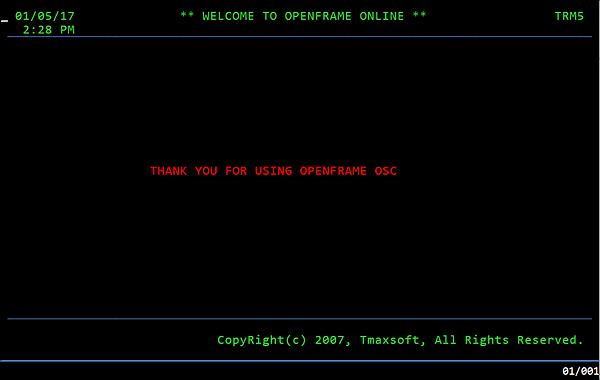 OIVP QUIT Screen
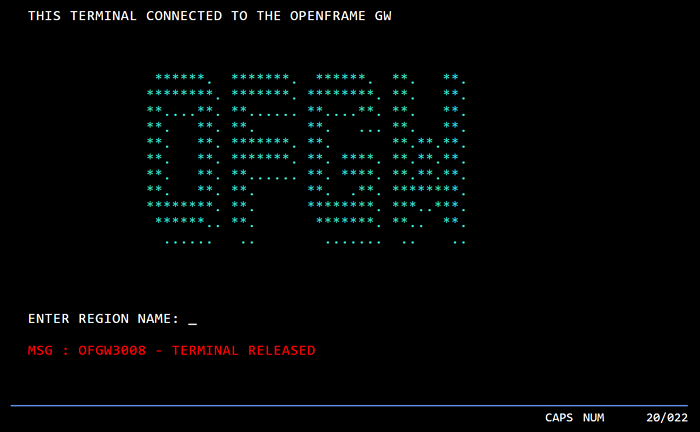 ISSUE DISCONNECT After OpenFrame GW Screen
Commands for Verified Resources
The following describes commands for managing resources verified by the OIVP.
| Resource | Command |
|---|---|
File |
WRITE REWRITE READ DELETE STARTBR ENDBR READNEXT READPREV |
TDQ |
WRITEQ TD READQ TD DELETEQ TD |
TSQ |
WRITEQ TS READQ TS DELETEQ TS |
Named Counter |
DEFINE COUNTER DELETE COUNTER GET COUNTER QUERY COUNTER |
etc. |
START LINK RETURN ENQ DEQ ISSUE DISCONNECT SEND MAP RECEIVE MAP SEND TEXT ASKTIME DELAY FORMATTIME SYNCPOINT RETRIEVE |