Using WebAdmin
This chapter describes basic and common functions provided in WebAdmin.
1. Login
Connect to WebAdmin, enter the user ID and password in the login screen, and click [Login].
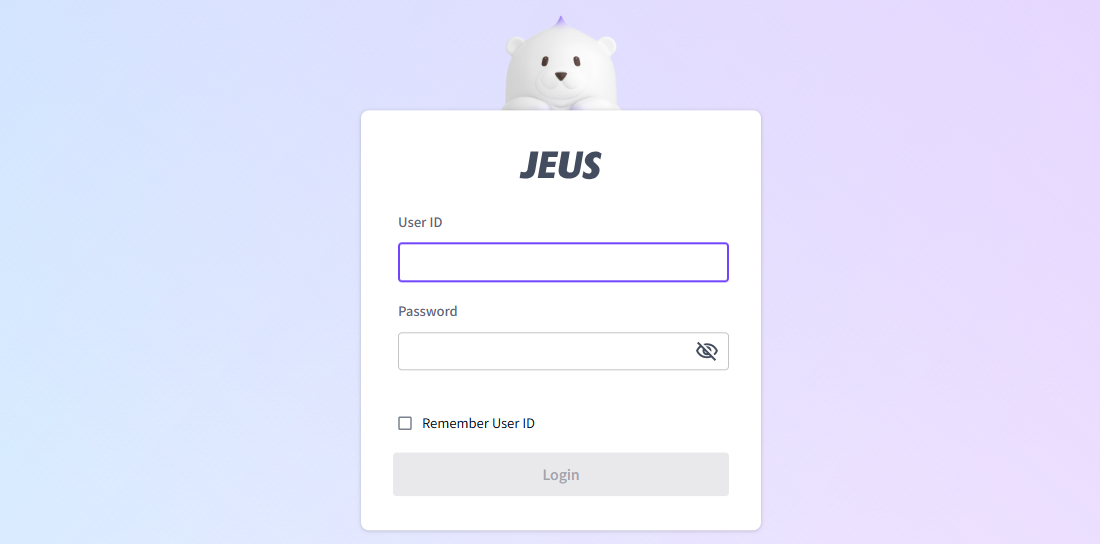
When login is successful, the WebAdmin main screen appears.
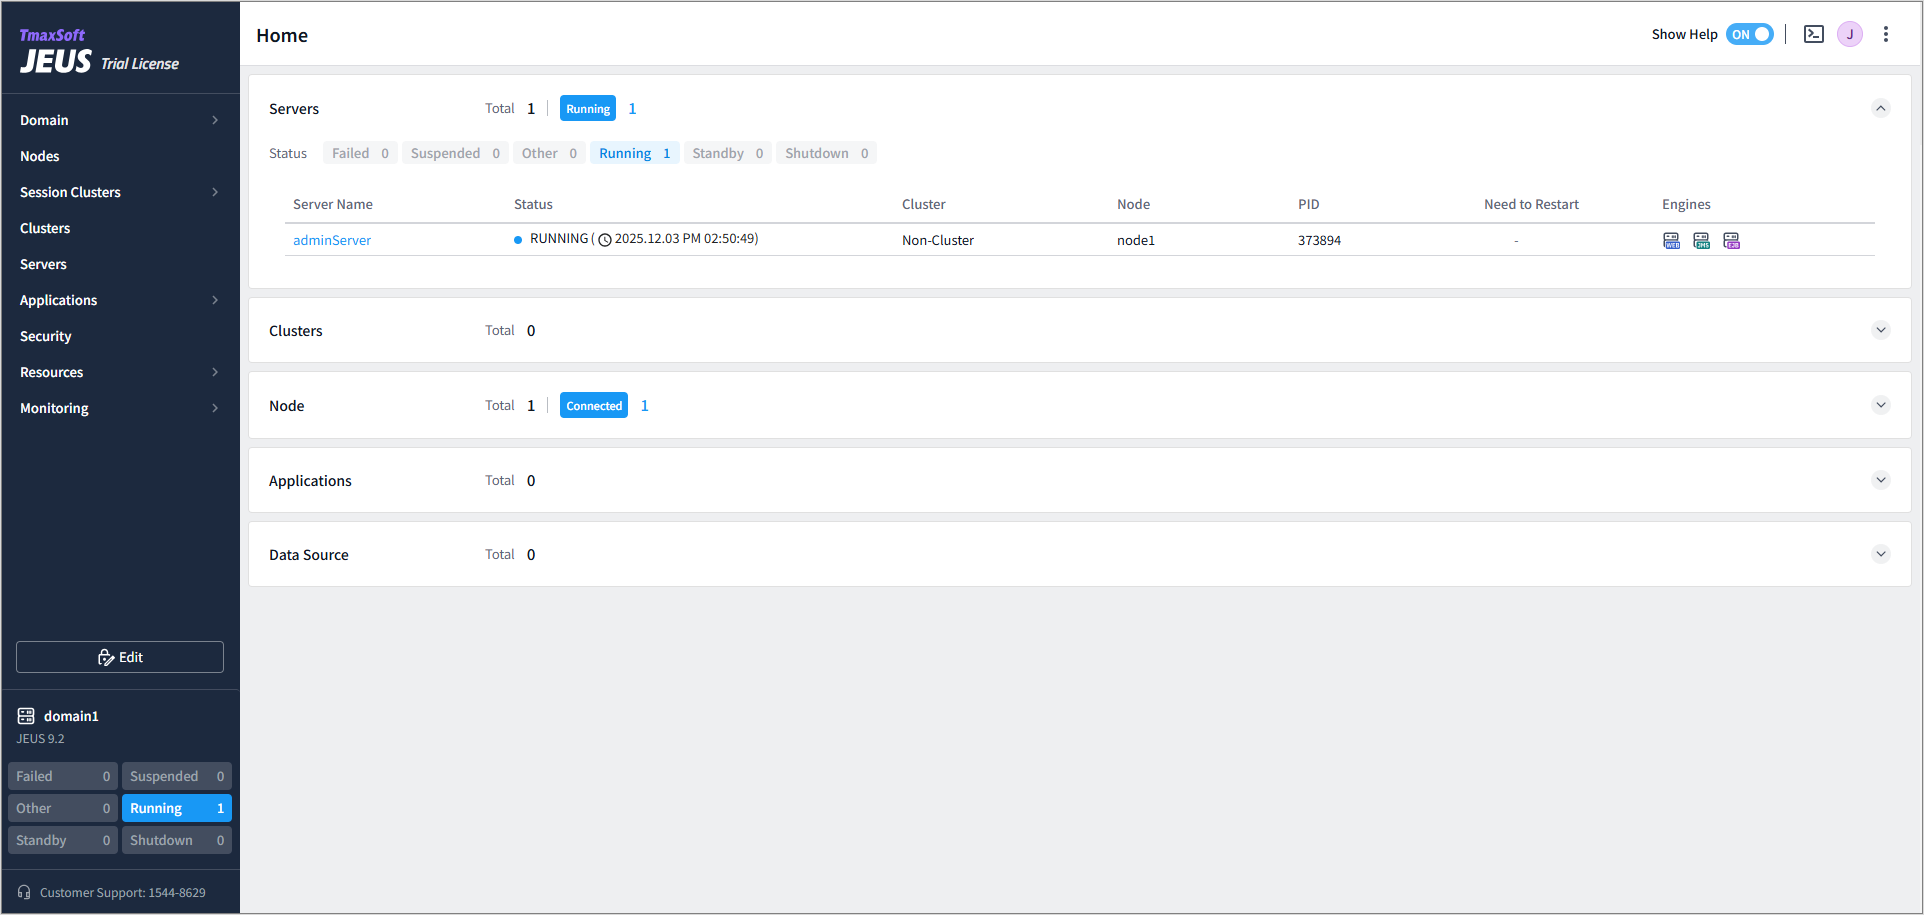
2. Screen Layout
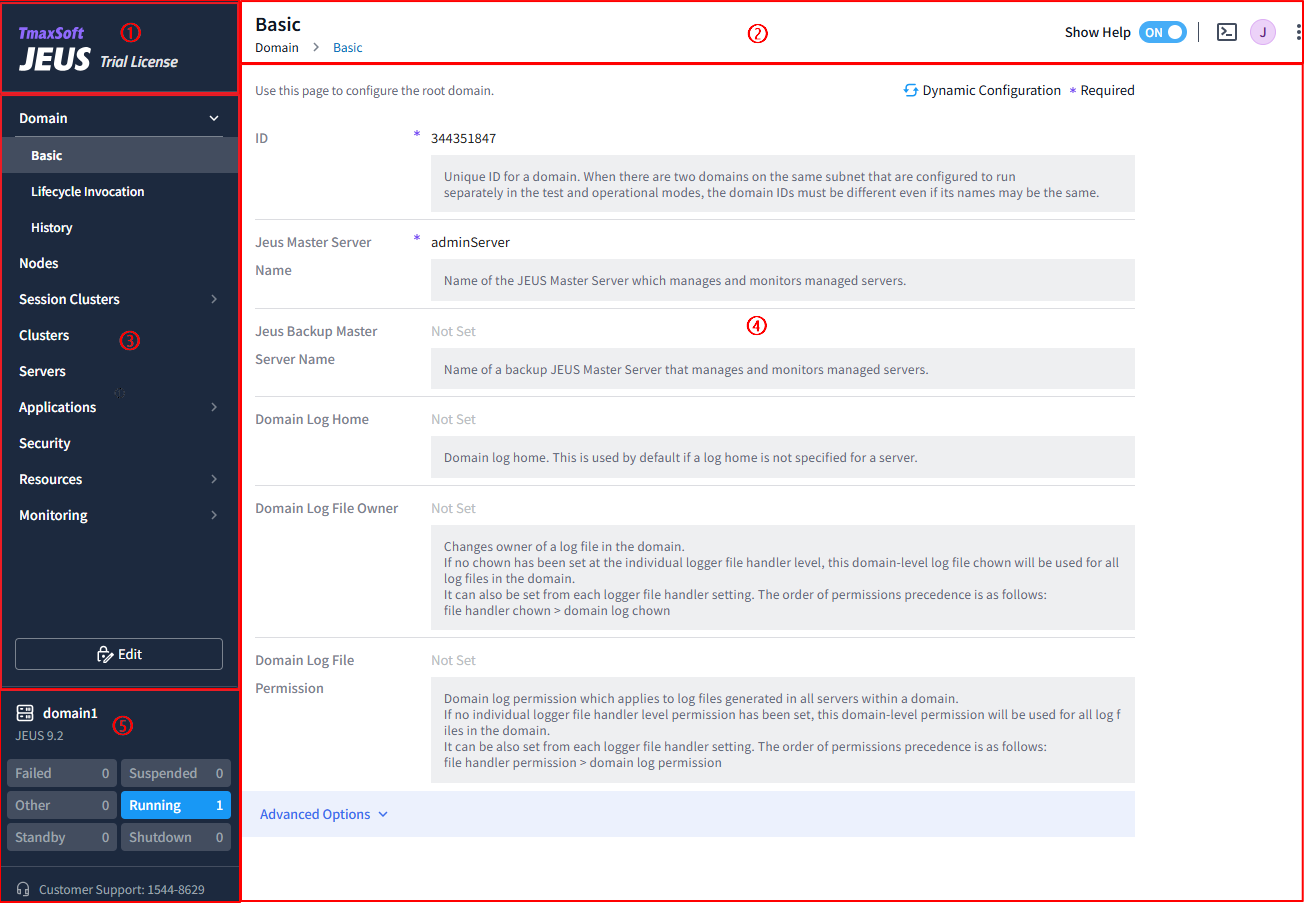
The following describes each component of the WebAdmin screen.
-
① Logo section
Displays JEUS log and license information. Click the logo to return to the WebAdmin Main Screen.
-
② Header section
Displays the title and navigation path of the current page, and provides access to Help, Console Tool, Manual, and User Information Management features.
-
③ Menu section
Provides the main configuration menus of JEUS.
The top-level menus consists of the following.
Menu Description Domain
Configures the domain, which is the largest administration unit in JEUS. For more information on the configuration items in the menu, refer to JEUS Domain Guide.
Nodes
Configures the nodes that manage server processes.
Session Clusters
Configures session clusters in the domain. For more information about the configuration items in the menu, refer to JEUS Session Server Guide.
Clusters
Configures clusters in the domain. For more information about the configuration items in the menu, refer to JEUS Domain Guide.
Servers
Configures servers in the domain. For more information about the configuration items in the menu, refer to JEUS Server Guide.
Applications
Deploys applications in the domain. For more information about the configuration items in the menu, refer to JEUS Application & Deployment Guide.
Security
Configures security items of JEUS. For more information, refer to JEUS Security Guide.
Resources
Configures resources used by applications.
Monitoring
Monitors each resource used by servers.
-
④ Main section
Manages each configuration, including creation, editing, and deletion.
-
⑤ Status section
Provides visual information, including the current domain name, JEUS version, server status, and the number of servers in each status. Hovering over a status displays the corresponding server list in a popover. Clicking on a server name opens the configuration page for that server.
The following describes server status.
State Description FAILED
The Master Server(Master) has determined that the connection to the Managed Server (MS) has been lost for a certain period and indicates that the MS was shut down abnormally.
FAILURE_SUSPECTED
The Master suspects an abnormal shutdown of the MS due to a failed connection to the MS.
STANDBY
The server failed to distribute one or more registered applications at startup and therefore cannot proceed to the "RUNNING" state. Modify the module and restart the server, or forcibly start the service by executing start -force.
RUNNING
The server has started and is operational.
SHUTDOWN
The server was shut down normally or has not been started.
SHUTTING_DOWN
The server is currently shutting down.
SUSPENDED
The administrator executed "suspend", suspending all applications. In this state, applications can be distributed but not started.
RESUMING
The server is recovering from the SUSPENDED state.
STARTING
The server is starting and cannot yet provide services.
SUSPENDING
The server is suspending all running applications.
Other
Server in FAILURE_SUSPECTED, SHUTTING_DOWN, RESUMING, STARTING, or SUSPENDING states are displayed as "Other" in the menu.
3. Common Features
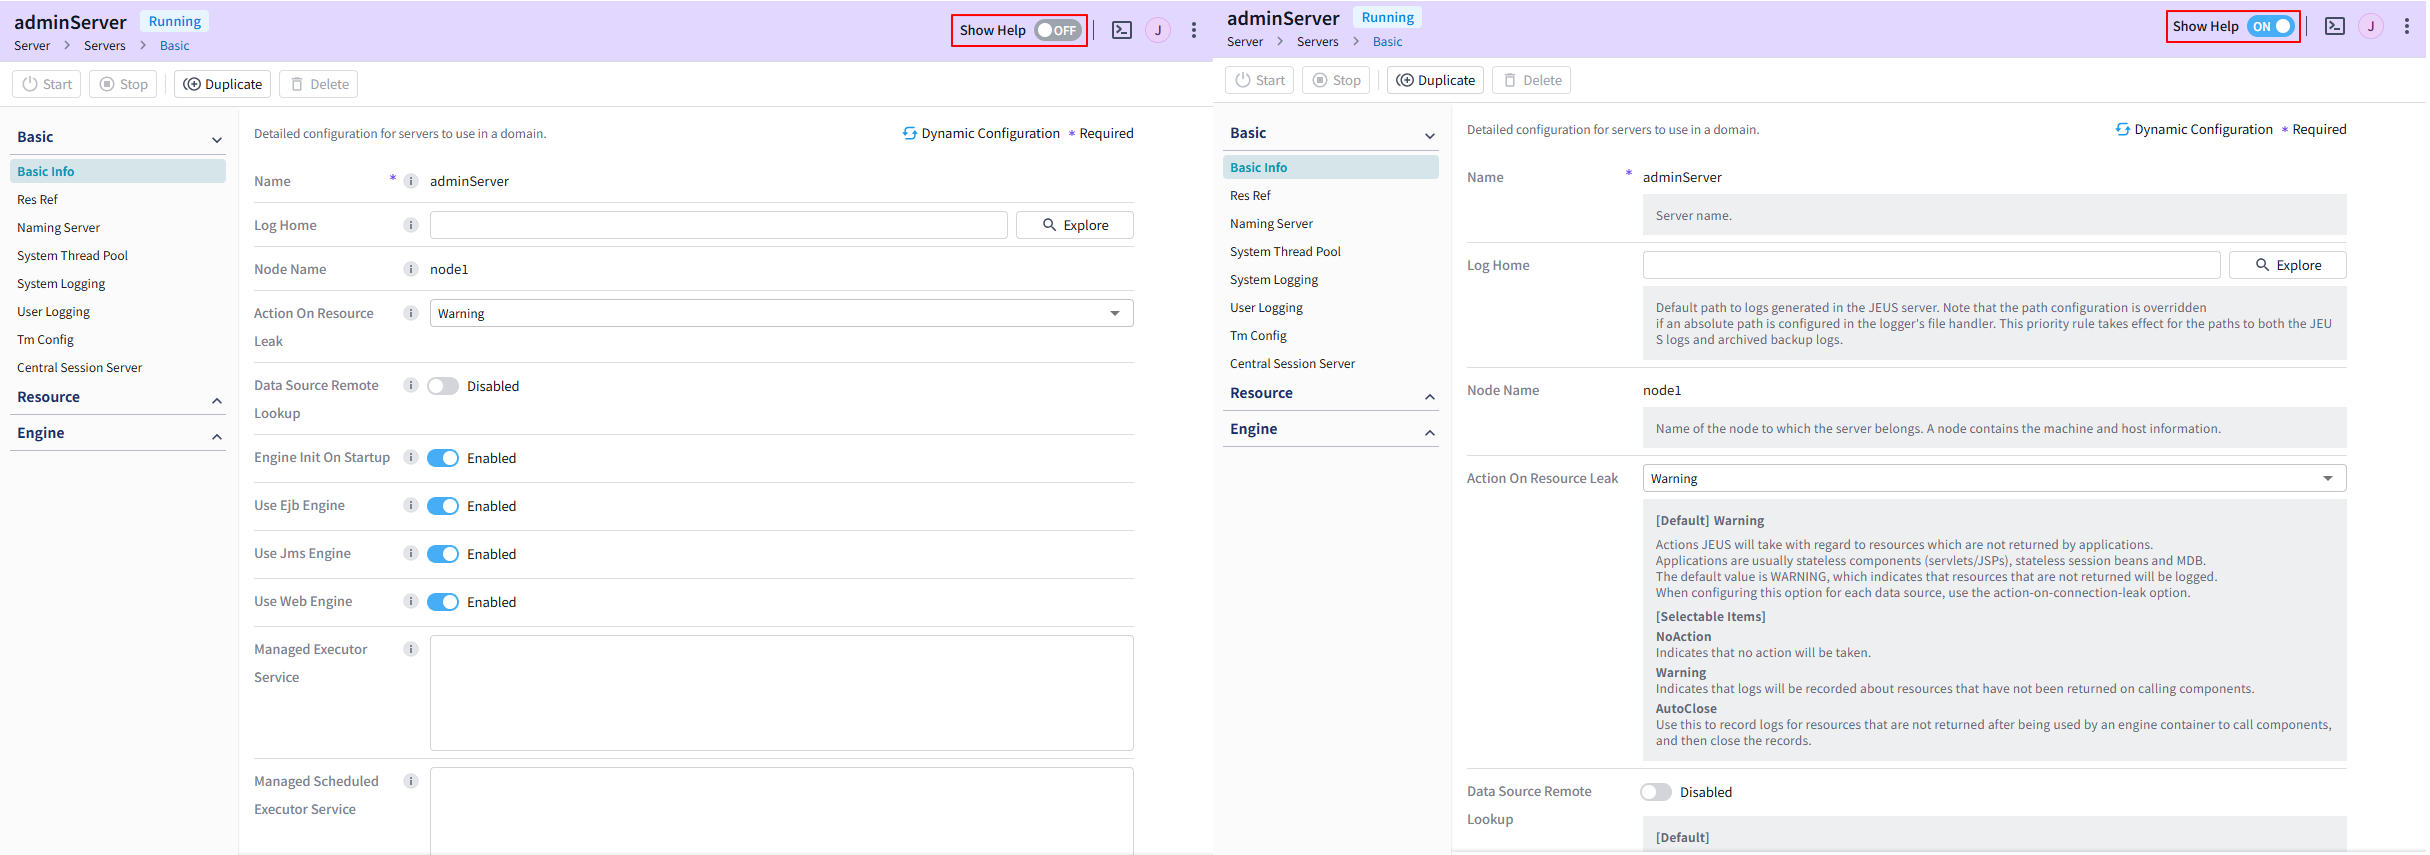
3.1. Show Help
Set the [Show Help] toggle switch to 'ON' on the right side of the header section to display setting descriptions for each domain. Setting it to 'OFF' hides the descriptions.
Even if it is set to 'OFF', the ⓘ icon is shown on the right side of each setting, and hovering over it displays a tool tip.
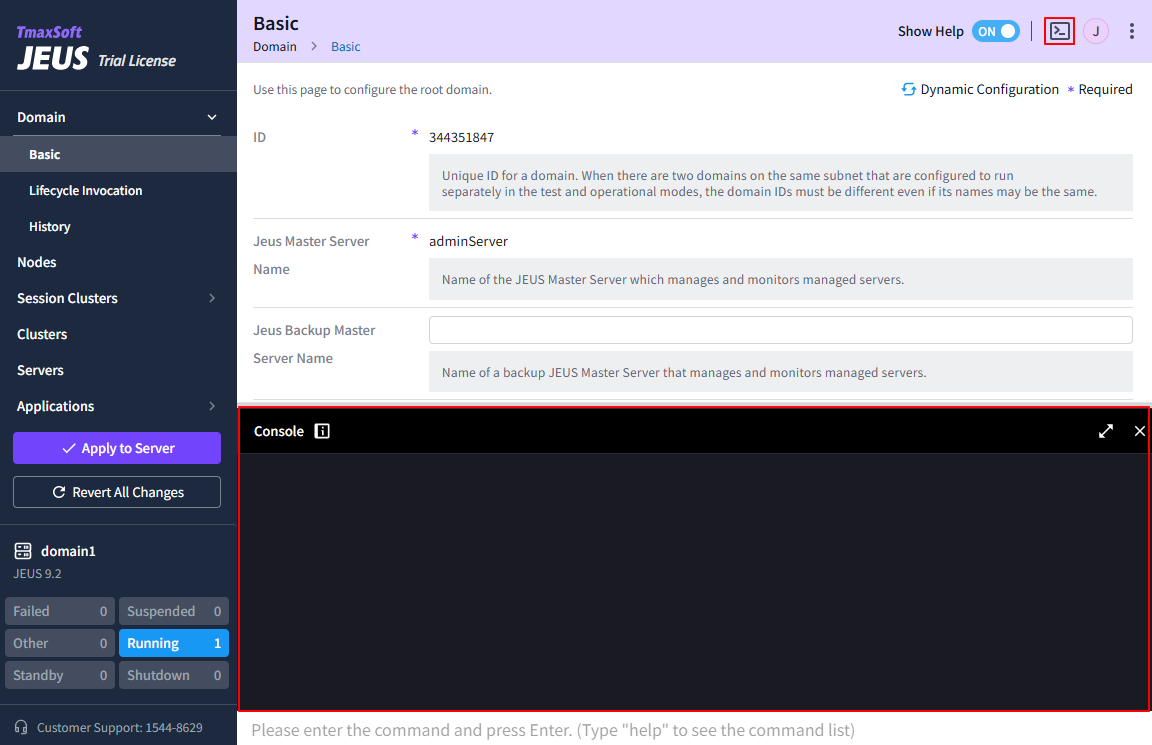
3.2. Console Tool
WebAdmin provides the JEUS command console tool.
|
The console tool does not support jeusadmin-specific features and local commands including 'repeat', 'interval', 'history', and 'connect'. For more information about each command, refer to jeusadmin in JEUS Reference Guide. |
Click the ![]() ([Console Command]) icon on the right side of the header section to open the Console window at the lower pane.
([Console Command]) icon on the right side of the header section to open the Console window at the lower pane.
3.3. Action Buttons
WebAdmin provides various action buttons to manage resources.
-
Servers and Clusters
The following describes action buttons to control servers and clusters.
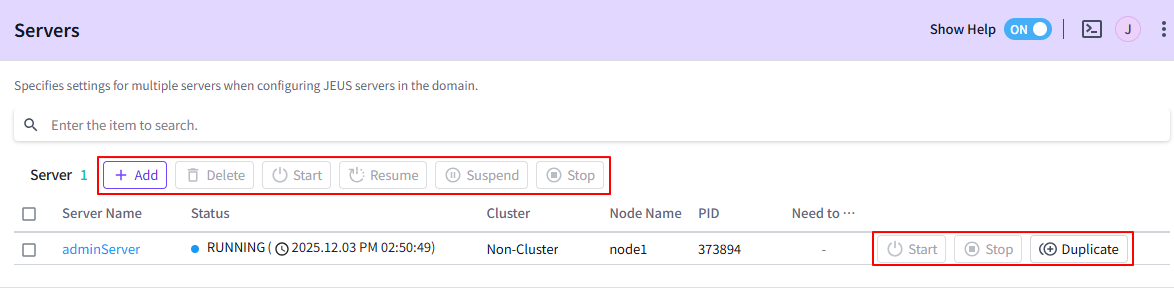
Button Description Start
Starts servers and clusters.
Stop
Shuts down servers and clusters.
Resume
Resumes suspended servers and clusters.
Suspend
Suspends running servers and clusters.
Duplicate
Creates a new server by duplicating the server configuration. Available only for servers in Edit Mode.
-
Applications
The following describes action buttons to control applications.

Button Description Install
Installs a new application.
Direct Deploy
Directly deploys applications to servers by specifying their absolute paths on the machine (such as the Master Server).
Delete
Deletes installed applications.
Deploy
Deploys applications to servers.
Undeploy
Undeploys applications from their servers.
Start
Runs applications.
Stop
Stops running applications.
3.4. Edit Mode
WebAdmin provides edit mode and read-only mode.
In read-only mode, configuration information is displayed, and any buttons that cannot be used are disabled.
Edit mode, in which settings can be modified, can be activated in two ways.
-
① Lock & Edit
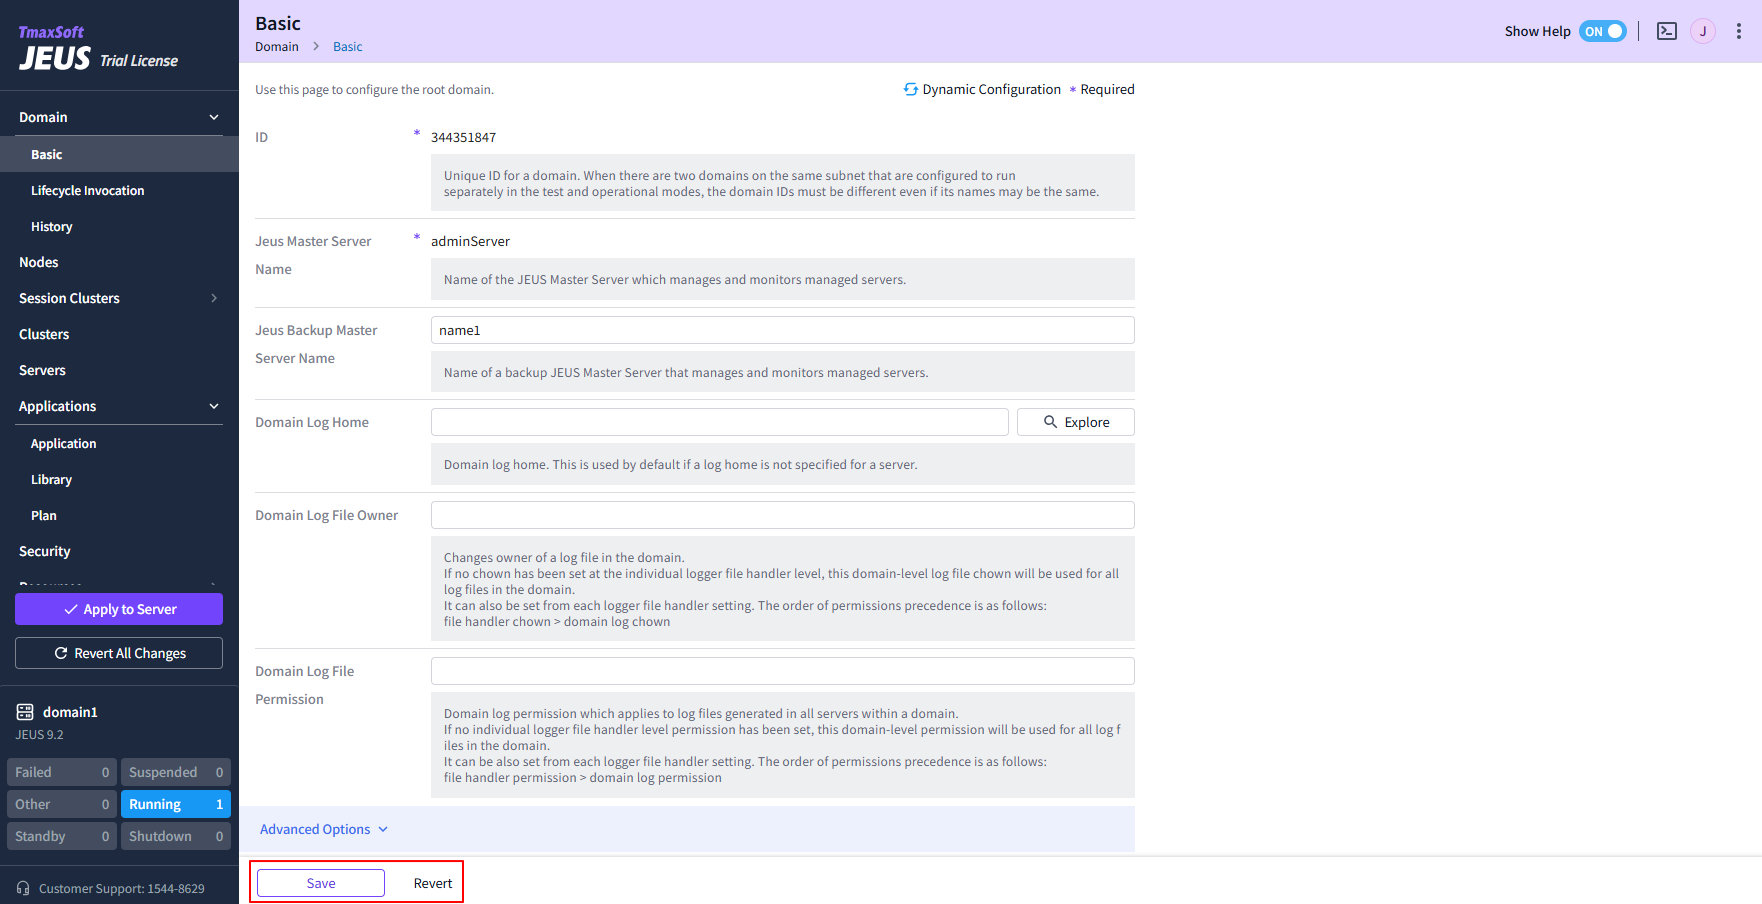
Click [Edit] at the bottom of the menu section to activate the Lock & Edit state. In this state, edit mode remains active even when navigating between pages.
After making changes, click [Save] at the bottom to save the modifications temporarily. If you click [Revert], the modifications are canceled.
 Temporary Saving in Lock & Edit State
After making modification, you can revert all changes or apply them to servers using the buttons at the bottom of the menu section. When applying the modifications to servers, you can add a description of the changes, which will be displayed on the History screen.
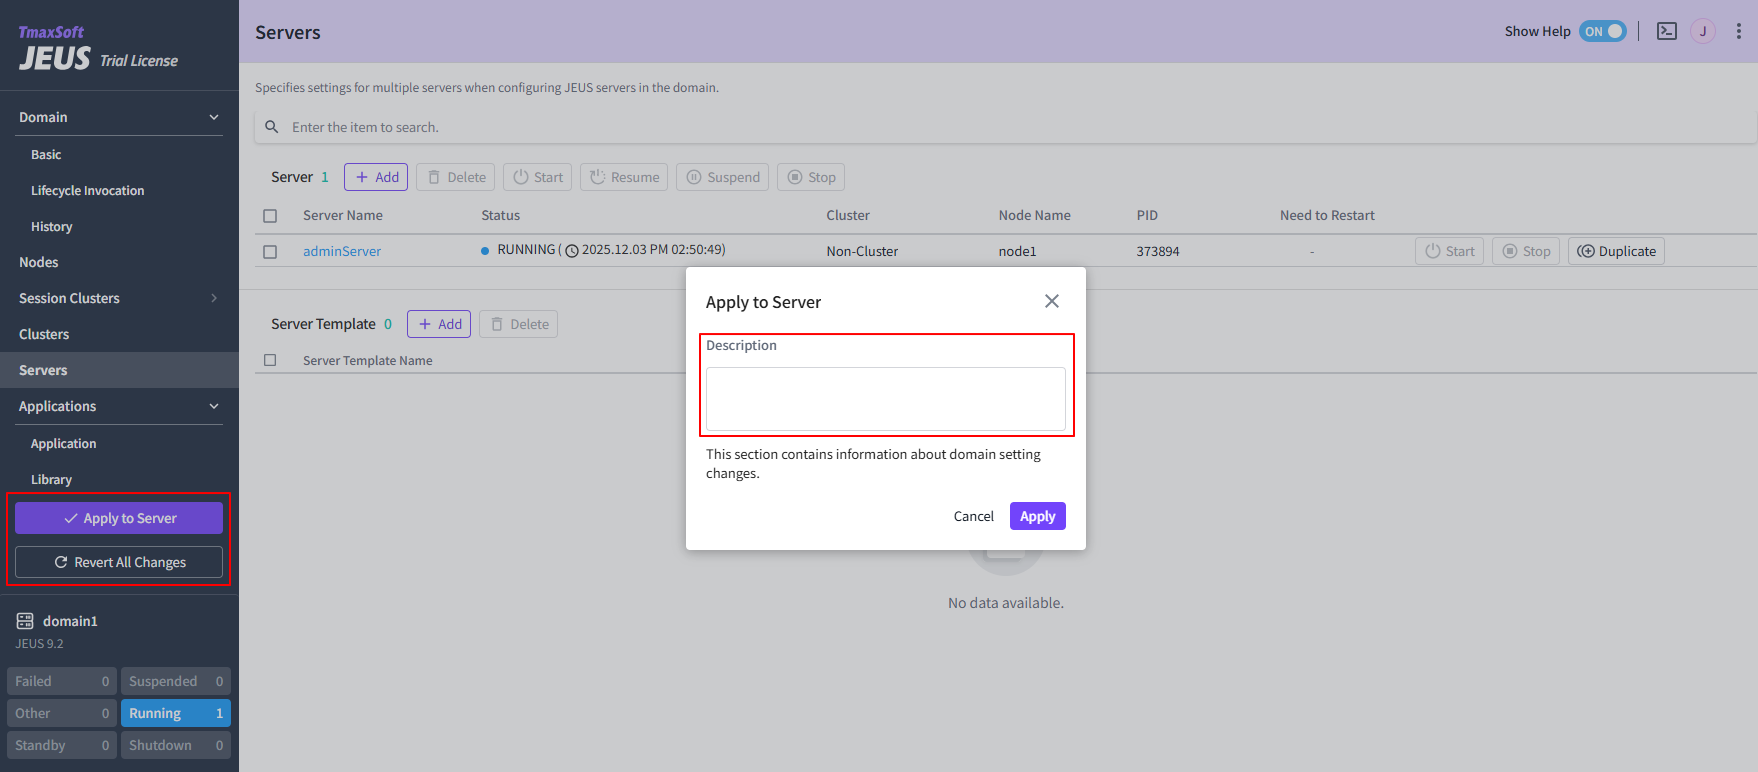 Applying to Servers in Lock & Edit State
 -
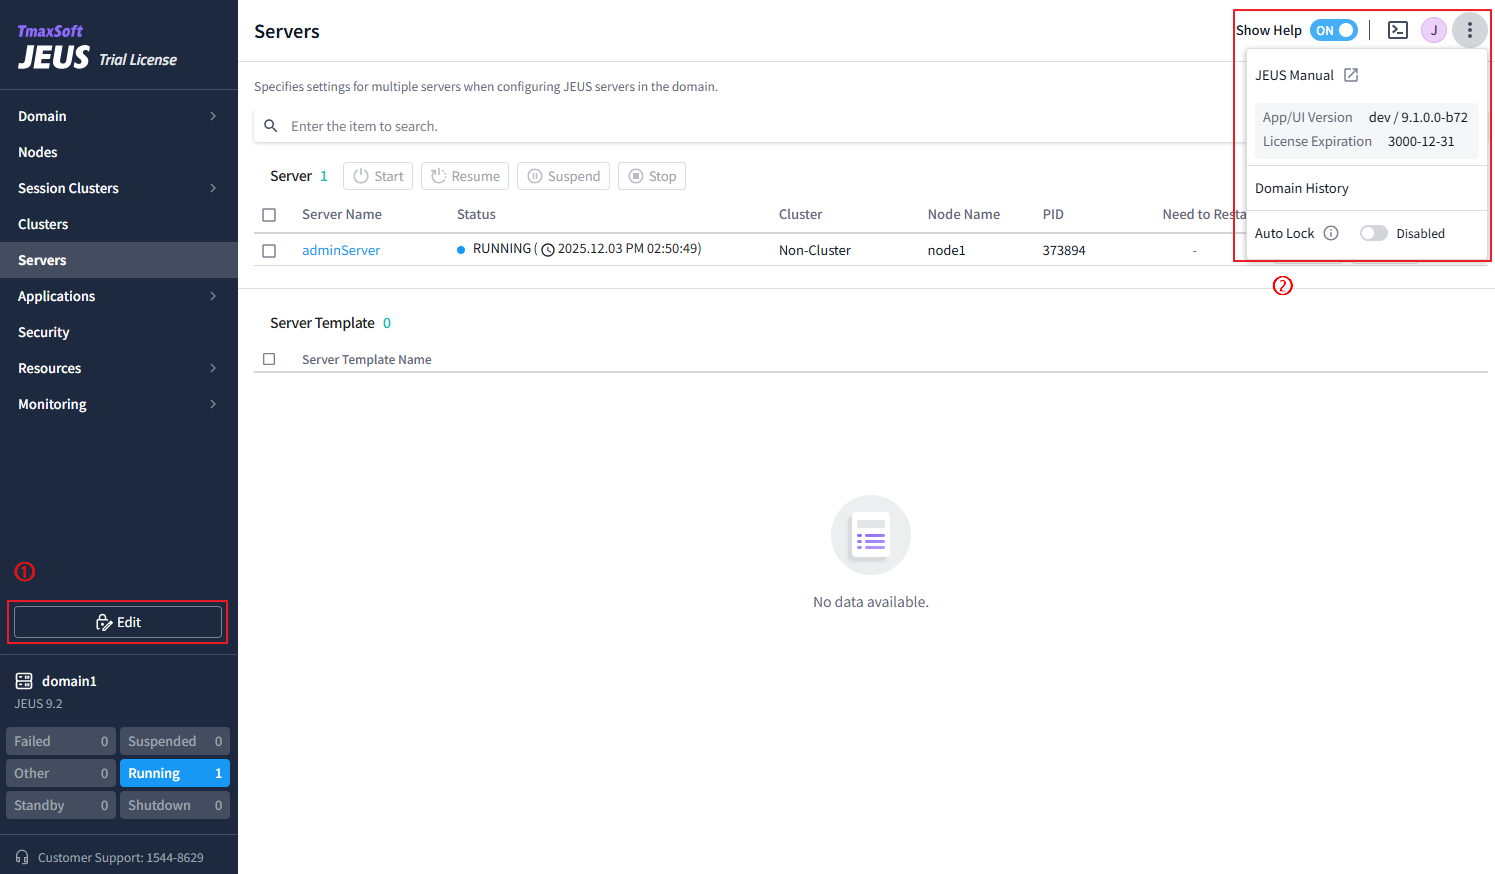
② Auto Lock
Click the
 icon in the header section to display the Auto Lock activation switch.
Auto Lock can be activated only when Lock & Edit is not active. When Auto Lock is enabled, the [Edit] button appears on certain settings pages, and clicking it activates edit mode, allowing you to modify settings.
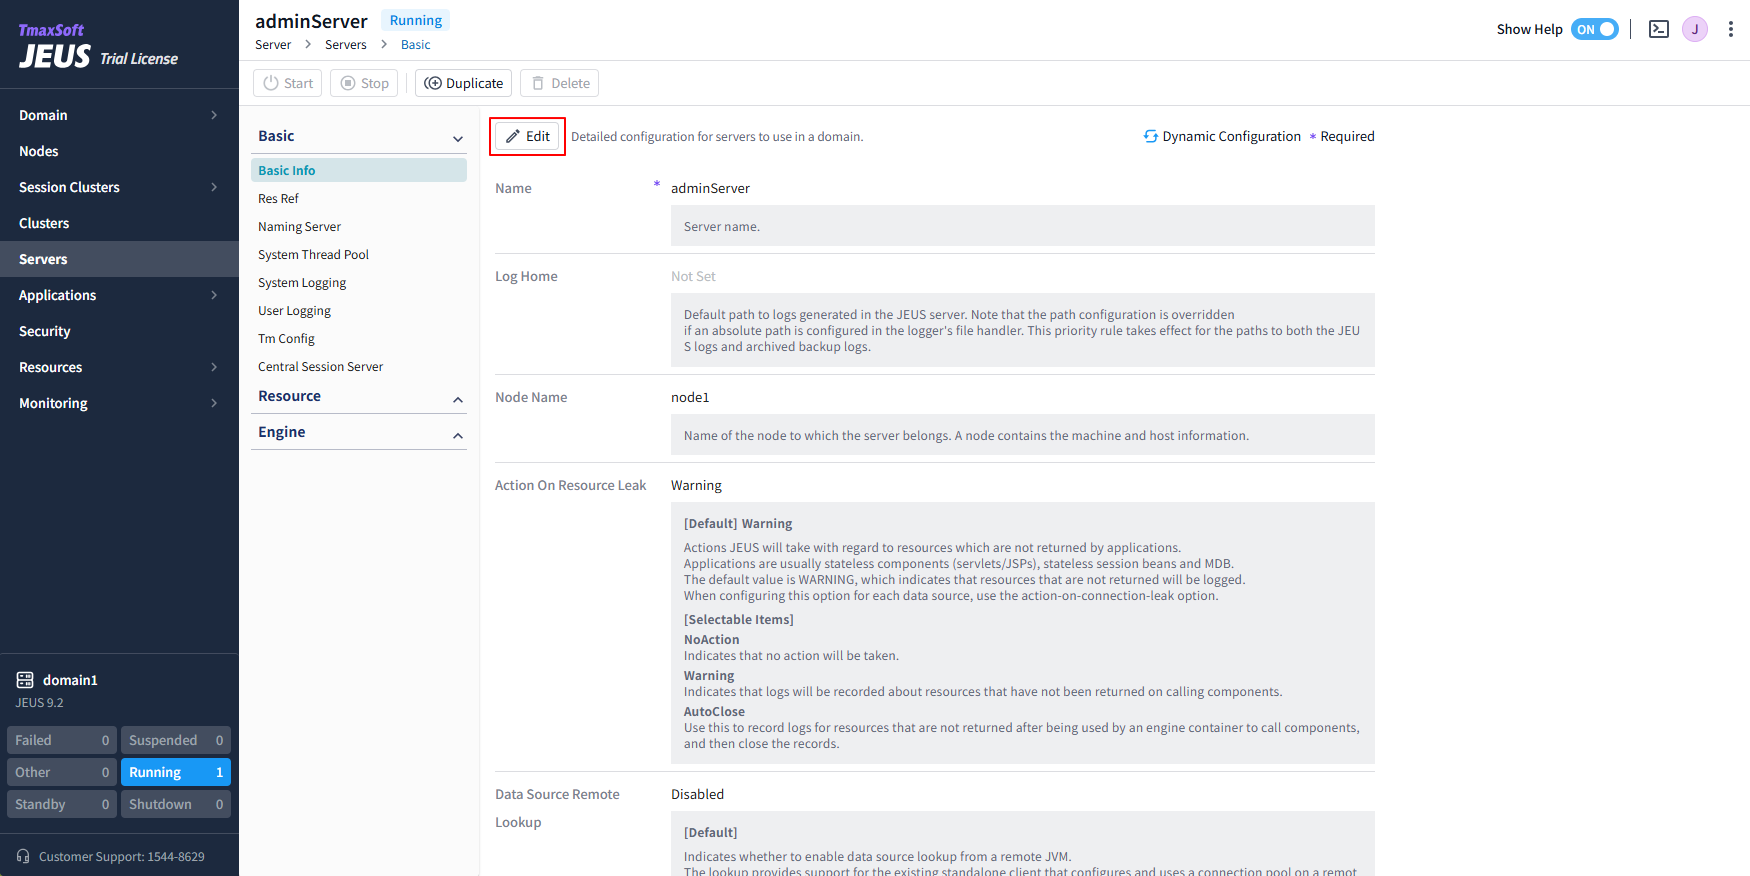 Auto Lock Edit Mode
After making modifications, click [Save] to immediately apply the settings to the server. These modifications are not recorded on the History screen.
3.5. Forcible Lock
The lock is assigned per user rather than session, and only the user who holds the lock can modify or cancel the settings.
Click [Edit] at the bottom of the menu section to enter the 'Lock & Edit' state, which remains active until you either click [Apply to Server] to apply the modifications to servers, or [Revert All Changes] to cancel them.
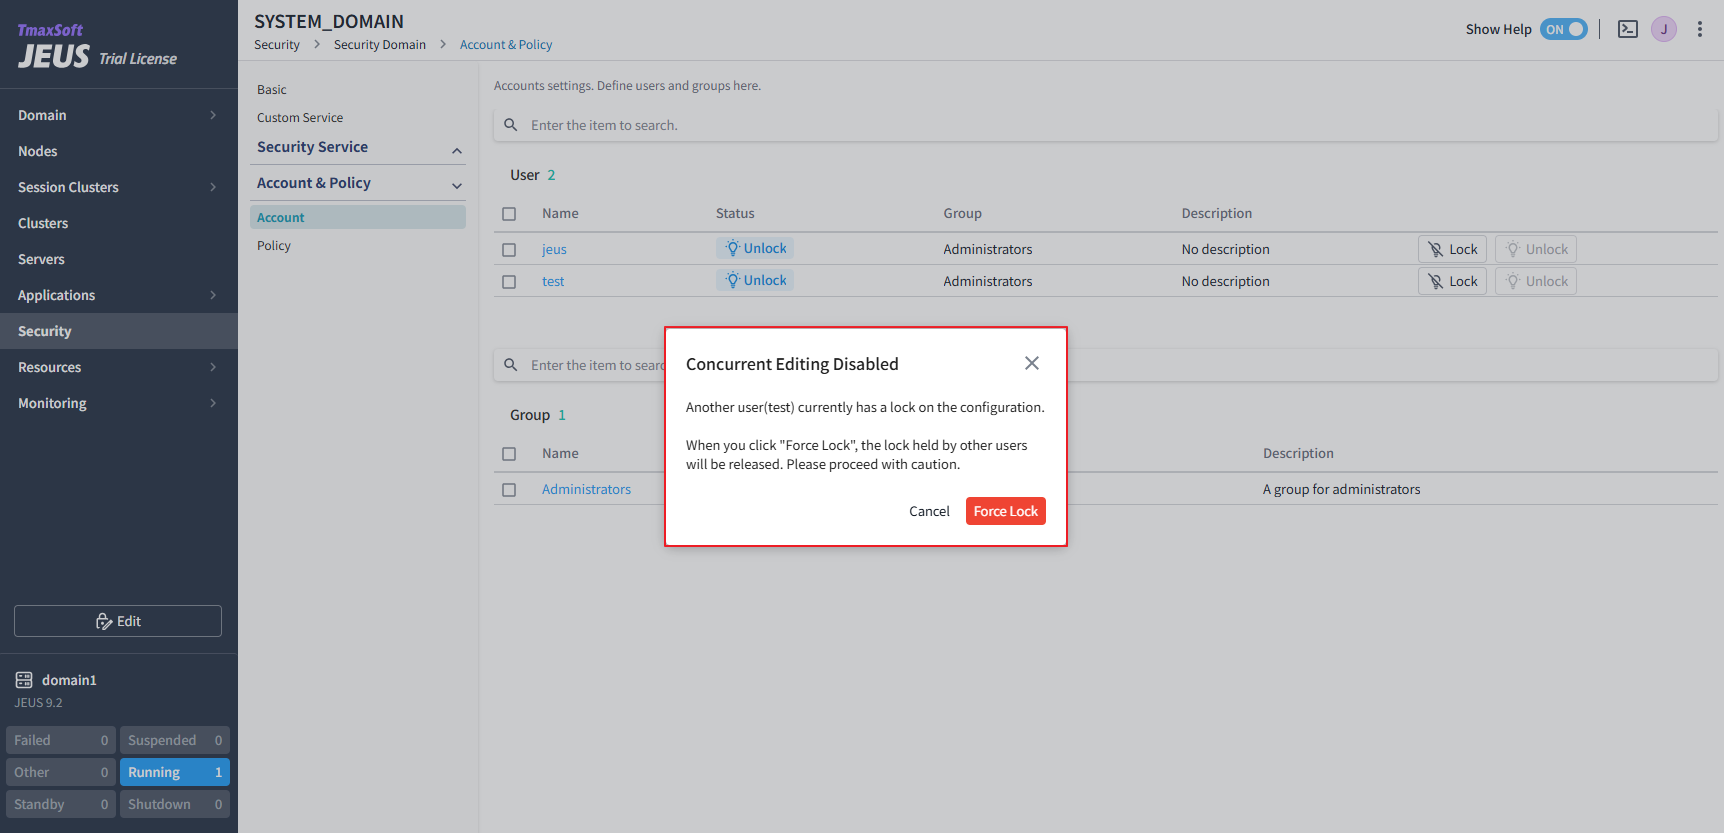
If a user obtains a lock and does not release it, other users cannot edit settings because the lock is not released automatically. To resolve this, other users are allowed to forcibly take over the lock.
If one user is in the 'Lock & Edit' state and another user clicks [Edit], 'Concurrent Editing Disabled' message appears. The second user can then click [Force Lock] to forcibly obtain the lock and enter edit mode. In this case, any modifications made by the previous user are discarded, but changes that were already applied to servers are remain intact.
4. Basic Features
4.1. Adding Configurations
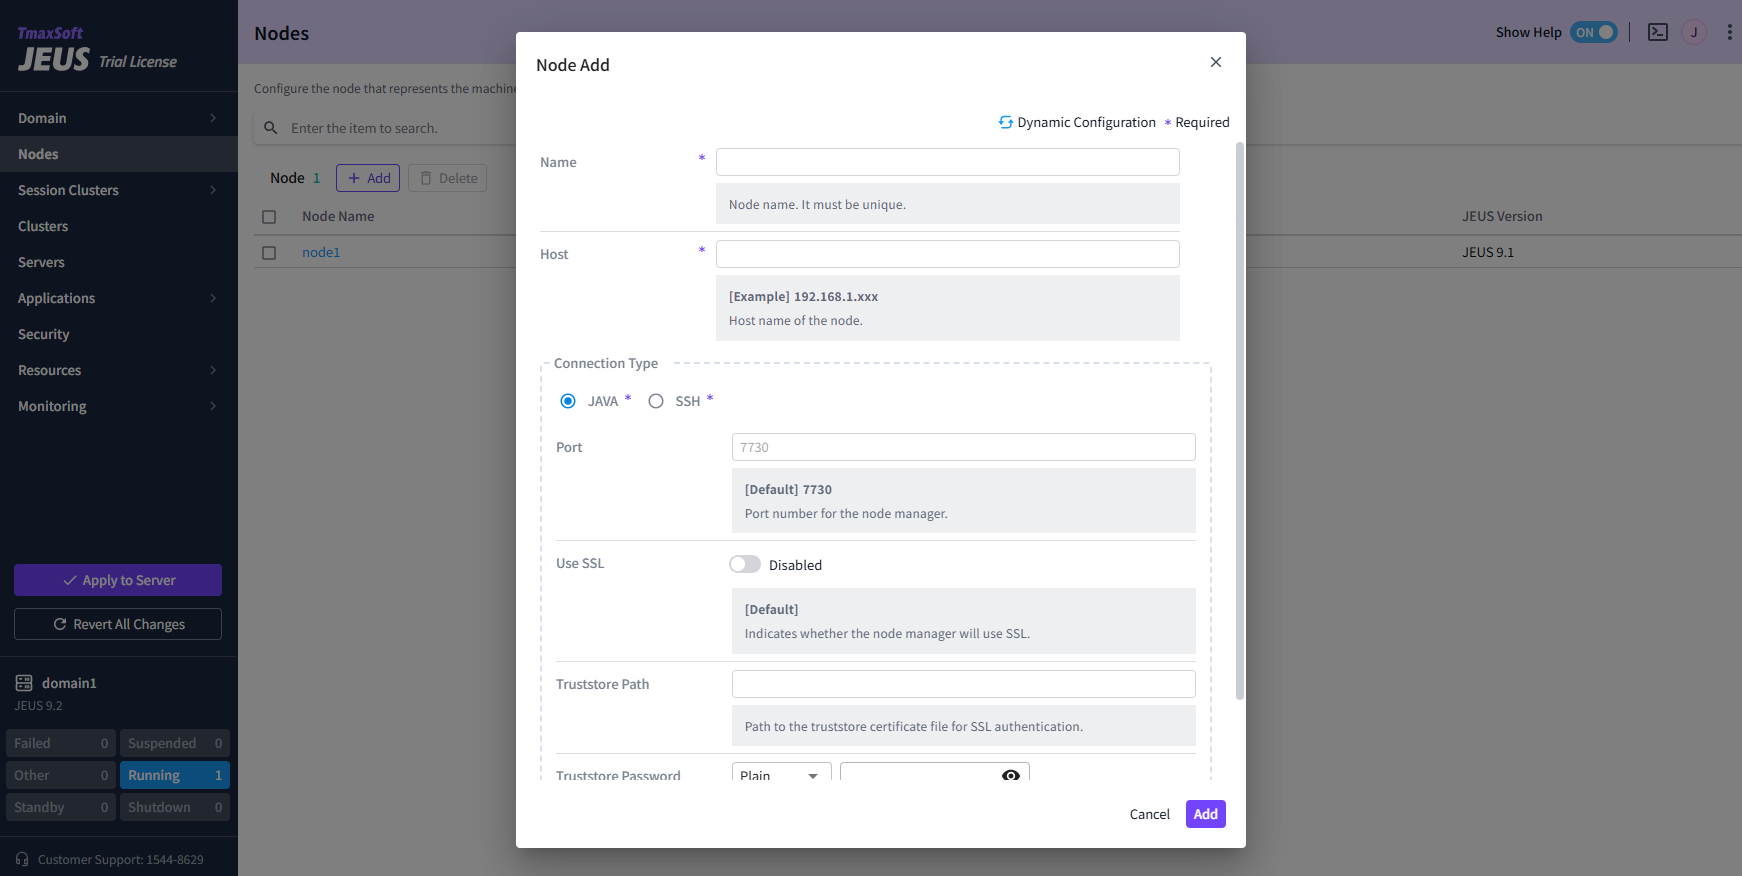
In Edit Mode, click [Add] above the settings list to add an item.
|
Click [Add] to open the 'Add' dialog box. After entering the required settings, click [Add] at the bottom to add the item.
Settings are categorized into Basic Settings and Advanced Options, the latter of which are not commonly used. Clicking Advanced Options expands or collapses the additional settings.
|
Items marked with an asterisk ( ※ Dynamic setting items: Applied without restarting the server. |
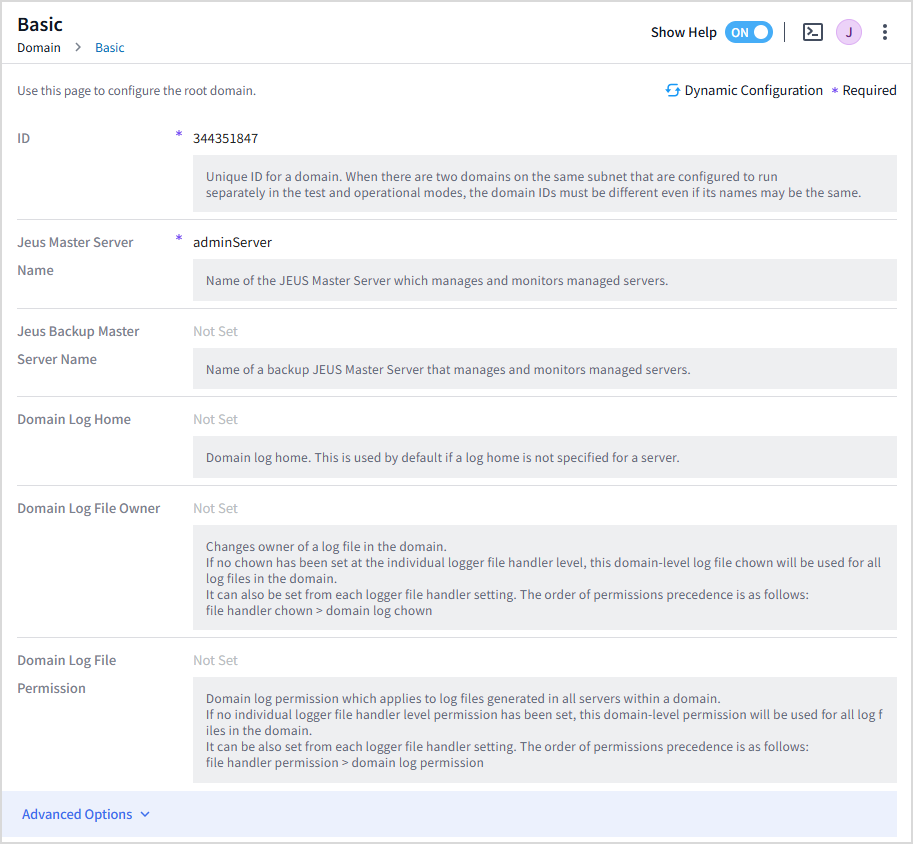
4.2. Displaying Configurations
In read-only mode, configuration information is displayed, and any buttons that cannot be used are disabled.
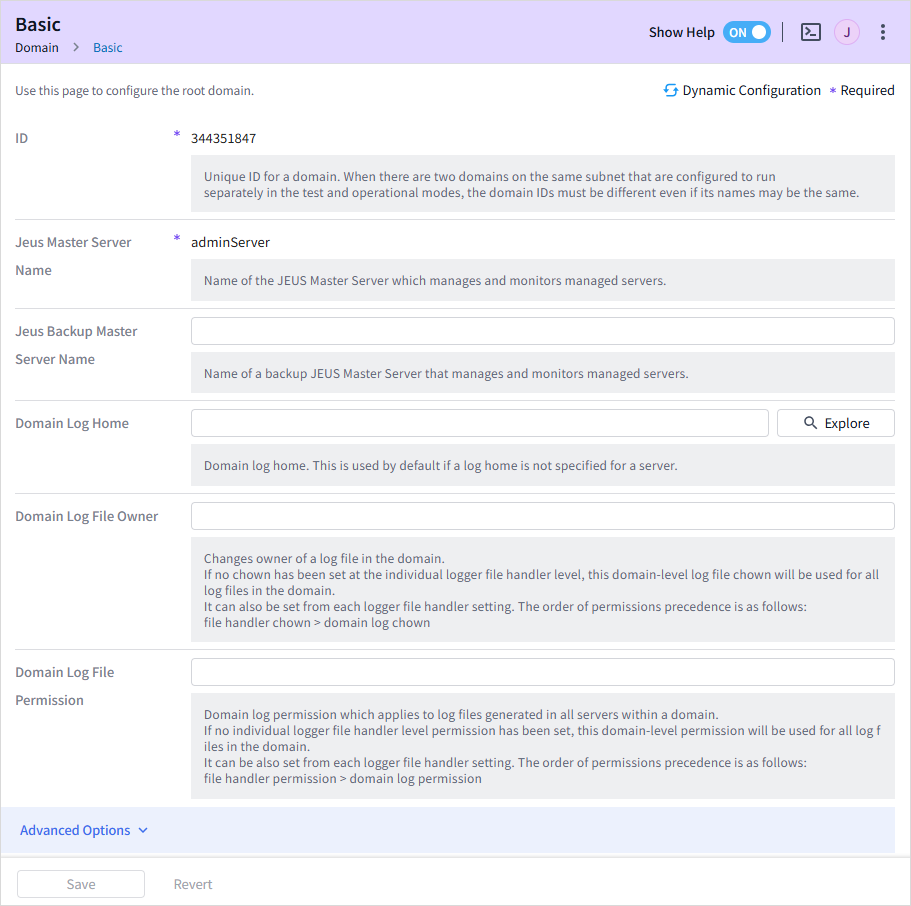
4.3. Modifying Configurations
In Edit Mode, configurations can be modified. However, editing is applied differently for each edit mode.
|
Manageable features vary by resource and mode based on legacy JEUS operation. This guide does not include those specific details. |
-
Auto Lock
Modify the settings and click [Save] to apply the changes to the server. If you click [Cancel], the mode reverts to 'Auto Lock'.
-
Lock & Edit
Modify the settings, click [Save], and then click [Apply to Server] under the menu to apply the changes to server.
If you click [Revert], the changes on the current page are canceled. If you click [Revert All Changes] under the menu, all changes on all pages are canceled and the mode returns to 'Read-only Mode'.
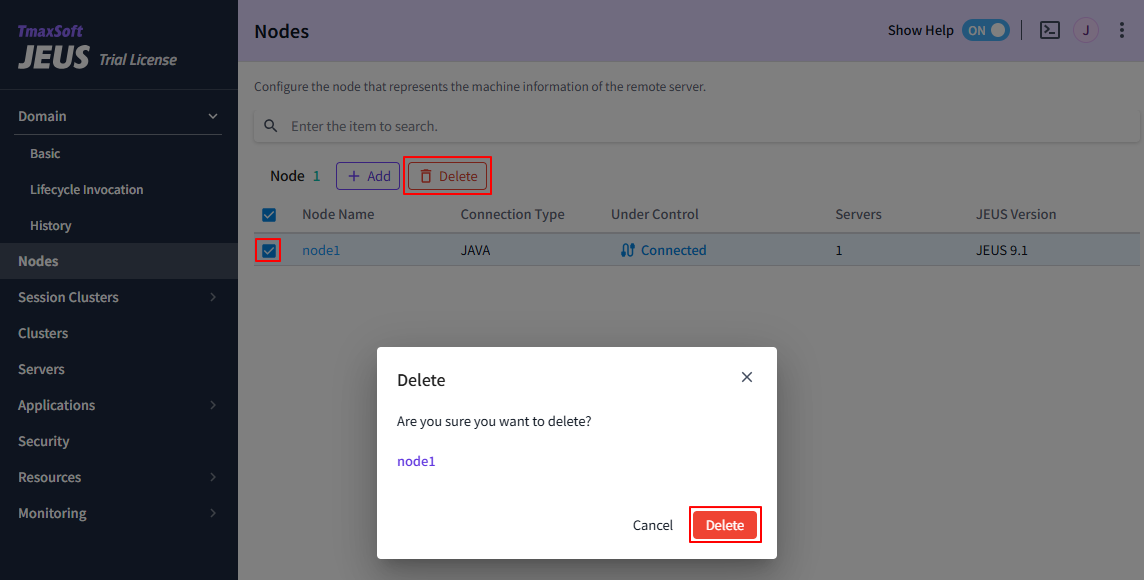
4.4. Deleting Configurations
In Edit Mode, click [Delete] above the configuration list to delete a configuration.
|
When you select an item to delete in the table, and click [Delete], the Delete dialog box opens. Click [Delete] to confirm the deletion.
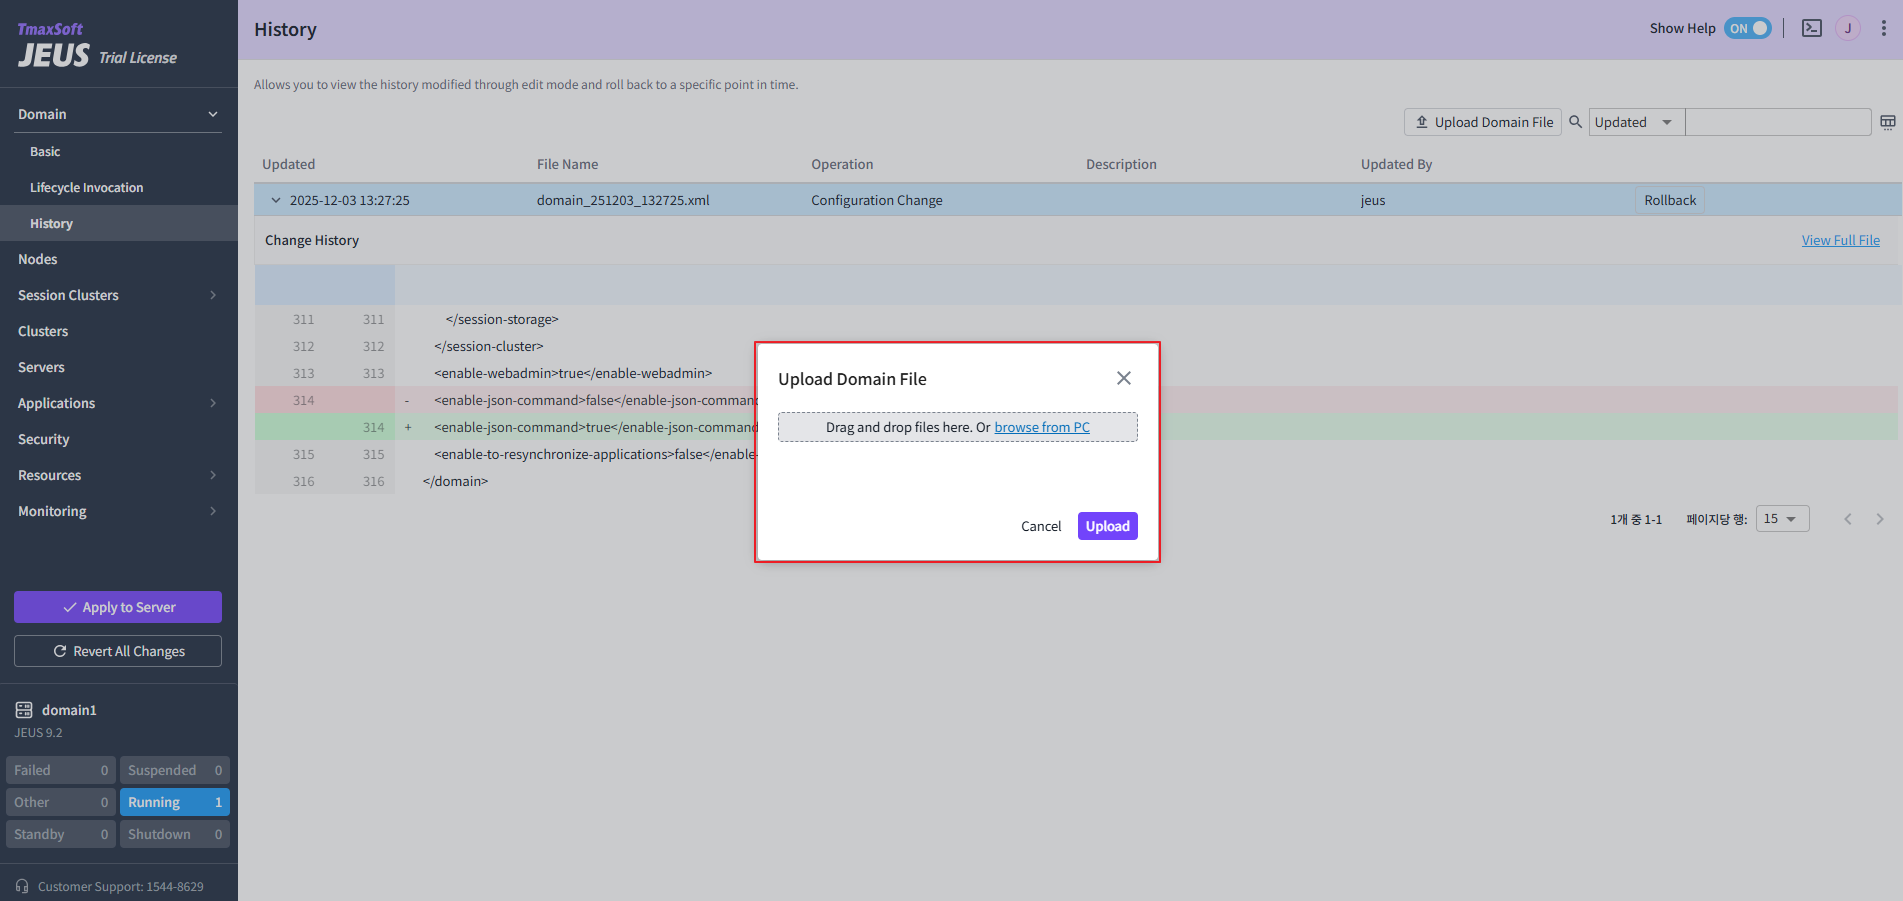
4.5. Displaying Modification History
Click [Domain] > [History] to view the configuration change history. Only changes made in Lock & Edit mode are shown.
The main features on the History page are as follows.

-
① Displaying Change History
Click [>] to the left of the date in the Updated column to view the change details.
If a description was added when the configuration was modified, it is displayed on the Description column.
-
② Rollback
Click [View Full File] to open the dialog box.

Click [Download] on the upper right side to download the XML file, or click [Rollback] to restore the configuration to the version prior to the change.
-
③ Uploading Domain Files
You can apply configurations by uploading a domain (XML) file directly. The [Upload Domain File] button is enabled only in 'Edit Mode'.
|
If uploaded XML files contain unsupported tags or are from a different version, an error occurs. |