Examples
This chapter describes examples of using AnyLink HTTP adapter.
1. Overview
The following shows the basic HTTP BizTx process.

A BizTx is processed as follows:
-
A request input message is sent via a sample HTTP client.
-
AnyLink receives the message via an inbound adapter and then executes a service flow.
-
The service flow maps the request input message to the request output message.
-
The request output message is sent to the sample HTTP server via an outbound adapter.
-
The sample HTTP server sends the response input message.
-
The service flow maps the response input message to the response output message.
-
The response output message is sent to the sample HTTP client via an inbound adapter.
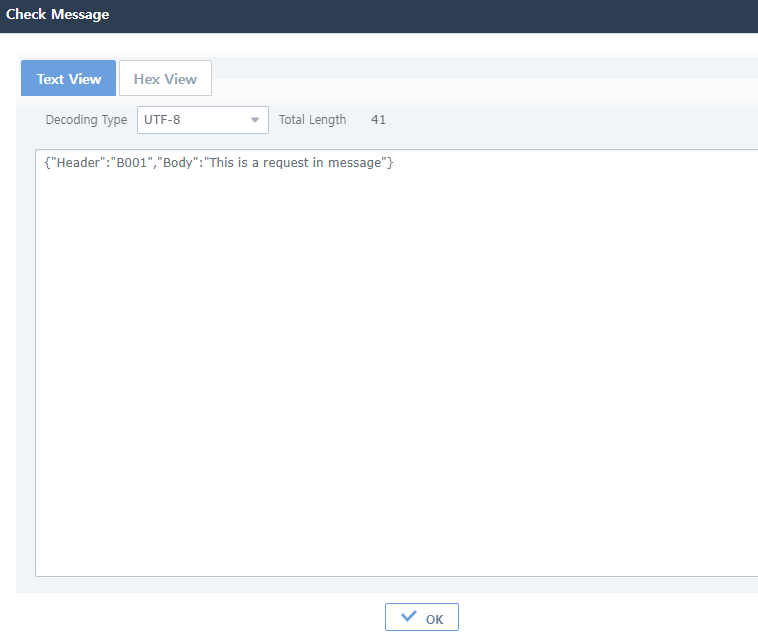
All used messages use the JSON format.
2. Creating an Adapter
Log in to AnyLink WebAdmin through a web browser, go to [System] > [Adapter], and click [Add] below the Adapter List to go to the Add Adapter screen. For information about creating an adapter, refer to Adapter Configuration.
|
For information about accessing and creating business systems in AnyLink WebAdmin, refer to AnyLink WebAdmin Guide. |
2.1. Creating an Outbound Adapter
The following is an example of creating an HTTP adapter.

-
Basic Settings
Item Value Adapter ID
HTTP_ADT_Tutorial
Adapter Name
HTTP_ADT_Tutorial
Adapter Type
HTTP
Description
HTTP outbound adapter
Biz System Name
ANL001
-
[Advanced Settings] Tab
Item Value Outbound Thread Pool ID
No
3. Creating an Endpoint
From the [Adapter] screen, click an adapter and go to the Adapter Details screen. Click [Add] from the [Endpoint List] tab to go to the Add Web Service Endpoint screen. For more information about creating an endpoint, refer to Endpoint Configuration.
3.1. Creating an Inbound Endpoint
The following is an example of creating an HTTP inbound endpoint.
-
Basic Settings
 Adding an Inbound Endpoint - Basic Settings
Item Value Endpoint ID
HTTP_EP_IN
Endpoint Name
HTTP_EP_IN
Endpoint Status
Running
Initial State at Boot
Running
Direction
Inbound
-
[Connection Info] Tab
 Adding an Inbound Endpoint - [Connection Info]
Item Value Path
/http/tc/HTTP_EP_IN_Tutorial
-
[Advanced Settings] Tab
 Adding an Inbound Endpoint - [Advanced Settings]
Item Value BizTx Group/BizTx
com.tmax.tutorial.httpTutorial (This item can be entered manually or can be selected after creating BizTx Group/BizTx from the BizTx Group/BizTx screen.)
3.2. Creating an Outbound Endpoint
The following is an example of adding an HTTP outbound endpoint. In this example, only [Connection Info] tab is shown.
-
Basic Settings
 Adding an Outbound Endpoint - Basic Settings
Item Value Endpoint ID
HTTP_EP_OUT
Endpoint Name
HTTP_EP_OUT
Endpoint Status
Running
Initial State at Boot
Running
Direction
Outbound
-
[Connection Info] Tab
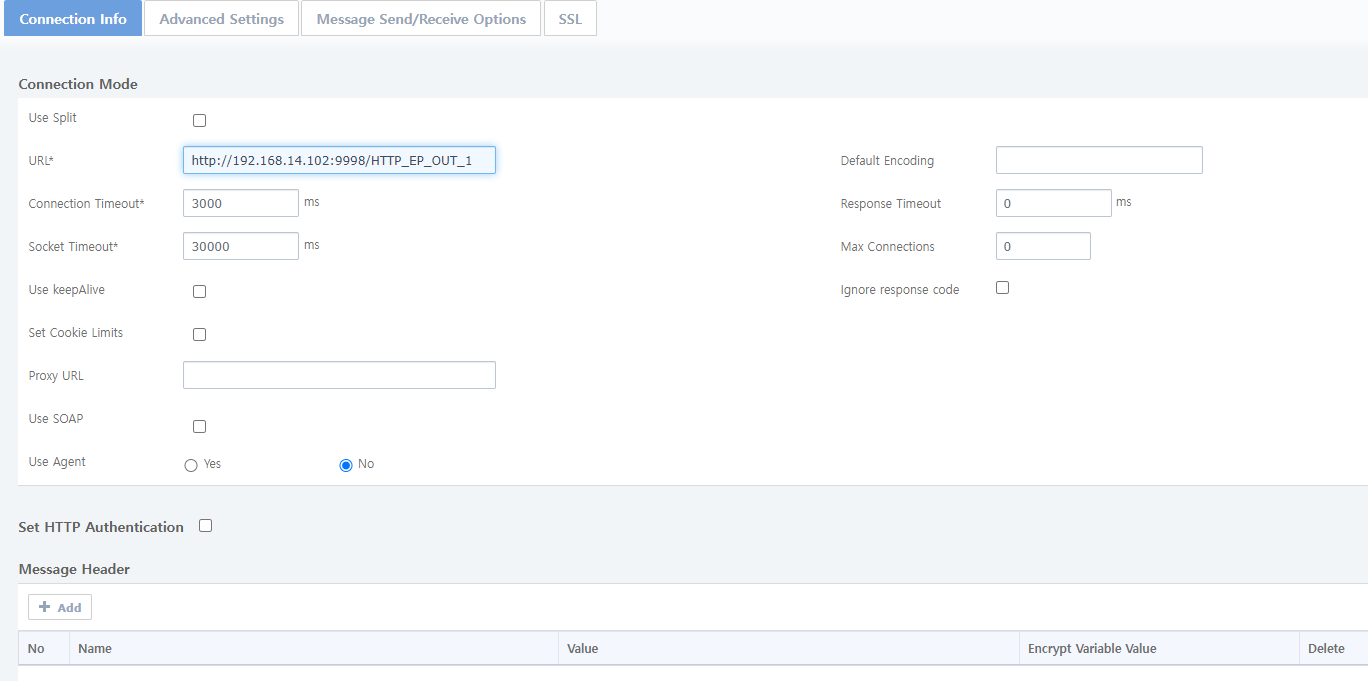 Adding an Outbound Endpoint - [Connection Info]
Item Value URL
Connection Timeout
3000
Socket Timeout
30000
4. Creating a Studio Resource
This section describes how to create a resource in Studio.
|
For information about AnyLink Studio, refer to AnyLink Studio Guide. |
Create a BizTx resources in AnyLink Studio.
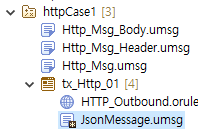
4.1. Creating a BizTx Group
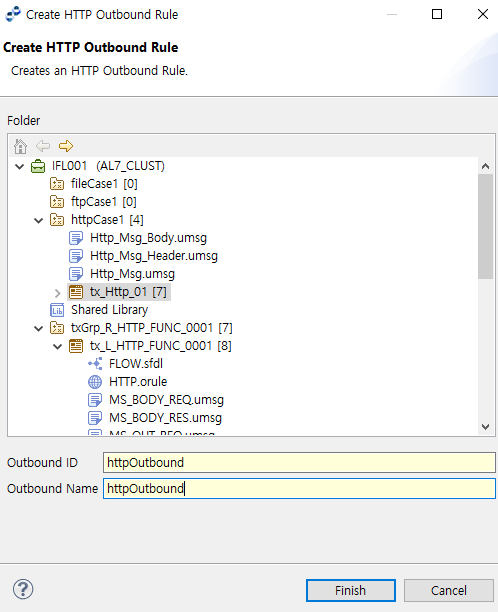
In the BizTx Group navigator, right click on a Project and go to [New] > [BizTx/BizTx Group].
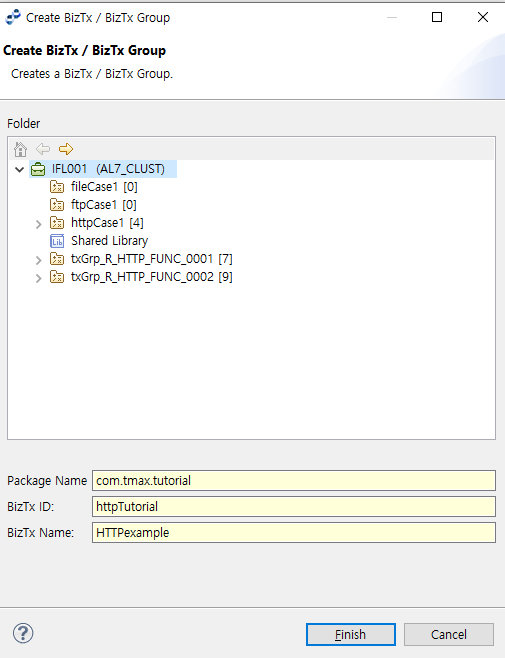
| Item | Value |
|---|---|
Package Name |
com.tmax.tutorial |
BizTx ID |
httpTutorial |
BizTx Name |
HTTPexample |
4.2. Creating a BizTx
In the BizTx Group navigator, right click on a BizTx Group and go to [New] > [BizTx/BizTx Group].
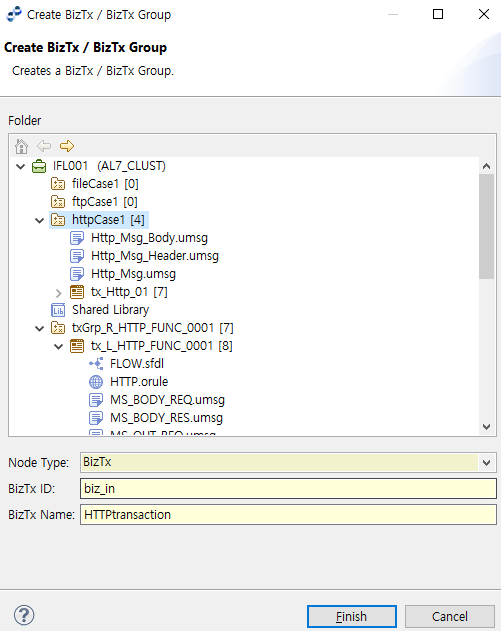
| Item | Value |
|---|---|
Node Type |
BizTx |
BizTx ID |
biz_in |
BizTx Name |
HTTPtransaction |
4.3. Creating a Message
In the BizTx Group navigator, right click on a BizTx Group and go to [New] > [Message].
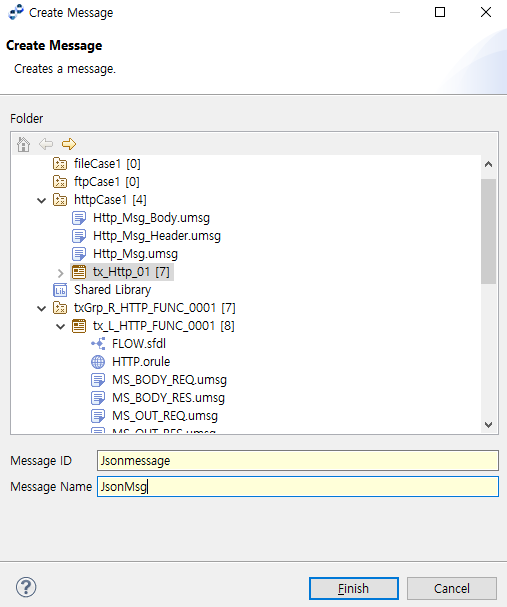
| Item | Value |
|---|---|
Message ID |
Jsonmessage |
Message Name |
JsonMsg |
5. Configuring a Studio Resource
This section describes how to configure a resource.
|
For more information about AnyLink Studio, refer to AnyLink Studio Guide. |
5.1. Configuring a BizTx Group
The following is an example of configuring a BizTx Group. The [Parsing Info] tab and the [Parsing Options] tab are not configured in this example.
-
[BizTx Group Info] Tab
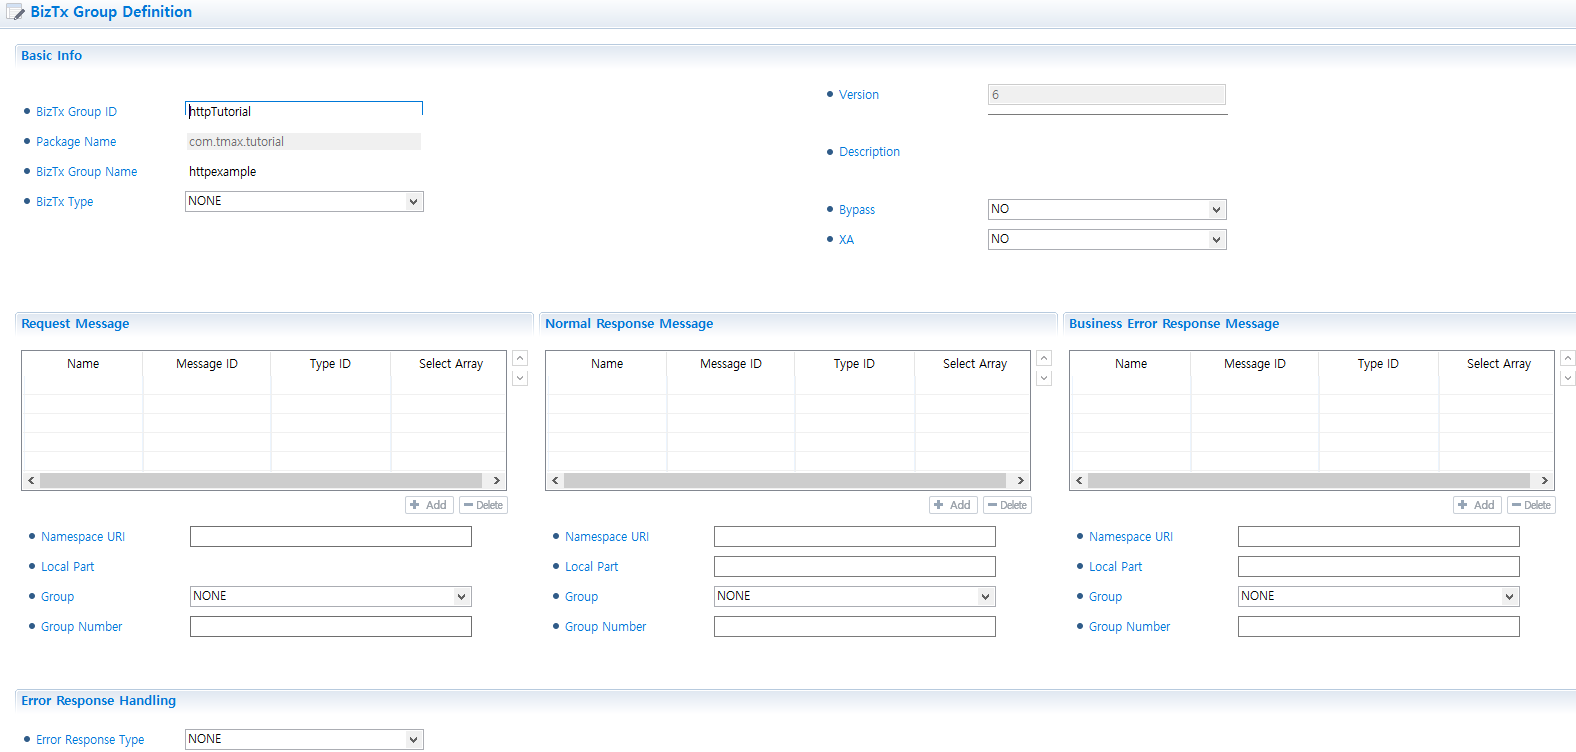 Configuring a BizTx Group - [BizTx Group Info]
Item Value XA
NO
Request Message
None
Normal Response Message
None
Bypass
NO
Error Response Type
NONE
-
[BizTx Group Option] Tab
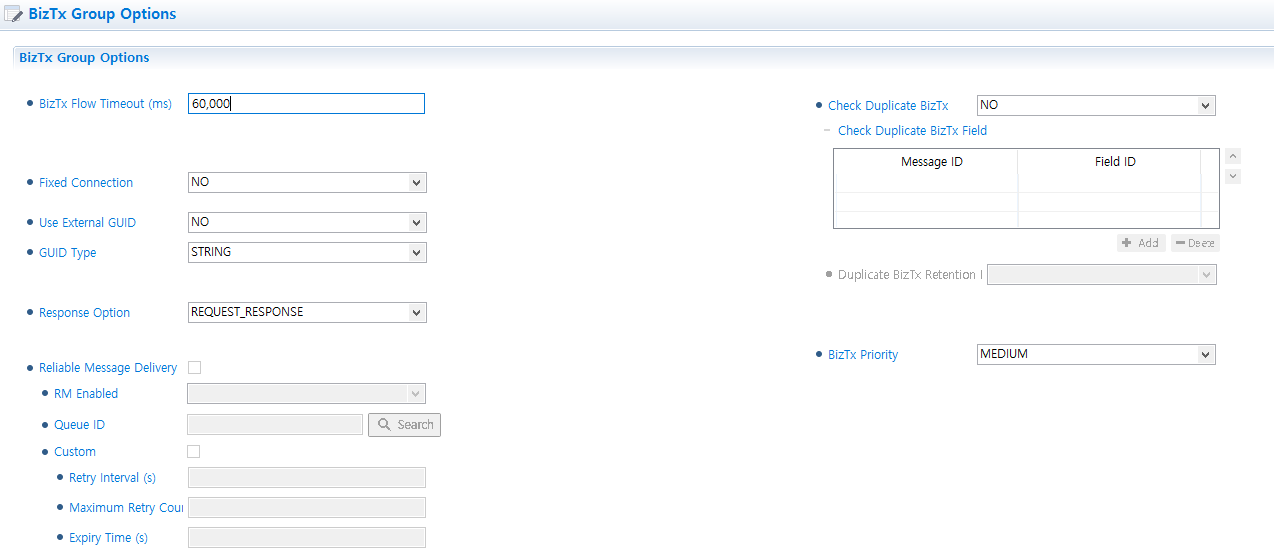 Configuring a BizTx Group - [BizTx Group Option]
Item Value BizTx Flow Timeout (ms)
60000
Response Option
REQUEST_RESPONSE
BizTx Priority
MEDIUM
5.2. Configuring a BizTx
The following is an example of configuring a BizTx. The [Parsing Info] tab and the [Parsing Options] tab are not configured in this example.
-
[BizTx Info] Tab
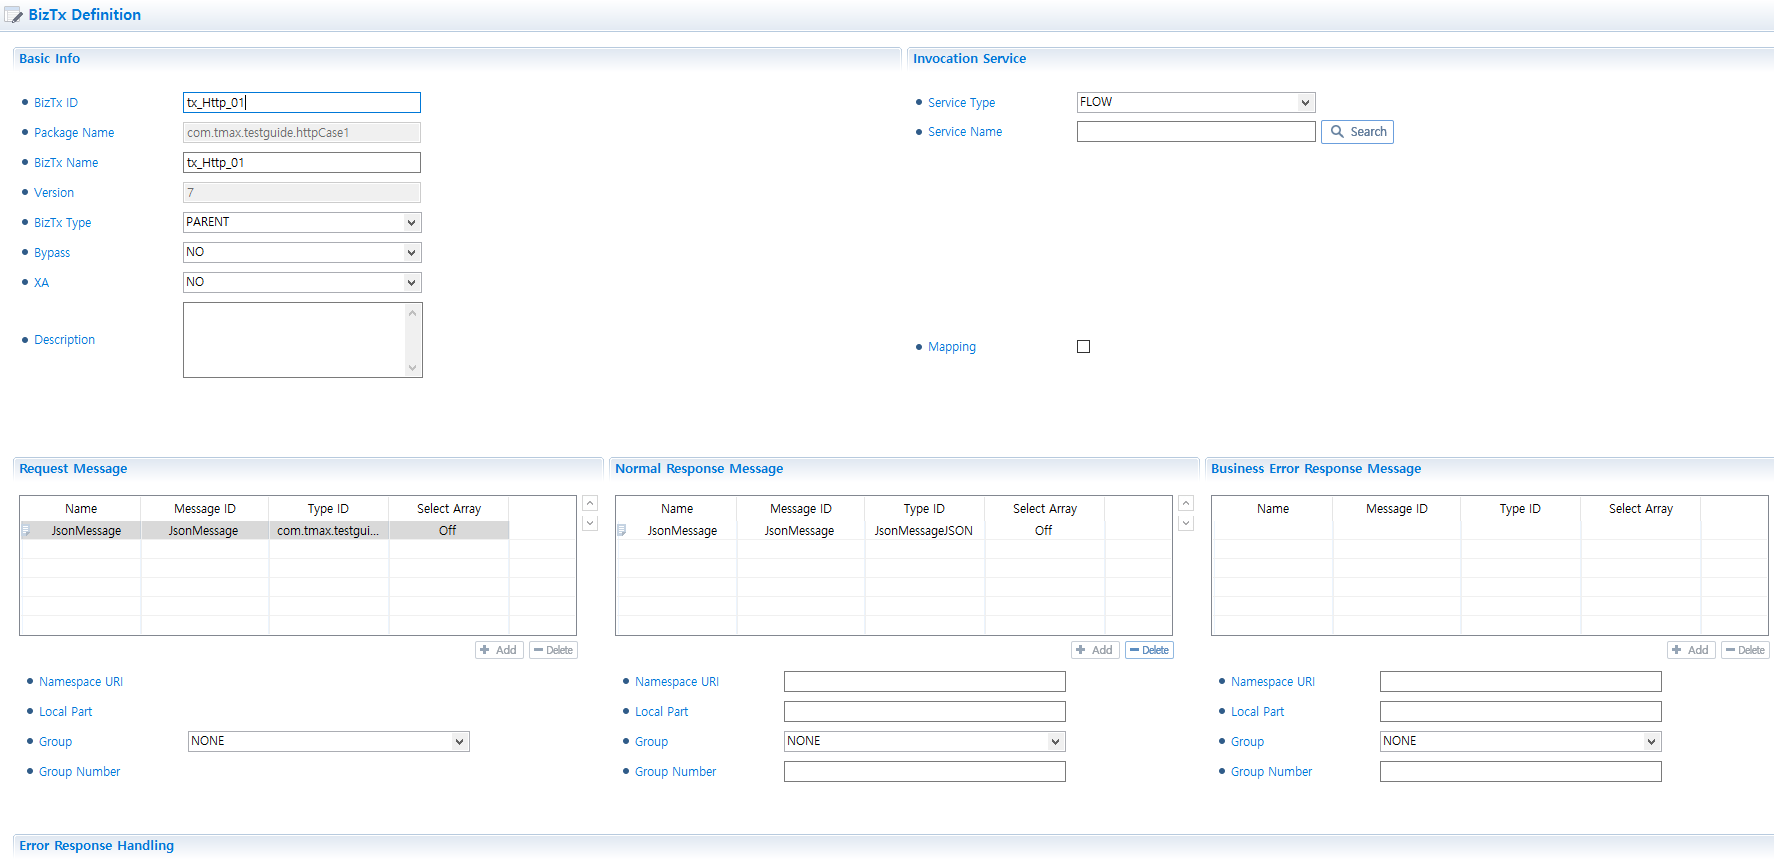 Configuring a BizTx - [BizTx Info]
Item Value Bypass
NO
XA
NO
Error Response Type
PARENT
Service Type
FLOW
Service Name
HTTP_IN_FLOW_Message_START_Event_BE815D (randomly generated)
Request Message
JsonMessage (JsonMsg)
Normal Response Message
JsonMessage (JsonMsg)
-
[BizTx Options] Tab
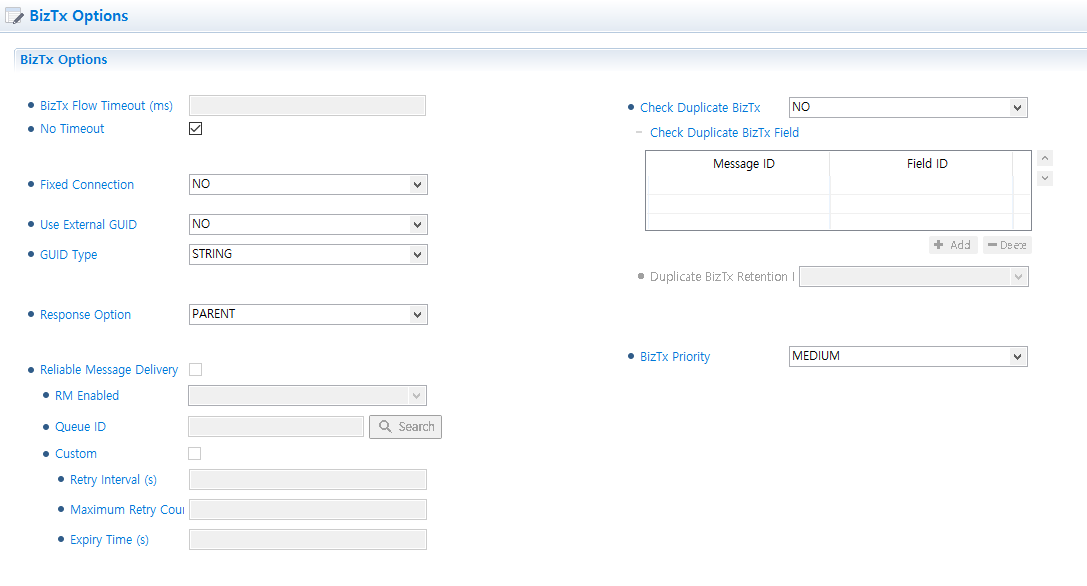 Configuring a BizTx - [BizTx Options]
Item Value BizTx Flow Timeout (ms)
None
No Timeout
Yes
Response Option
PARENT
BizTx Priority
MEDIUM
5.3. Configuring a Message
The following is an example of configuring a message. For information about how to configure a message, refer to AnyLink Studio Guide.
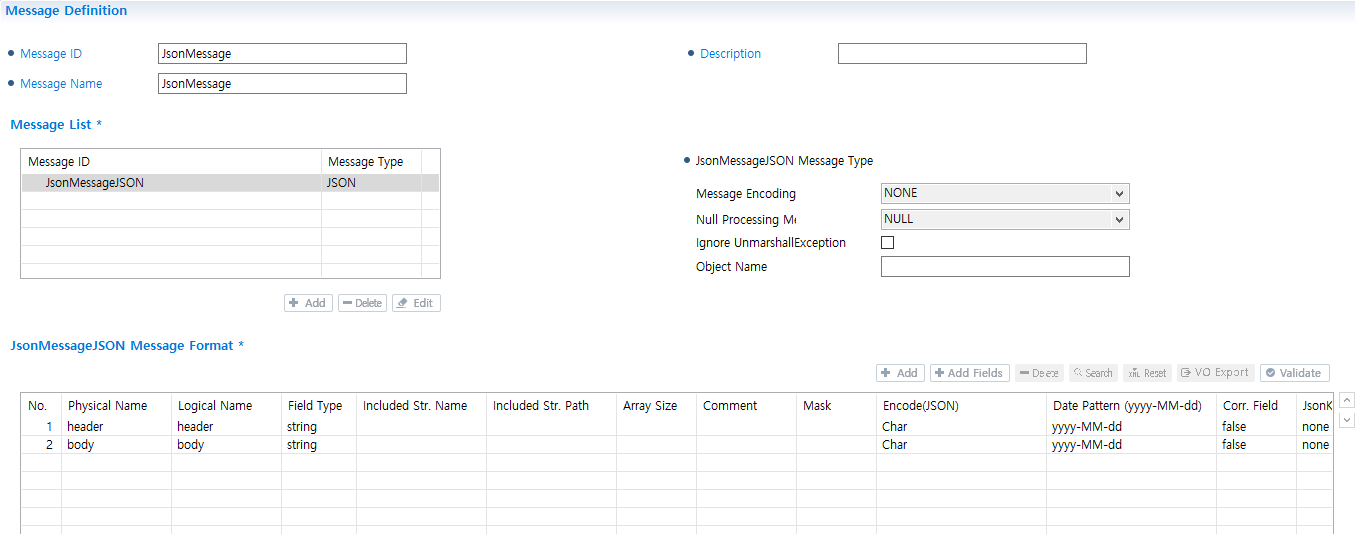
| Item | Value |
|---|---|
Message Type |
JSON |
Field 1 |
Header |
Field 2 |
Body |
5.4. Configuring an Outbound Rule
The following is an example of configuring an HTTP outbound rule.
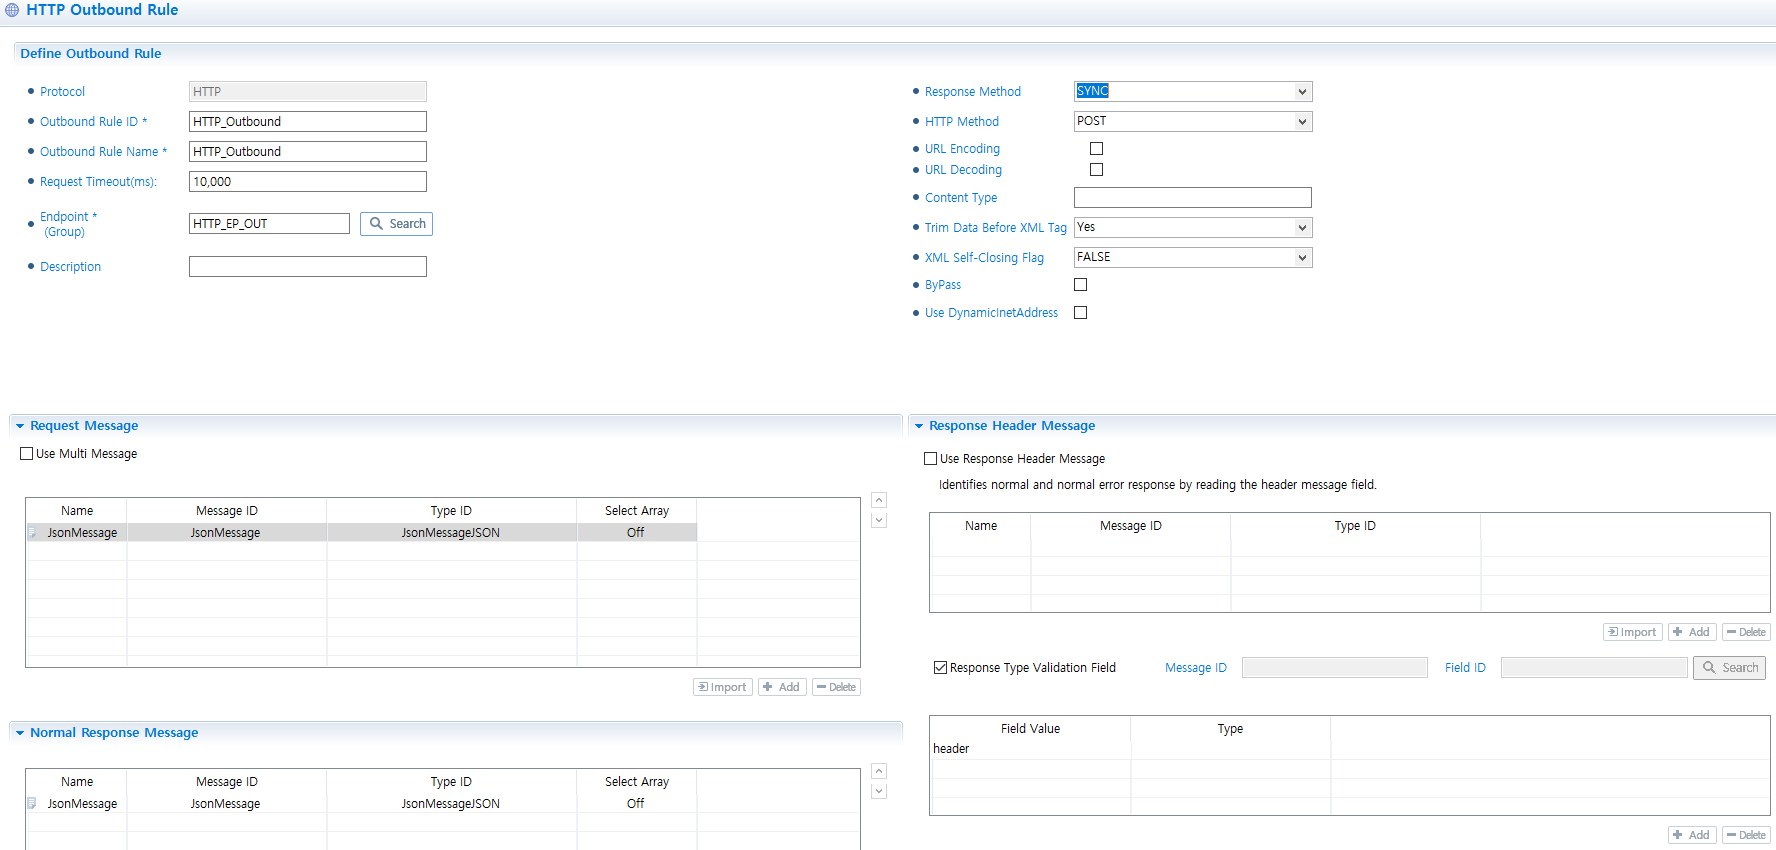
| Item | Value |
|---|---|
Request Timeout (ms) |
10000 |
Response Method |
Sync |
HTTP Method |
POST |
Endpoint |
HTTP_EP_OUT |
Request Message |
JsonMessage (JsonMsg) |
Normal Response Message |
JsonMessage (JsonMsg) |
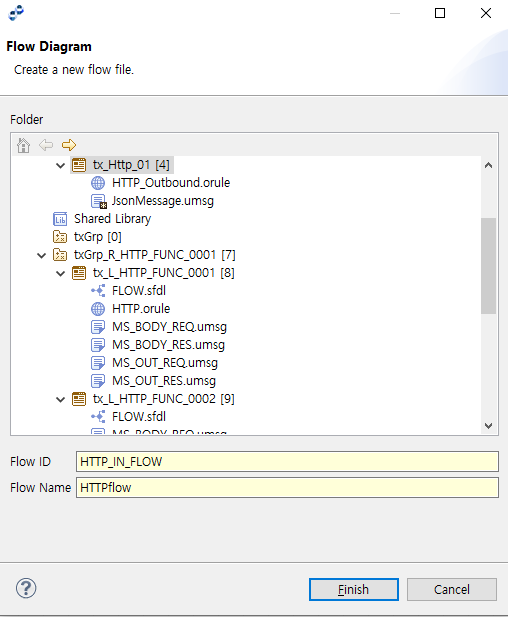
5.5. Configuring a Flow
Configure a flow as follows:
-
Create a flow diagram.
-
Configure variables.
-
Configure message events.
-
Configure outbound service call.
-
Configure response service call.
Flow Diagram
The following is an example of creating a service flow diagram.

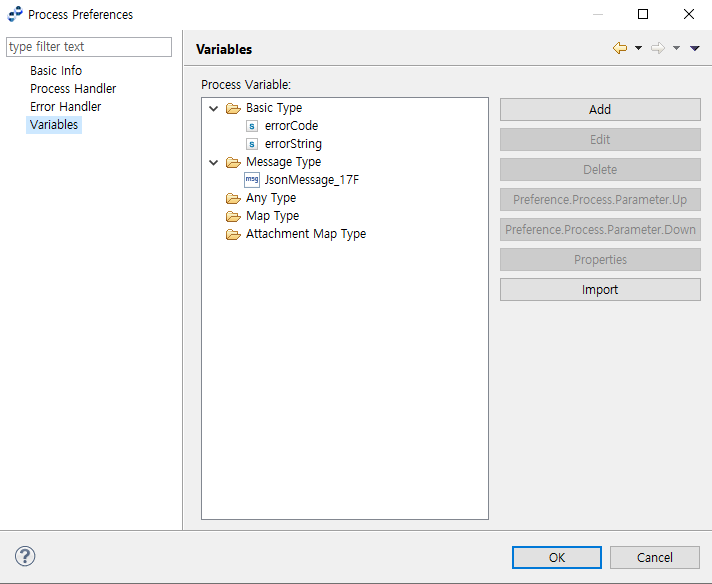
Variables
To set variables, click [Properties] from the context menu of the Flow editor.
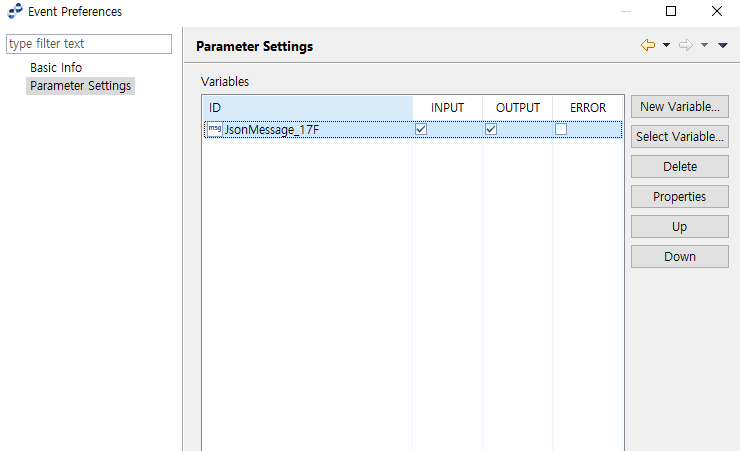
Message Event
Click [Properties] from the context menu of a Message Event in the Flow editor, and then click [Parameter Settings] from the Event Preferences window.
Outbound Call
Configure an outbound call as follows:
-
Select [Properties] from the [Outbound Call] > [Outbound Rule] context menu of the flow editor. Click [Parameter Settings] in the Activity Preferences window.
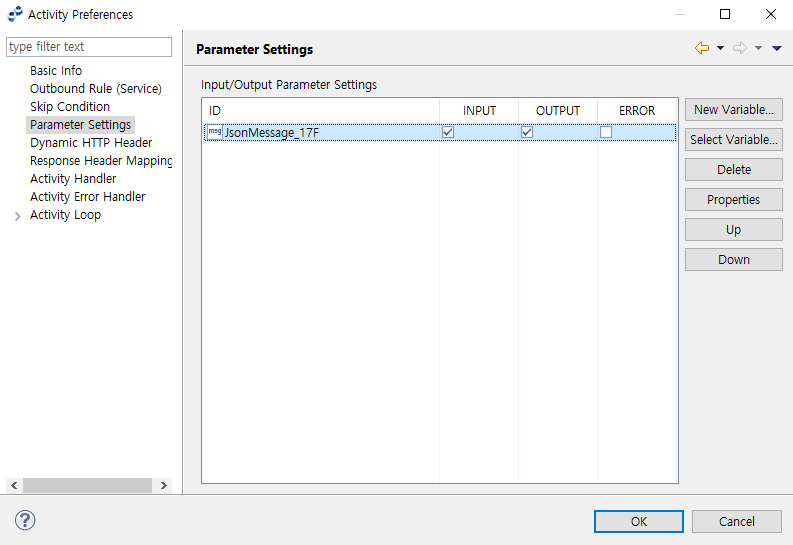 Outbound Call - Parameter Settings
 -
Click [Outbound Rule (Service)] from the Activity Preferences window.
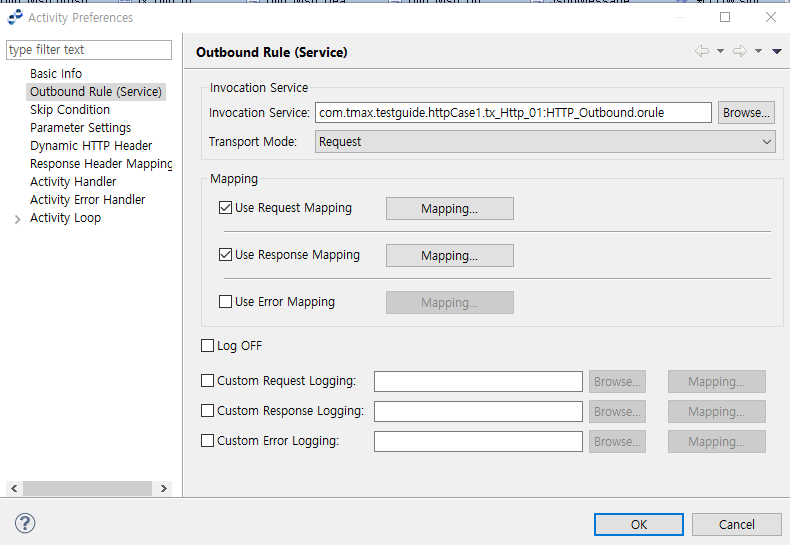 Outbound Call - Outbound Rule (Service)
 -
Select the 'Use Request Mapping' and 'Use Response Mapping' checkboxes, and then click [Mapping] to create mappings.
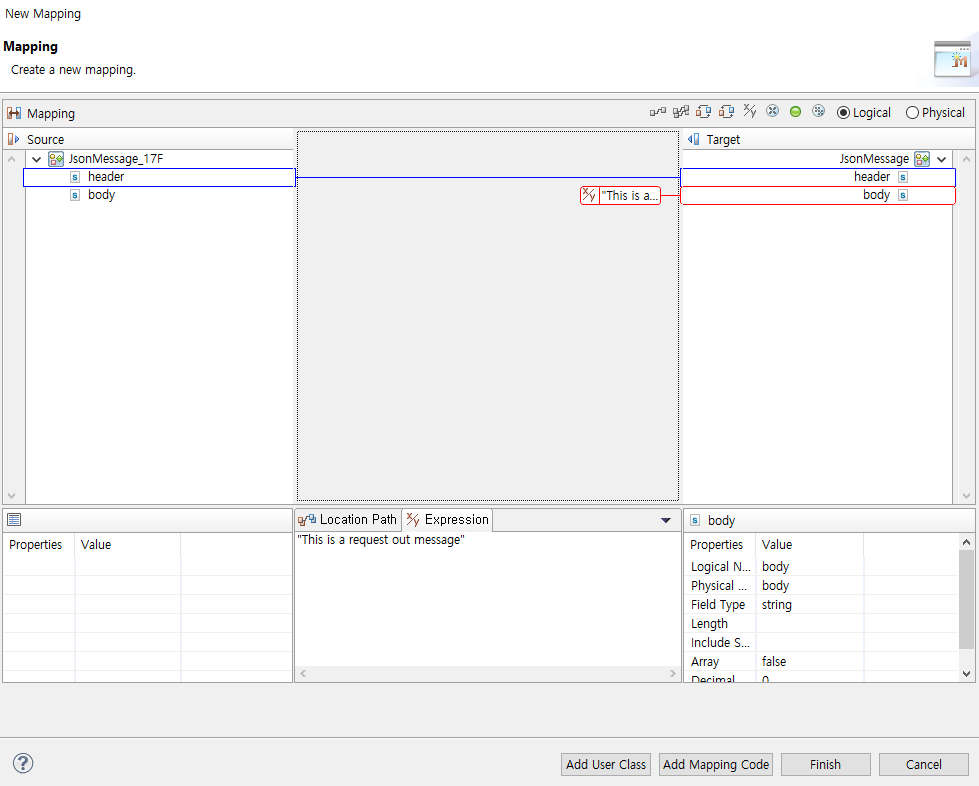 Outbound Call - Outbound Rule (Service) - Request Mapping
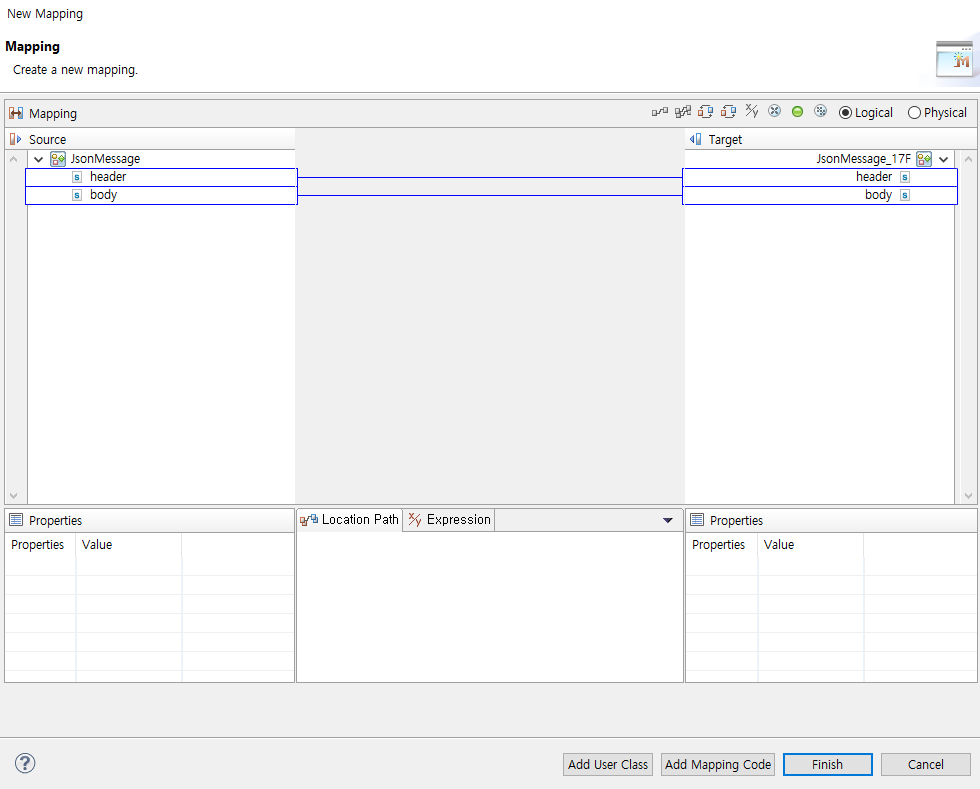 Outbound Call - Outbound Rule (Service) - Response Mapping
Response Call
Configure a response call as follows:
-
Select [Property] from the [Send Message] > [Reply Message] context menu of the flow editor. Click [Reply Message] in the Activity Preferences window.
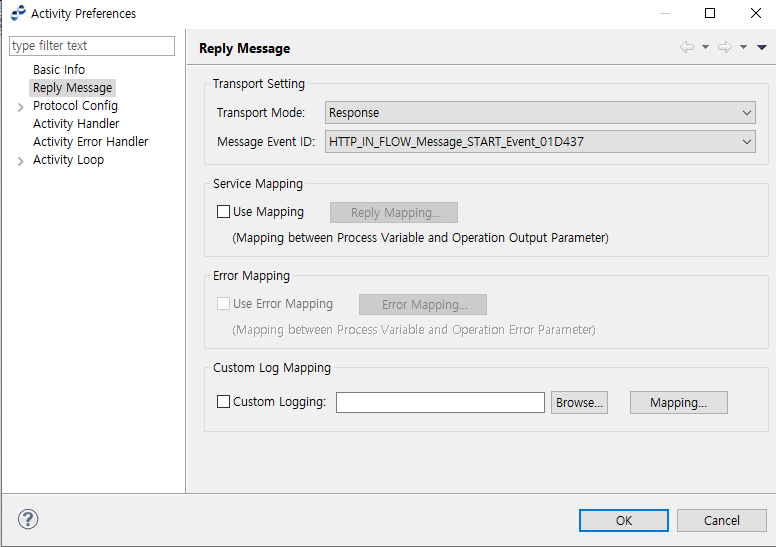 Response Call - Reply Message
 -
Select the 'Use Mapping' checkbox, and then click [Reply Mapping…] to create mapping.
Click [Add Source] from the context menu of the Source section in the Mapping screen, and then select JsonMsg for the mappings.
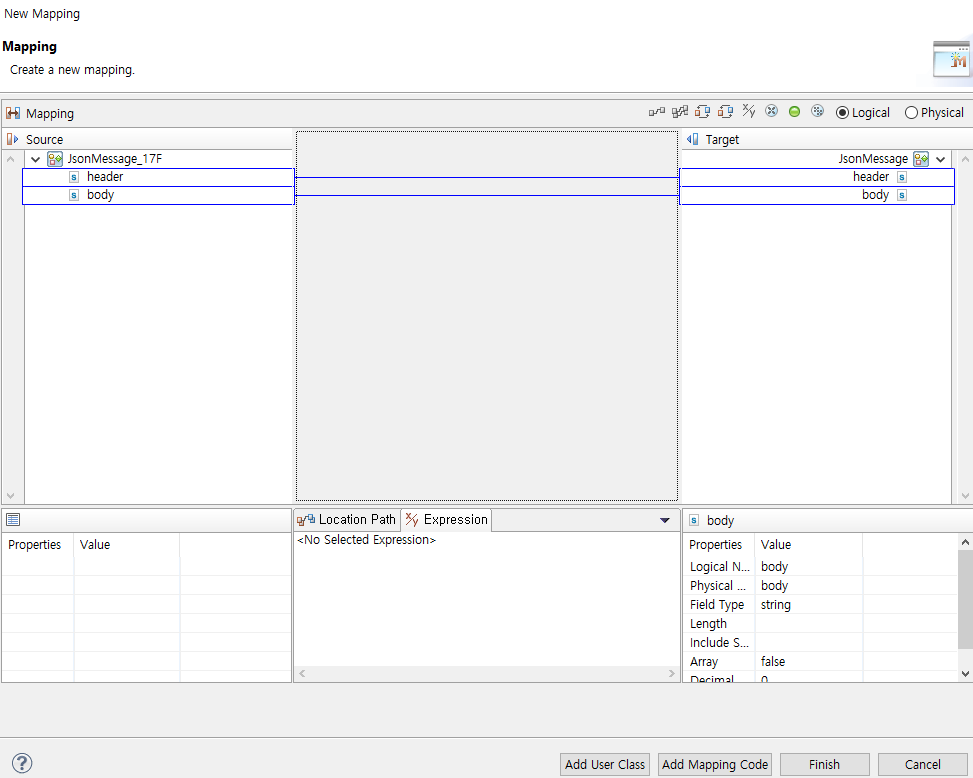 Response Call - Reply Message - Service Mapping - Reply Mapping
6. Deployment
Use the following Deploy Options window to configure deployment options for a BizTx Group/BizTx
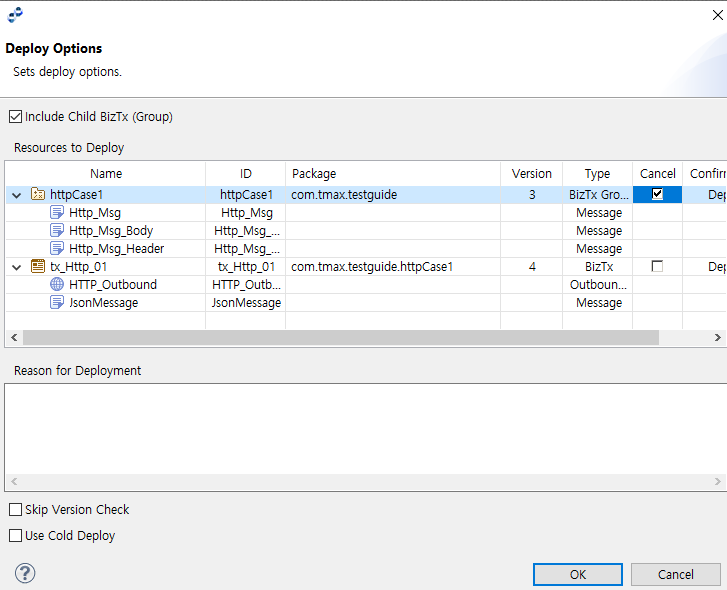
|
For more information, refer to AnyLink Studio Guide. |
7. Testing a BizTx
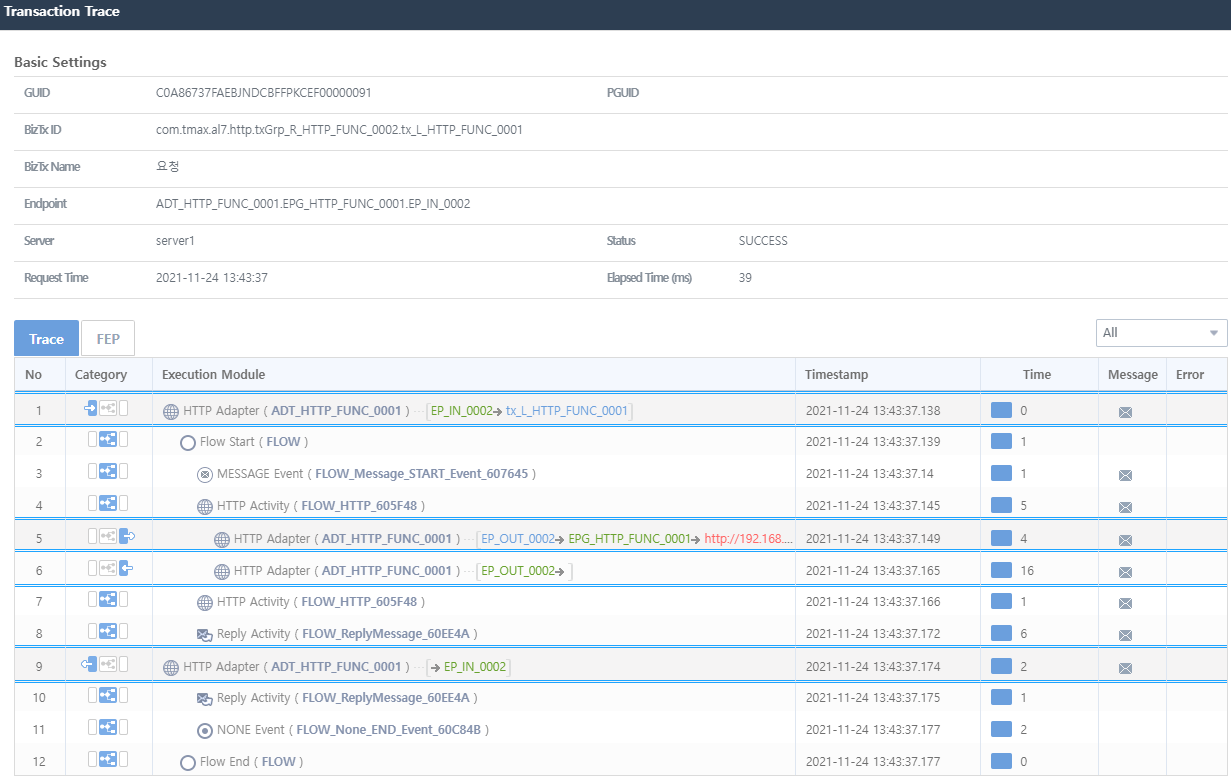
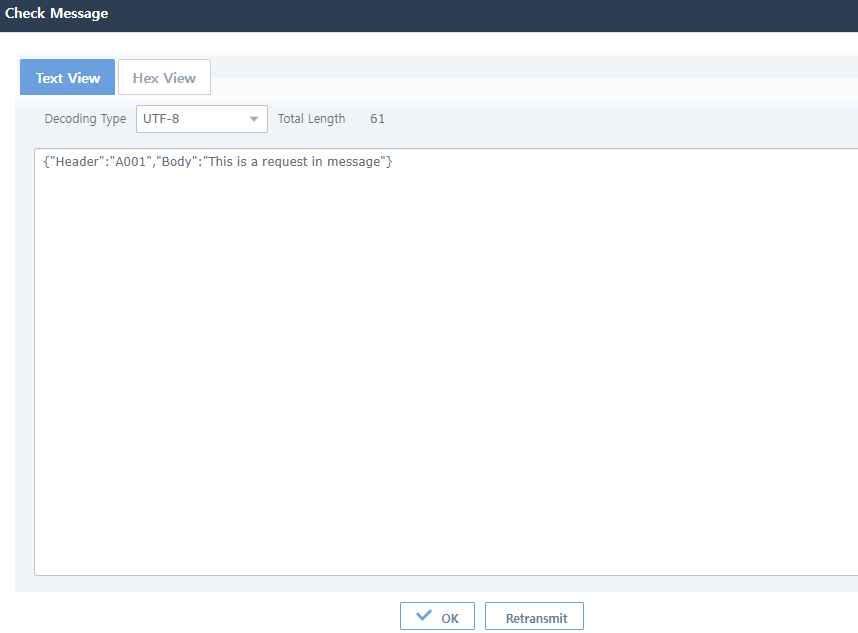
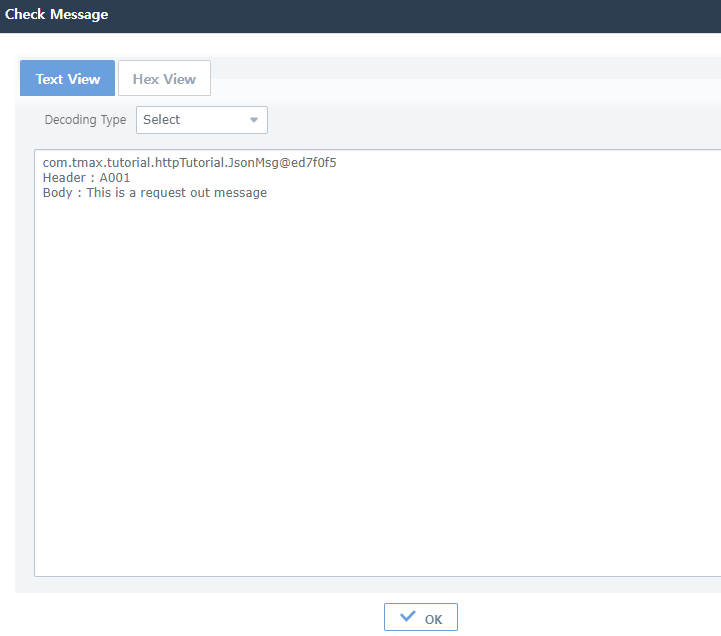
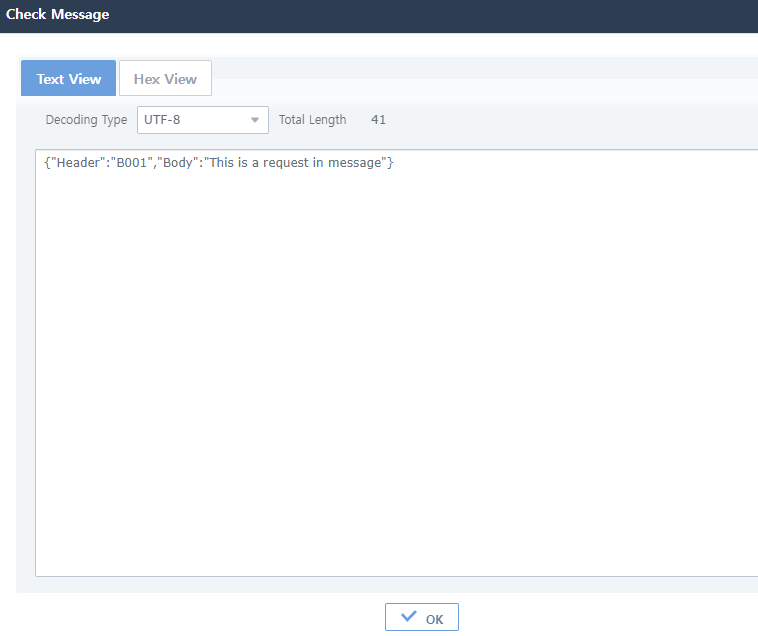
Client programs use AnyLink’s outbound HTTP, and server programs use AnyLink’s inbound HTTP. The following is an example of performing a test.
