Installing and Uninstalling the Remote Agent
This chapter describes how to install the remote agent in Unix/Linux and Windows.
1. Installation and Uninstallation in Unix/Linux
1.1. Installation
To install the product in Unix/Linux, the console installer must be executed. The console installer suggests default values in the installation process. Since it is impossible to go back to a previous step in a shell, entered values can be changed after the installation.
The following describes how to install AnyLink in Unix/Linux.
-
Upload the AnyLink remote agent installation file (AnyLink_RemoteAgent.bin) to the server, and go to the directory that contains the file.
-
Grant execution permission to the file.
chmod u+x AnyLink_RemoteAgent.bin
-
Enter the file name in the console, and then press <ENTER>.
anylink@node:~$ ./AnyLink_RemoteAgent.bin Preparing to install... Extracting the installation resources from the installer archive... Configuring the installer for this system's environment... strings: '/lib/libc.so.6': No such file Launching installer... Preparing CONSOLE Mode Installation... =============================================================================== AnyLink_RemoteAgent (created with InstallAnywhere by Macrovision) ------------------------------------------------------------------------------- -
An introduction about the installer will be displayed. Press <ENTER> to go to the next step.
=============================================================================== Introduction ------------ InstallAnywhere will guide you through the installation of AnyLink_RemoteAgent. It is strongly recommended that you quit all programs before continuing with this installation. Respond to each prompt to proceed to the next step in the installation. If you want to change something on a previous step, type 'back'. You may cancel this installation at any time by typing 'quit'. PRESS <ENTER> TO CONTINUE: -
The AnyLink remote agent license agreement screen will be displayed.
=============================================================================== License Agreement ----------------- Installation and Use of AnyLink_RemoteAgent Requires Acceptance of the Following License Agreement: Installation and Use of AnyLink Remote Agent(hereafter, Software) Requires Acceptance of the Following License Agreement: TmaxSoft Co., Ltd. (hereafter, TmaxSoft) License Agreement (hereafter,Agreement) Product : AnyLink Remote Agent This is a legal agreement between you (either an individual or an entity) and TmaxSoft, Incorporated. By opening the sealed software package and/or by using the software, you agree to be bound by the terms of this agreement. AnyLink Software License 1. Grant of license: TmaxSoft hereby grants you a non-exclusive, non-transferable, non-sublicensable limited license to the Software and any intellectual property related to the Software including, but not limited to, user manuals and implementation instructions. You should read this Agreement carefully before opening the Software package, installing or using the Software. Once you open the Software package, install or use the PRESS <ENTER> TO CONTINUE: -
Determine whether to accept the license agreement. To accept, enter "Y" and then press <ENTER>. To reject, enter "N" and then press <ENTER>.
Software, you are deemed to have agreed to the contents of this Agreement. 2. Copyright: The Software and all related intellectual property is owned by TmaxSoft and protected by copyright laws and international treaty provisions. You shall not use or copy the Software without usage authorization of TmaxSoft. You also shall not copy the printed materials accompanying the Software, nor print copies of any user documentation provided in online or electronic form. 3. Other restrictions: You shall not rent, lease, or lend the Software and accompanying materials on a permanent basis to any individual or company. You shall not, nor permit any third party to reverse engineer, decompile, disassemble, modify, adapt, create derivative works from or otherwise attempt to derive source code from the Software provided. TmaxSoft Co., Ltd. DO YOU ACCEPT THE TERMS OF THIS LICENSE AGREEMENT? (Y/N): y -
Select the installation directory. To use the default value, press <ENTER>. To change the directory, enter the installation path.
=============================================================================== Choose Install Folder ------------------- Where would you like to install? Default Install Folder: /home/anylink/AnyLinkRA ENTER AN ABSOLUTE PATH, OR PRESS <ENTER> TO ACCEPT THE DEFAULT : -
Re-check the entered directory information. To change to a different directory, select "2 - Change.." and press <ENTER>.
=============================================================================== Directory Check --------------- User Specified Directory exists. To overwrite AnyLink_RemoteAgent, click 'Overwrite'. To choose Different directory, click 'Change'. To cancel the installation, click 'Cancel'. ->1- Overwrite 2- Change... 3- Cancel ENTER THE NUMBER OF THE DESIRED CHOICE, OR PRESS <ENTER> TO ACCEPT THE DEFAULT: -
Enter the JDK location. If <ENTER> is pressed without any location, then the automatically recognized JDK location will be used.
=============================================================================== Choose JDK Folder ----------------- Please Choose a Folder: Input User JDK Folder (DEFAULT: /home/anylink/jdk1.7.0_79): -
Enter the IP address of the server in which the AnyLink remote agent is installed. (xxx.xxx.xxx.xxx)
=============================================================================== Input User RemoteAgent IP ----------------------- Enter requested information Agent IP (DEFAULT: 127.0.0.1): -
Enter the port that will be used by the AnyLink remote agent.
=============================================================================== Input User RemoteAgent Port ------------------------- Enter requested information Agent Port (DEFAULT: 25100): File Send Port (DEFAULT: 25110): Manager Port (DEFAULT: 25120): -
The pre-installation summary will be displayed.
Press <ENTER> to start the installation.
=============================================================================== Pre-Installation Summary ------------------------ Please Review the Following Before Continuing: Product Name: AnyLink_RemoteAgent Install Folder: /home/anylink/AnyLinkRA Disk Space Information (for Installation Target): Required: 30,906,755 bytes Available: 916,017,520,640 bytes PRESS <ENTER> TO CONTINUE: -
The installation will start along with the progress bar.
=============================================================================== Installing... ------------- [==================|==================|==================|==================] [------------------|------------------|------------------|------------------] -
The installation complete screen will be displayed when the installation is completed.
===============================================================================
            Installation Complete --------------------- Congratulations.
            AnyLink_RemoteAgent has been successfully installed to:
            /home/anylink/AnyLinkRA PRESS <ENTER> TO EXIT THE INSTALLER:
1.2. Installation Verification
This section describes how to check the installation as well as how to start the server.
Directory Structure
The following directory will be created if the AnyLink remote agent is normally installed.
$AnyLink_RemoteAgent_HOME +---- bin +---- config |----
      lib +---- agent +---- common +---- manager |---- logs
- bin
-
Contains the server start and terminate scripts, start and stop execution files.
- config
-
Contains the agent.xml, manager.xml, and logging.properties files, which have the server’s configuration information.
- lib
-
Contains the agent’s and the manager’s libraries.
- logs
-
Contains the AnyLink remote agent log files.
Startup Verification
The remote agent can be started by executing start.sh in the AnyLink remote agent HOME.
anylink@po3:~/AnyLinkRA/bin$ ./start.sh
        *************************************************************** -
        AGENT Home : /home/anylink/AnyLinkRA
        *************************************************************** +
        /home/anylink/jdk1.7.0_79/bin/java -Xmx512m -server
        -Djava.util.logging.config.file=
        /home/anylink/AnyLinkRA/config/logging.properties -Djava.class.path=
        /home/anylink/AnyLinkRA/lib/common/*:/home/anylink/AnyLinkRA/lib/manager/*
        -Dagent.home= /home/anylink/AnyLinkRA -cp
        /home/anylink/AnyLinkRA/lib/common/*:
        /home/anylink/AnyLinkRA/lib/manager/*
        com.tmax.AnyLink.agent.manager.AgentManagerMain start
        ========================== INIT LOGGER =========================
        DailyRollingFileHandler(version:2.1.6). Setting level=FINEST,
        formatter=com.tmax.AnyLink.util.logging.CompactFormatter@63acd9bf,
        filter=null, errorManager=java.util.logging.ErrorManager@690bbdb8,
        encoding=null, valid-day=1, valid-hour=0, valid-minute=0,
        pattern=/home/anylink/AnyLinkRA/logs/agent_%d{1}.log(/home/anylink/AnyLinkRA/logs/agent_%d{1}.log),
        append=true, keepDays=1, async=false [com.tmax] named logger is
        j.u.l.Logger DailyRollingFileHandler.applyProperties(version:2.1.6).
        Setting level=FINEST,
        formatter=com.tmax.AnyLink.util.logging.CompactFormatter@5c52fbe5,
        filter=null, errorManager=java.util.logging.ErrorManager@4c17a6bd,
        encoding=null, valid-day=1, valid-hour=0, valid-minute=0,
        pattern=/home/anylink/AnyLinkRA/logs/agent_%d{1}.log(/home/anylink/AnyLinkRA/logs/agent_%d{1}.log),
        append=true, keepDays=1, async=false
2. Installation and Uninstallation in Windows
This section describes how to install and uninstall the remote agent in Windows.
2.1. Installation
The following describes the installation process in Windows.
-
Go to the directory that contains the AnyLink remote agent installer (AnyLink_Remote_Agent.exe) and execute the file.
-
The AnyLink remote agent introduction screen will be displayed. Read the introduction and click [Next] to proceed to the next step. Clicking [Cancel] will stop the installation, and clicking [Previous] will go to a previous step.
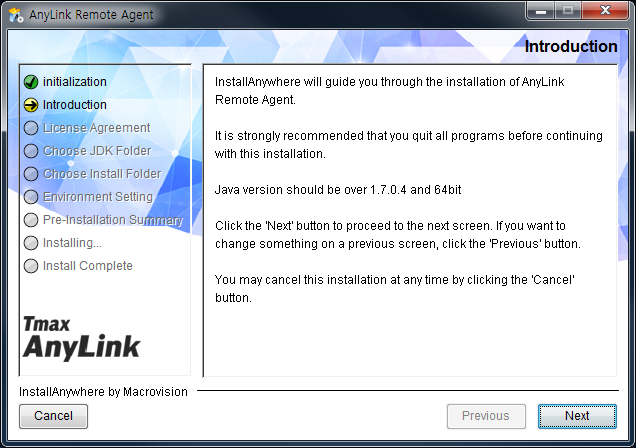 AnyLink Remote Agent Installer - Introduction
 -
The TmaxSoft license agreement screen will be displayed. Read the description and then select "I accept the terms of the License Agreement" and click [Next] to accept the agreements. If not, then the installation cannot proceed.
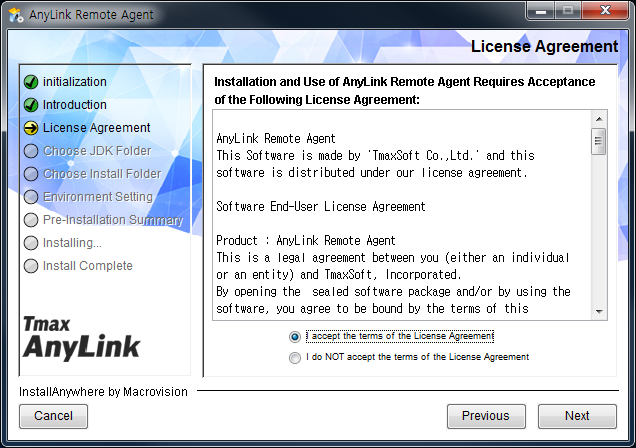 AnyLink Remote Agent Installer - License Agreement
 -
Select the directory in which JDK is installed and then click [Next]. If JDK was not installed in the default directory, then click [Choose…] to choose the location of the JDK directory. To restore JDK’s default installation directory, click [Restore Default Location].
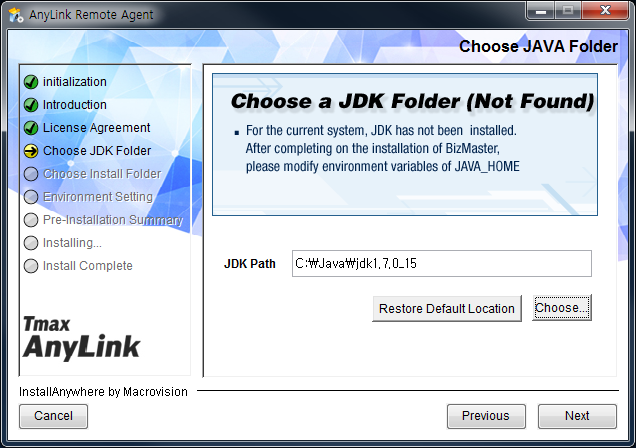 AnyLink Remote Agent Installer - Choose Java Folder (1)
 -
Specify the directory in which the AnyLink remote agent will be installed, and then click [Next]. In order not to use the default directory, click [Choose…] to choose another installation location. To restore the default installation directory, click [Restore Default Location].
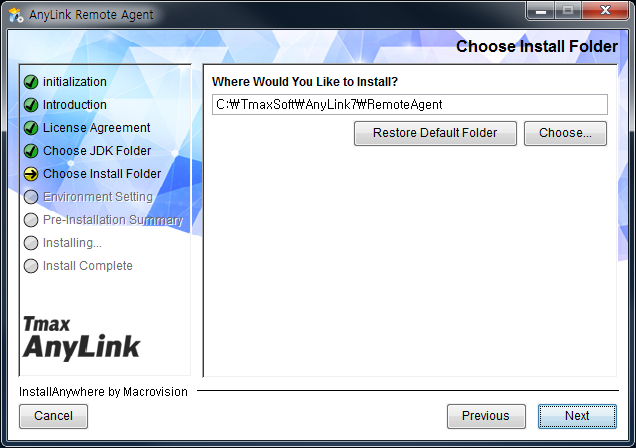 AnyLink Remote Agent Installer - Choose JAVA Folder (2)
 -
Set the port for communicating with the server.
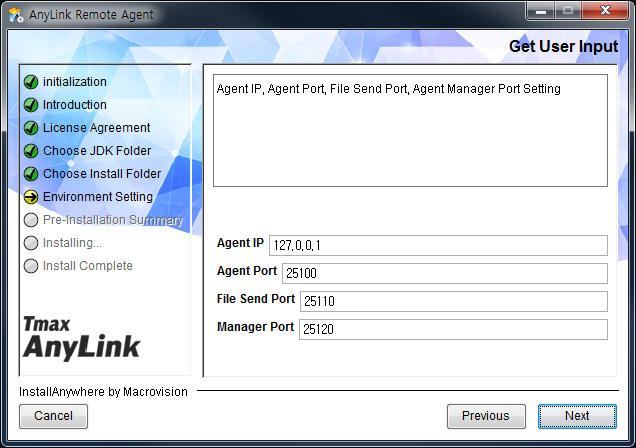 AnyLink Remote Agent Installer - Environment Settings
 -
The pre-installation summary will be displayed. Check the settings such as the installation path, and then click [Install] to proceed with the remote agent installation. To change the settings, click [Previous] to go back to a desired screen and then change the settings.
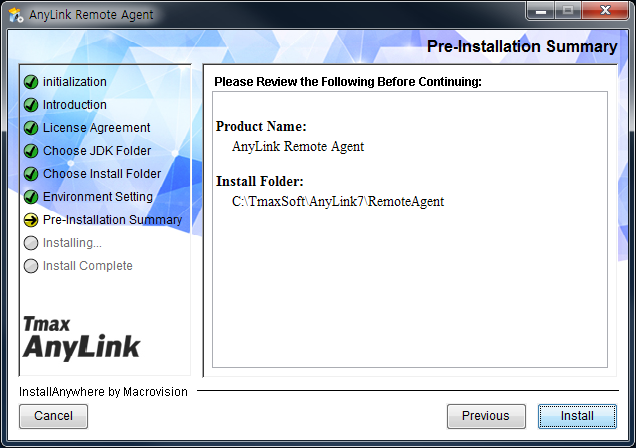 AnyLink Remote Agent Installer - Pre-Installation Summary (1)
 -
Proceed with the AnyLink remote agent installation. The progress bar displays the installation progress.
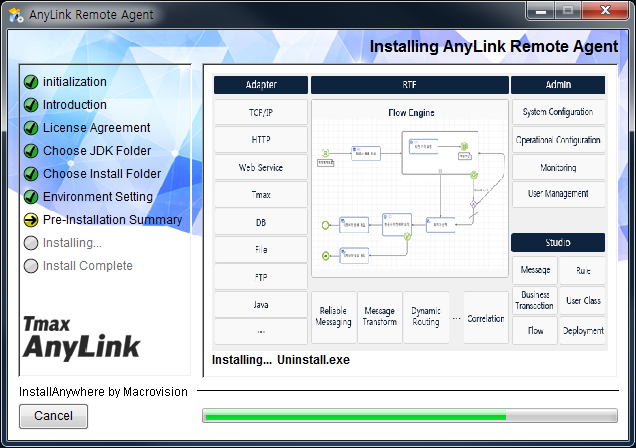 AnyLink Remote Agent Installer - Pre-Installation Summary (2)
 -
After the AnyLink remote agent has been installed, click [Done] to end the installation.
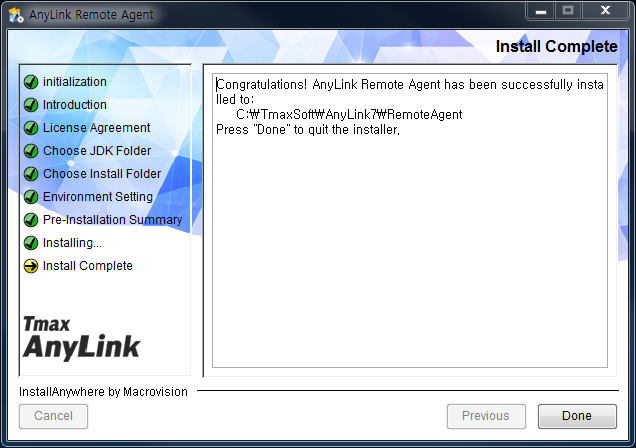 AnyLink Remote Agent Installer - Installation Complete
2.2. Installation Verification
This section describes how to check that the product has been properly installed as well as how to start the server. For description about the directory structure, refer to "Directory Structure".
Startup Verification
If the remote agent has been successfully installed, then start the remote agent by selecting [Start] > [All Programs] > [TmaxSoft] > [AnyLink7] > [RemoteAgent] > [Start] in Windows.
2.3. Uninstallation
The following is the process for uninstalling the AnyLink remote agent.
-
Select [Start] > [All Programs] > [TmaxSoft] > [AnyLink7] > [RemoteAgent] > [Uninstall].
-
The uninstallation confirmation screen will be displayed. Read the warning message and click [Uninstall] to uninstall the remote agent.
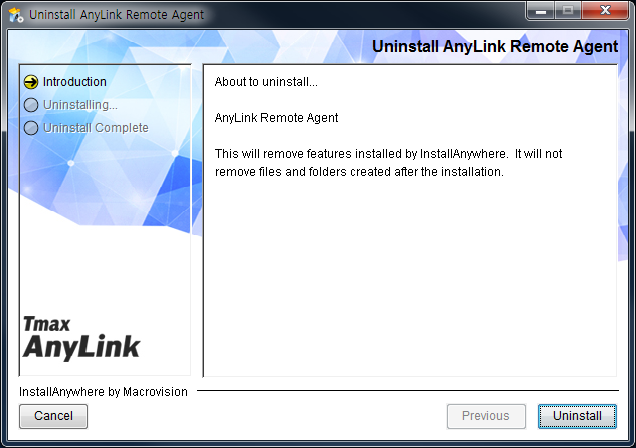 AnyLink Remote Agent Uninstallation
 -
The remote agent uninstallation will start.
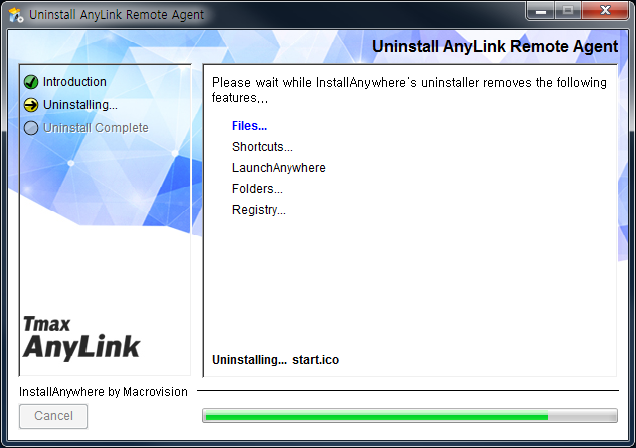 AnyLink Remote Agent Uninstallation
 -
When the AnyLink remote agent has been uninstalled, the uninstallation message will be displayed. Click [Done] to end the uninstallation.
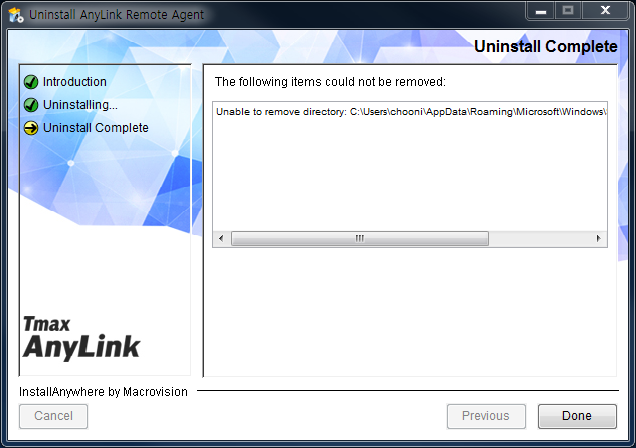 AnyLink Remote Agent Uninstall Complete
2.4. Uninstallation Verification
Check that the installation directory specified in the installer has been completely removed. If the user executes the uninstaller directly in the uninstaller directory, then the installation directory and the uninstaller directory can remain as empty directories. This is normal, so delete them manually.
Files and directories added after the installation are not automatically deleted. To delete those files and directories, the user must manually delete them.