Environment Configuration
This chapter describes how to configure AnyLink Tmax adapter and outbound rule.
1. Adapter Configuration
Configure a Tmax adapter in WebAdmin.
|
For information about accessing and using AnyLink WebAdmin, refer to AnyLink WebAdmin Guide. |
Log in to AnyLink WebAdmin through a web browser, and go to [System] > [Adapter] to view the adapter list.

Click [Add] from the Adapter List screen to add an adapter. Enter the required information in the Add Adapter screen, and then click [Save]. If successful, the message "Created successfully." is displayed.

-
Basic Settings
Item Description Adapter ID
Adapter ID. Only alphanumeric and special (-, _) characters are allowed, and the length must be between 3 and 30 characters. Must be unique within the same business system.
Adapter Name
Adapter name. Only Korean, alphanumeric, and special (-, _) characters are allowed, and the length must be between 3 and 30 characters.
Adapter Type
Select 'Tmax' from the list.
Description
Adapter description. Optional.
Biz System Name
Business system to deploy adapter to.
-
[Advanced Settings] Tab
Item Description Outbound Thread Pool ID
Thread pool ID to be used during an outbound service call. If an ID different from the thread pool executed in the engine is specified, then the thread is changed to this thread pool during an outbound service call.
Use this option when the user wants to separate thread pools by each adapter so that there is no effect between different adapters.
2. Endpoint Configuration
Select the [System] > [Adapter] menu of WebAdmin to display the adapter tree on the left. Click the [Endpoint List] tab in the Adapter Details screen to display the endpoint list of the adapter.

Click [Add] below the [Endpoint List] tab to go to the Add Endpoint screen. Enter the required items, and then click [Save] to add the endpoint. Check the result from the tree on the left.
-
Basic Settings
The following shows the Basic Settings section of the Add Endpoint screen.
 Add Endpoint Screen - Basic Settings
Item Description Endpoint ID
Endpoint ID. Only alphanumeric and special (-, _) characters are allowed, and the length must be between 3 and 30 characters. Must be unique within the same adapter or endpoint group.
Endpoint Name
Endpoint name. Only Korean, alphanumeric, and special (-, _) characters are allowed, and the length must be between 3 and 30 characters.
Endpoint Status
Initial endpoint status.
-
Running: endpoint is running.
-
Stopped: endpoint is stopped.
Initial State at Boot
Initial endpoint state at boot time.
-
Running: endpoint is in Running state at boot time.
-
Stopped: endpoint is in Stopped state at boot time.
If the 'Endpoint Status' and 'Initial State at Boot' are different, a warning message ("Initial State at Boot" and "Endpoint Status" Mismatch Message) is displayed when stopping or restarting an endpoint.
Direction
Endpoint’s communication direction.
-
Inbound: endpoint for inbound messages.
-
Outbound: endpoint for outbound messages.
Description
Endpoint description. Optional.
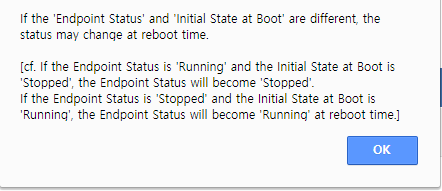 "Initial State at Boot" and "Endpoint Status" Mismatch Message
 -
-
[Connection Info] Tab
The following shows the [Connection Info] tab of the Add Endpoint screen.
 Add Endpoint Screen - [Connection Info] - Server
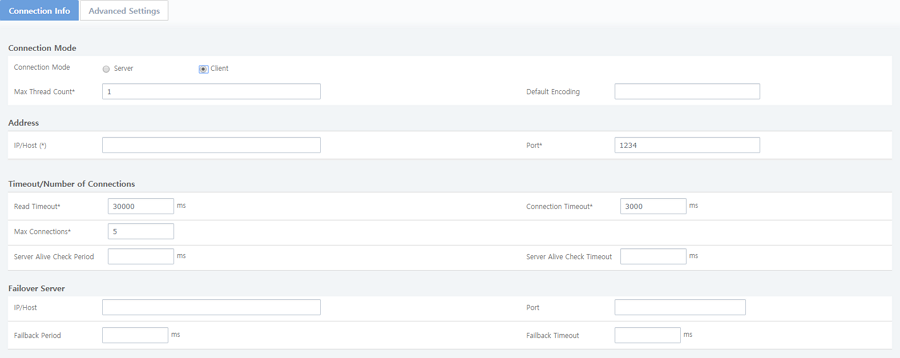 Add Endpoint Screen - [Connection Info] - Client
-
Connection Mode
Item Description Connection Mode
Connection method in which an endpoint runs.
-
Server: An endpoint runs in server mode.
-
Client: An endpoint runs in client mode.
Max Thread Count
Maximum work thread count.
For an outbound adapter, messages sent through a queue are processed by the work thread allocated in each adapter. As a result, the work thread count refers to the number of messages that are simultaneously processed. However, if the number of threads is too large, then overhead increases from frequent context exchanges. As a result, the user must set an appropriate value.
Default Encoding
Default encoding to be used in an endpoint. The encoding set in the message is given priority over the default encoding. If no encoding is set in the message and the endpoint, then the system’s default encoding is used.
-
-
Address
Item Description IP/Host
IP/host.
-
Client: IP/host to be connected.
-
Server: Node IP/host.
Port
Port.
-
Client: Port number to be connected.
-
Server: Port number to listen.
-
-
Timeout/Number of Connections
Item Description Read Timeout
Maximum wait time for a response after sending a request message to a Tmax server. If the response message is not received after this time has expired, then the adapter handles this message as an exception. Request messages received after this time are ignored. This option can be set only in a client type. (Default value: 30 sec)
Connection Timeout
Maximum wait time for a Tmax server to get a connection. This option can be set only in a client type.
Max Connections
Maximum number of connections between Tmax’s JEUS Gateway and an endpoint.
This value should be set larger than the MAX_CLH * CPC value in the Tmax server configuration file.
Server Alive Check Period
Interval for sending a ping message to a Tmax server. To check whether the server is alive, it needs to set both Server Alive Check Period and Server Alive Check Timeout.
There is no default value, and the alive check works only when set. This option can be set only in a client type.
Server Alive Check Timeout
Maximum wait time for a response message. If no response message is received before this timeout expires, then a ping message will be sent. If there is no response to the ping message for this timeout * 3, then it is determined that the connection has been disconnected.
There is no default value, and the alive check works only when set. This option can be set only in a client type.
-
Failover Server (Can be set only in the Client mode)
Item Description IP/host
IP/host of the failover server to be used when failed to connect.
Port
Port of the failover server to be used when failed to connect.
Failback Period
Set this option when performing a failover using the failover server and then performing a failback to the original server. If this period expires, then a connection is attempted to the original server. To use the failback function, it needs to set both Failback Period and Failback Timeout.
There is no default value, and the failover works only when set.
Failback Timeout
Timeout interval when connecting to the original server.
There is no default value, and the failover works only when set.
-
-
[Advanced Settings] Tab
The following shows the [Advanced Settings] tab in the Add Endpoint screen.
 Add Endpoint Screen - [Advanced Settings]
Item Description Message Handler
Select a message in the screen (Select Message Handler) displayed when clicking [Handler].
BizTx Group/BizTx
Select the transaction for the message that the endpoint must handle when receiving messages.
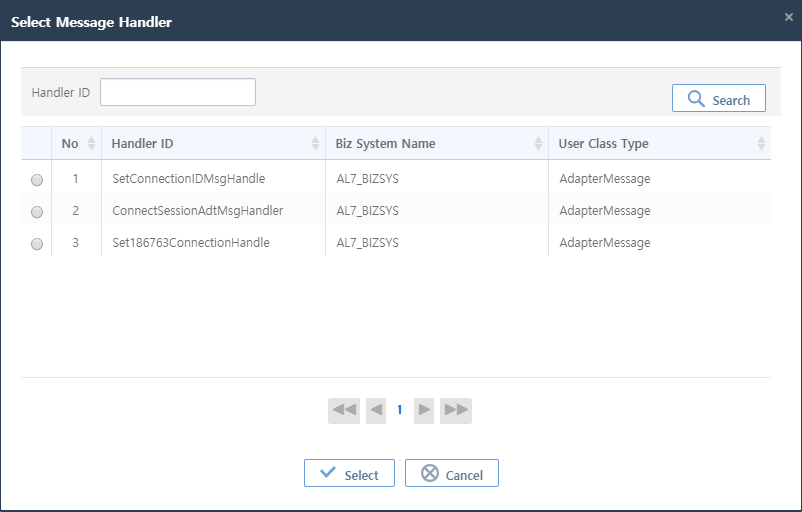 Select Message Handler
3. Outbound Rule Configuration
This section describes how to configure a Tmax outbound rule in AnyLink Studio.
|
For more information about AnyLink Studio, refer to AnyLink Studio Guide. |
In the Studio BizTx Group navigator, right click on a BizTx/BizTx Group and go to [New] > [Outbound Rule] > [Tmax Outbound Rule] to open the following Create Tmax Outbound Rule screen. Enter the required items, and then click [Finish].
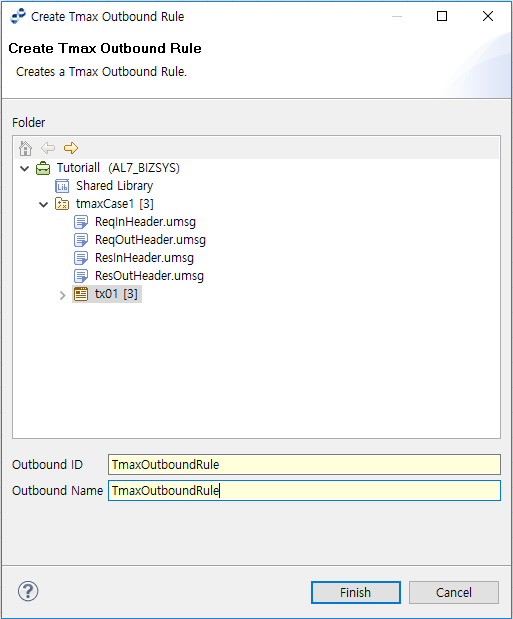
| Item | Description |
|---|---|
Outbound ID |
Outbound rule ID. Only alphanumeric and special (_) characters are allowed, and the first character must be an alphabet character. Must be unique in the same BizTx node. |
Outbound Name |
Outbound rule name. Only Korean, alphanumeric, and special (-, _) characters are allowed. Must follow the XML naming conversion. |
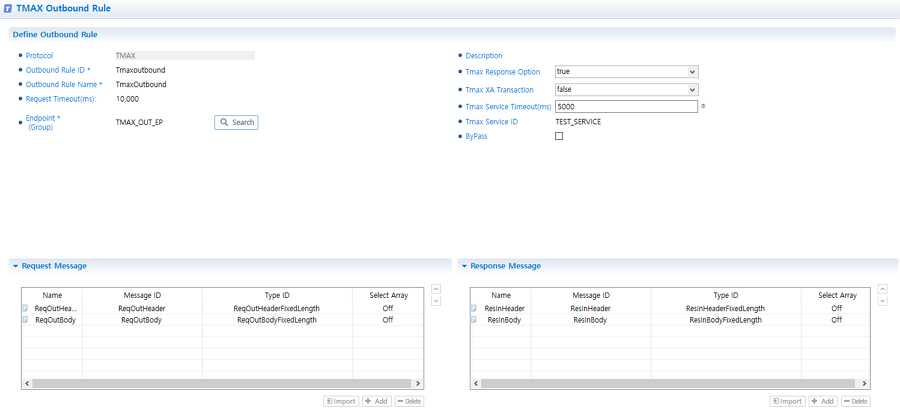
After an outbound rule is created, detailed settings are displayed in the following tabs.
-
Define Outbound Rule
Item Description Outbound Rule ID
Outbound rule ID. Only alphanumeric and special (_) characters are allowed. Must be unique within the same BizTx node.
Outbound Rule Name
Outbound rule name. Only Korean, alphanumeric, and special (-, _) characters are allowed.
Description
Outbound rule description.
Request Timeout (ms)
Request processing timeout (positive integer). Timeout occurs if no connection or an outbound request response is received during the timeout period starting from the time when the outbound rule is called.
Default value is 10000.
Endpoint (Group)
Endpoint or endpoint group in which the outbound rule will be added. Must be connected to the server.
Tmax Response Option
Select if a response is received from Tmax after a Tmax service call.
Tmax XA Transaction
Option to use XA transaction when calling a Tmax service.
Tmax Service Timeout (ms)
Service timeout when calling a Tmax service. It is recommended to set to a value less than the Request Timeout value.
Can be set to -1, 0, and a positive integer value. The default value is -1 when creating an outbound rule.
-
-1: Follows the endpoint setting.
-
0: Waits indefinitely.
-
Positive integer value: Waits as much as the set value.
Tmax Service ID
Tmax service ID to be called.
-
-
Define Outbound Rule Message
Request message and normal response message can be defined for an outbound rule.
Item Description Request Message
Request message for the outbound rule.
Normal Response Message
Response message for the outbound rule.