Introduction
This chapter describes the basic concepts of Test Framework and Studio’s unit test function and screen layout.
1. Overview
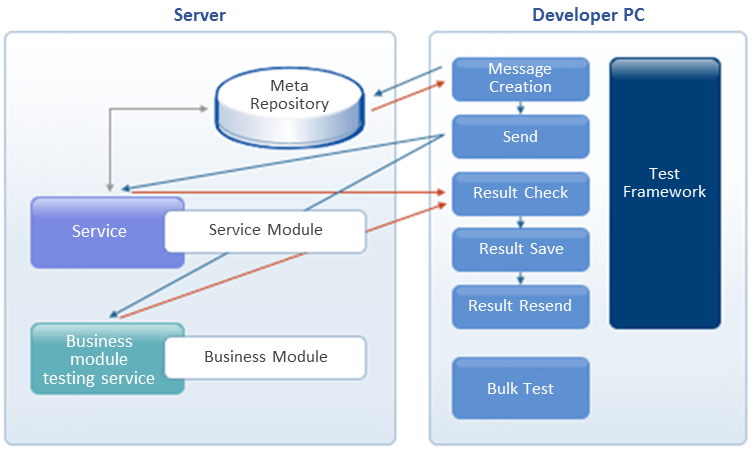
Test Framework is a Studio’s built-in tool that tests developed Service Module (SM) and Business Module (BM). With this tool’s unit test function, you can visually check the structure and field information of a selected module. You can also perform unit tests by entering test data as if the service is actually running. By providing this tool, ProFrame supports rapid and accurate business development.
The following describes the unit test.
-
Basic test
Basic test is for simply testing SM or BM developed in Studio.
You can perform a basic test by entering data to the input structure of the module to test. For more information, refer to Basic Test.
2. Opening Unit Test Screen
To open a unit test screen, select a module to test from ProFrame Navigator.
The following example opens a unit test screen.
-
Select and right-click a module to test from ProFrame Navigator. Select [Unit Test] from the context menu for each WS resource unit test.
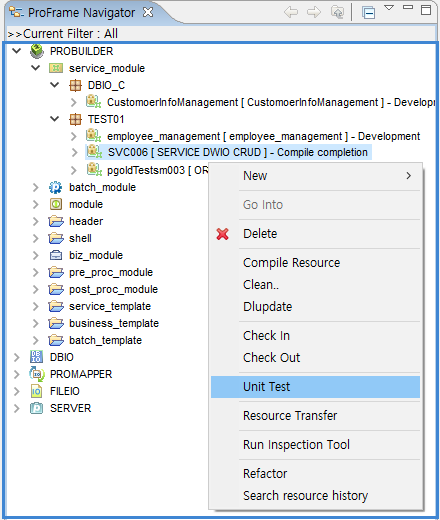 [Unit Test] Menu
 -
The following unit test screen opens. Its title differs depending on whether it is a SM or BM module or the RI/WS area resource.
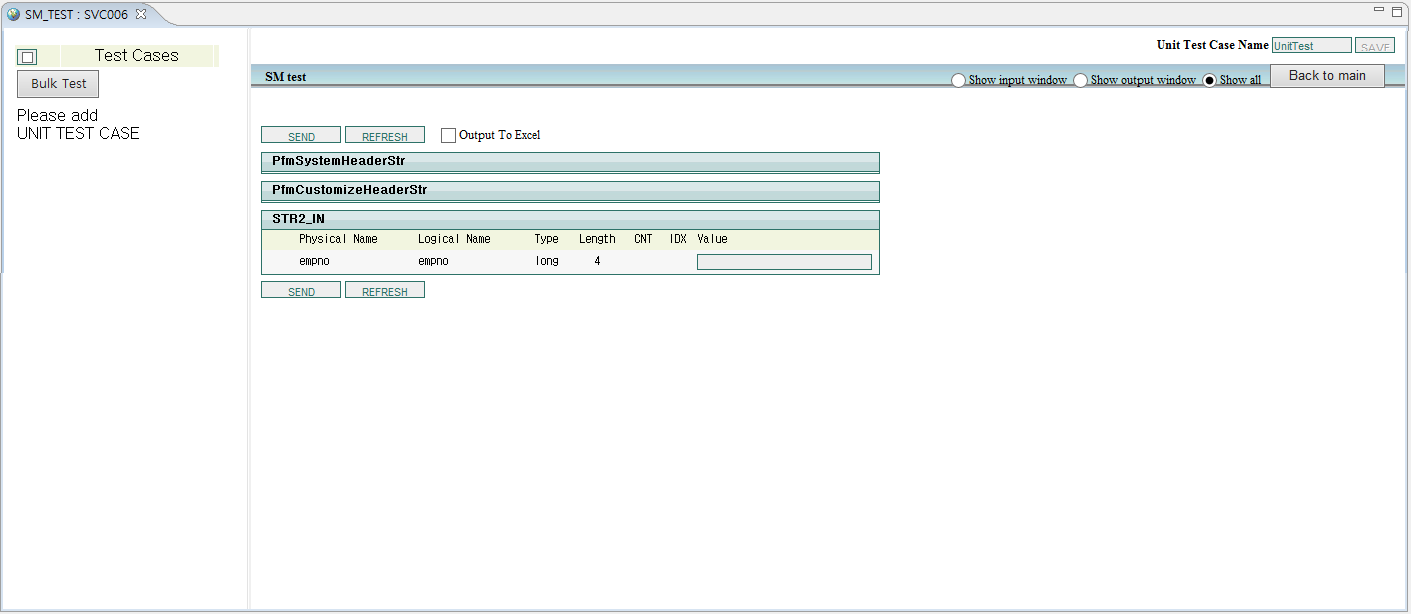 Example of Unit Test Screen
Module Unit Test Screen Title SM
SM_TEST : Physical_name
BM
Module_TEST : Physical_name
In this screen, a unit test can be performed based on selected module’s input structure information. For more information about how to perform a unit test, refer to Performing Unit Test.
3. Unit Test Screen Layout
The unit test screen is divided into 3 sections.
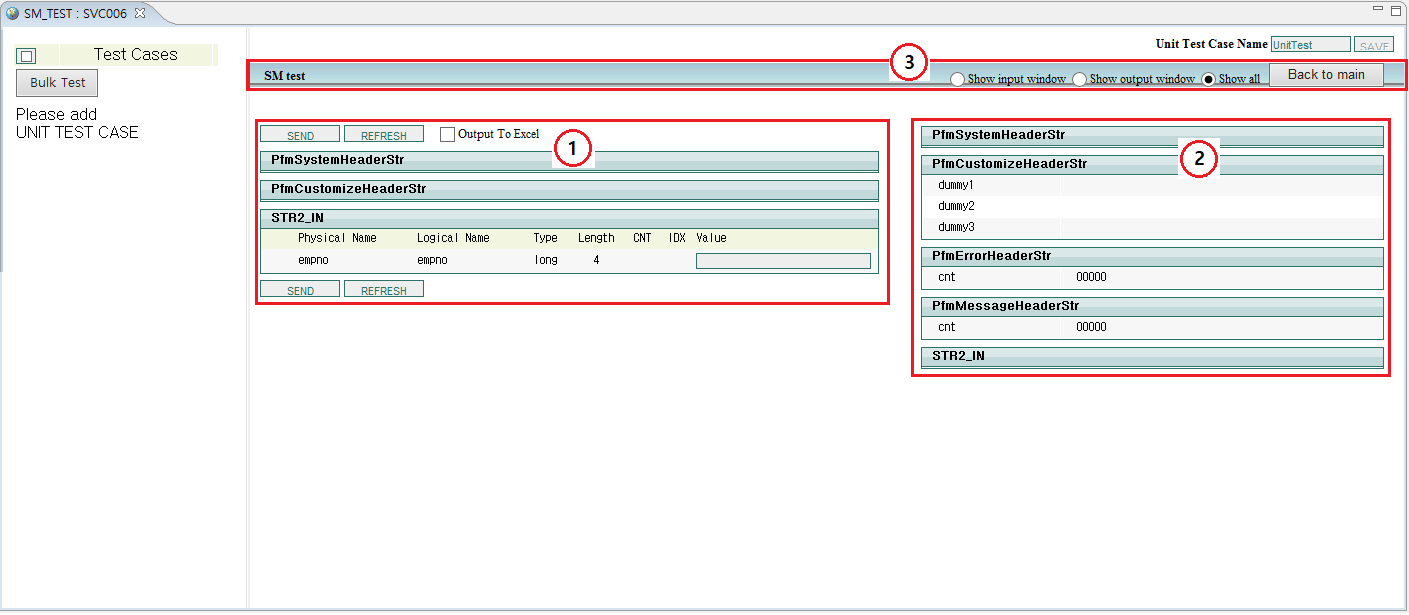
① Input section
② Output section
③ Input section’s view mode setting section
Input section
In this section, you can enter a selected module’s input information. To perform a unit test, enter data in the Value field and then click [SEND].
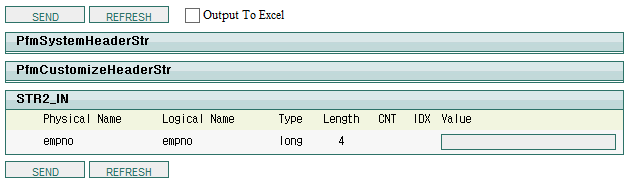
The following describes each item.
| Item | Description |
|---|---|
PfmSystemHeaderStr |
System header information of the selected module’s input message. |
PfmCustomizeHeaderStr |
Custom header information of the selected module’s input message. The information varies depending on the custom range. |
STR2_IN |
Information about the selected module’s input structure. |
Output To Excel |
If selected, unit test results are saved as an Excel file on the user’s local computer. |
[SEND] |
Performs unit test. |
[REFRESH] |
Initializes input values. |
Output section
Displays header information and output data as the unit test result.
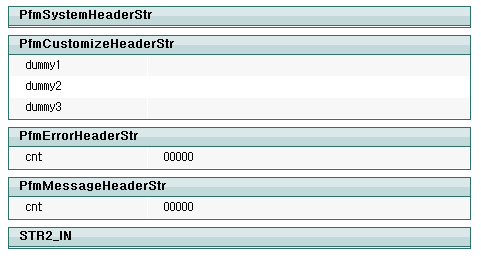
The following describes each item.
| Item | Description |
|---|---|
PfmSystemHeaderStr |
System header information of the selected module’s output message. |
PfmCustomizeHeaderStr |
Custom header information of the selected module’s output message. |
PfmErrorHeaderStr |
Error header information of the selected module’s output message. Header information is displayed as many as the number of errors occurred. |
PfmMessageHeaderStr |
Message information of the channel where the selected module is executed. |
Input section’s view mode setting section
The following describes each view and button.
| View/Button | Description |
|---|---|
Show input window |
Displays only the input section (①). |
Show output window |
Displays only the output section (②). |
Show all |
Displays the input and output sections (①, ②). |
[Back to main] |
Reloads the input section (①). |