Configuring FileIO
This chapter describes how to check and set FileIO-related information in Studio and WebAdmin.
1. Studio
The following are the steps for checking and setting FileIO preferences in Studio.
-
Select [Window] > [Preferences] from the main menu. In the open Preferences widow, select [ProFrame] > [FileIO].
-
In the open dialog box, set desired items and click [OK].
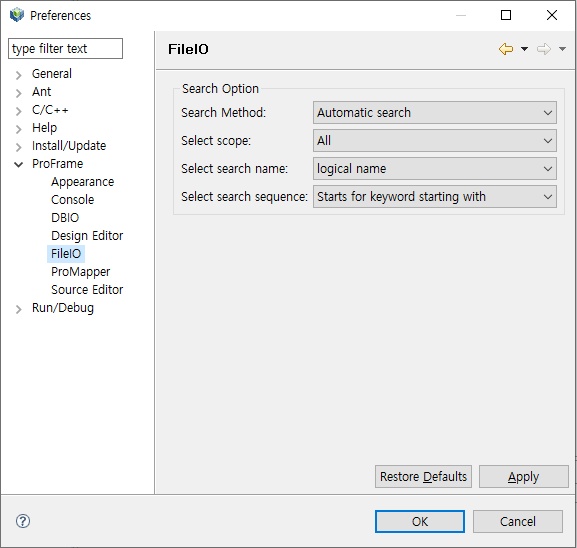 Studio – FileIO Configuration
The following describes each item.
-
Search Option
Options for searching for metadata or structures. The settings apply to both metadata and structures searches.
Item Description Search Method
Search method.
-
Automatic search: Displays search results after a few seconds after entering a search word.
-
Search manually: Displays search results after entering a search word and clicking [Search].
Select scope
Search scope.
-
All
-
User
Select search name
Either logical or physical name used to search for resources.
-
logical name
-
physical name
Select search sequence
Location of a search word.
-
Starts for keyword starting with: Searches for items from the start word.
-
Keyword containing: Searches for items containing the search word.
-
-
Buttons
Button Description [Restore Defaults]
Restores the default settings.
[Apply]
Applies the changes without closing the Preferences window.
-
2. WebAdmin
The following are the steps for checking and setting FileIO preferences in WebAdmin. For more information about how to use WebAdmin, refer to ProFrame Administrator Guide.
-
Enter the following URL in the address bar of your browser.
http://IP_ADDRESS:PORT/pfmdevsvr/login.jsp
'IP_ADDRESS' is the IP address of the host where the integrated server is installed, and 'PROT' is the listen port number of the integrated server set in WEBMain.xml.
-
The following WebAdmin login screen is displayed.
To log in to WebAdmin, select a project from 'PROJECT ID', enter your ID and password in the 'ID' and 'PW' text boxes, and then click [Login]. You can also use the default ID and password. The default ID is 'Tester' and password is '1234'.
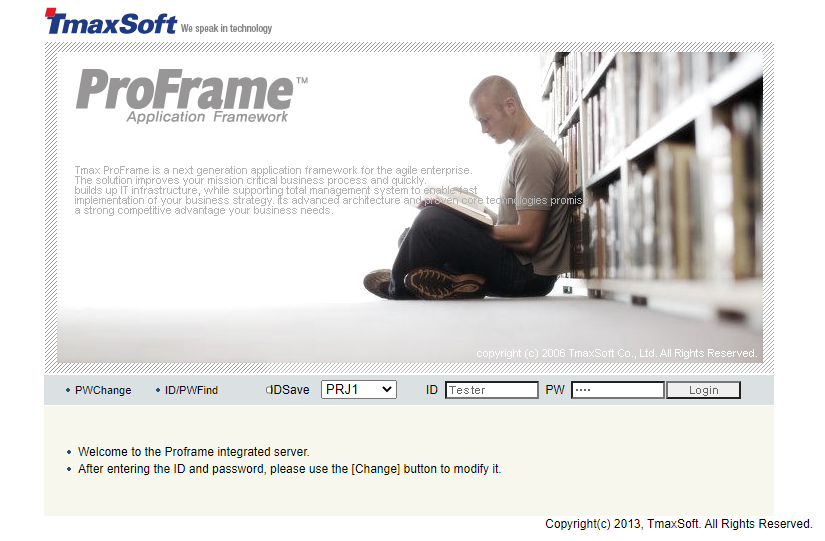 WebAdmin – Login Screen
 -
The following WebAdmin main screen is displayed.
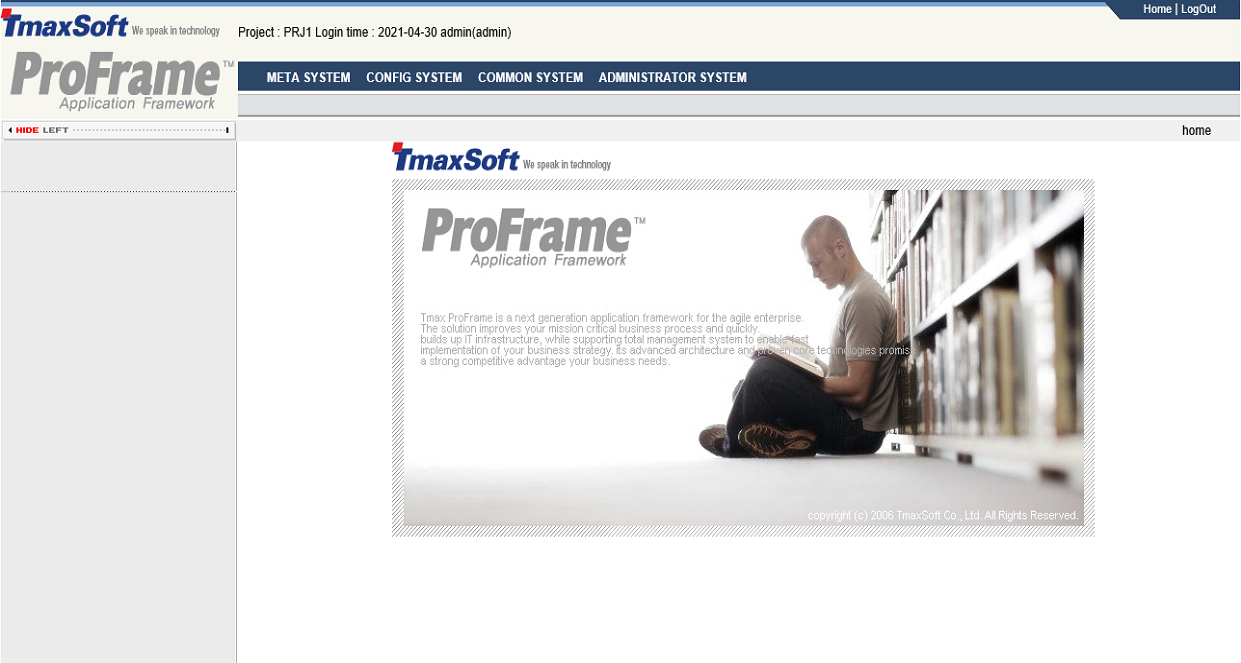 WebAdmin – Main Screen
 -
Select [CONFIG SYSTEM] from the main screen and then select [CONFIG MANAGEMENT] > [ConfigMgmt] > [ConfigMgmt].
-
In the ConfigMgmt screen, select 'FILEIO_STUDIO' from 'ConfigGroup' from the ConfigGroup combo box.
 WebAdmin – ConfigMgmt
FILEIO_STUDIO is a configuration group that includes configuration data related to FileIO operation. It includes data in the DEV_CONFIG table. The data can be added, modified, and deleted.
-
The following shows the results. The displayed number of results can be set up to 100.
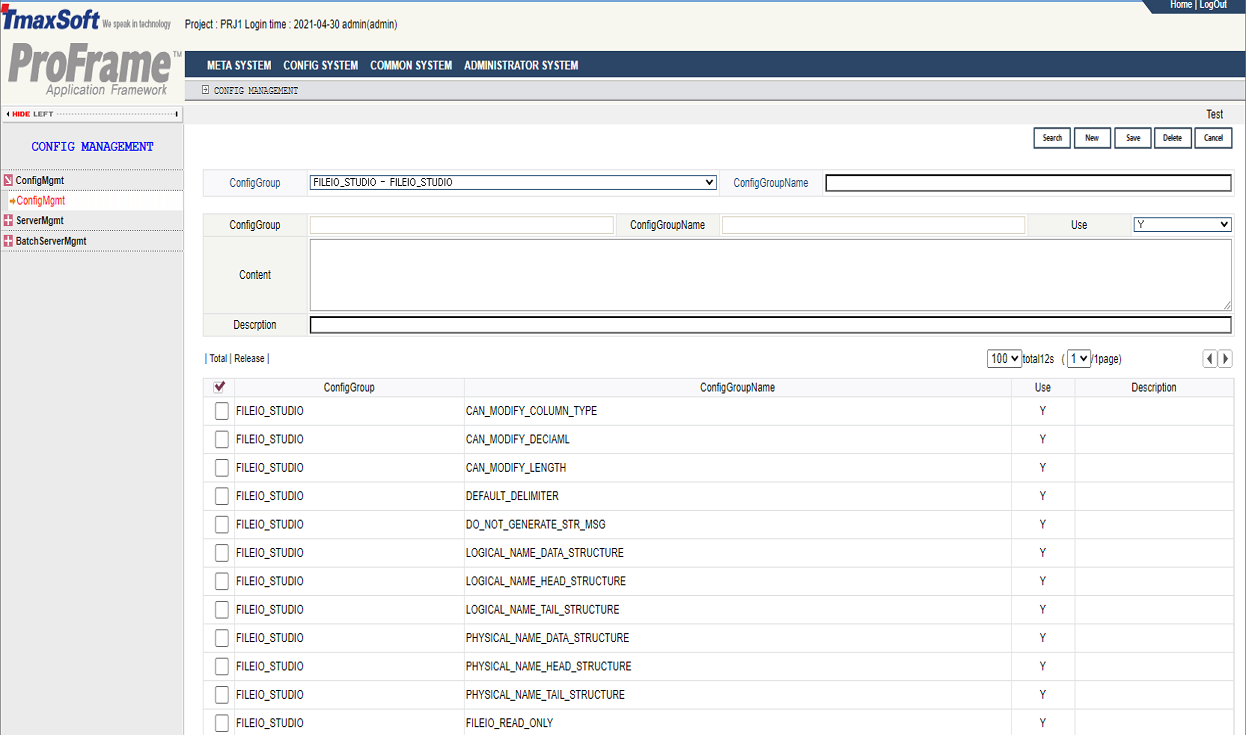 WebAdmin – FILEIO_STUDIO Search Results
The following describes each configuration item.
Item Description CAN_MODIFY_LENGTH
Option to enable editing column length.
-
true: Editable.
-
false: Not editable.
CAN_MODIFY_DECIAML
Option to enable editing columns' Decimal values.
-
true: Editable.
-
false: Not editable.
CAN_MODIFY_COLUMN_TYPE
Option to enable editing columns' data types.
-
true: Editable.
-
false: Not editable.
DEFAULT_DELIMITER
Default delimiter.
(Example: ,)
DO_NOT_GENERATE_STR_MSG
Option to create a structure and message when creating a FILEIO resource.
-
true: Creates only a FileIO resource.
-
false: Creates not only a FileIO resource but also a structure and message.
LOGICAL_NAME_HEAD_STRUCTURE
Suffix of the logical names of structures used for Head columns.
(Example: Head)
LOGICAL_NAME_DATA_STRUCTURE
Suffix of the logical names of structures used for Data columns.
(Example: Data)
LOGICAL_NAME_TAIL_STRUCTURE
Suffix of the logical names of structures used for Tail columns.
(Example: Tail)
PHYSICAL_NAME_HEAD_STRUCTURE
Suffix of the physical names of structures used for Head columns.
(Example: Head)
PHYSICAL_NAME_DATA_STRUCTURE
Suffix of the physical names of structures used for Data columns.
(Example: Data)
PHYSICAL_NAME_TAIL_STRUCTURE
Suffix of the physical names of structures used for Tail columns.
(Example: Tail)
-
-
Check the values in 'Content' and modify them if necessary.
The following are the steps for modifying the configuration items.
-
Select a configuration item to modify.
-
Check the values set in the item.
-
Modify the values ('Use', 'Content', 'Description') and then click [Save].
-
Confirm the modified values.
-
|
For more information about WebAdmin, refer to ProFrame Administrator Guide. |