Studio Preferences
This chapter describes how to set the studio preferences for the convenience of the developer. Select [Window] > [Preferences] for setting preferences.
1. Appearance
Select [ProFrame] > [Appearance] in [Preferences] dialog box. Appearance consists of [Basic], [Navigator] and [Other] tabs as settings for fonts and search options on the screen.
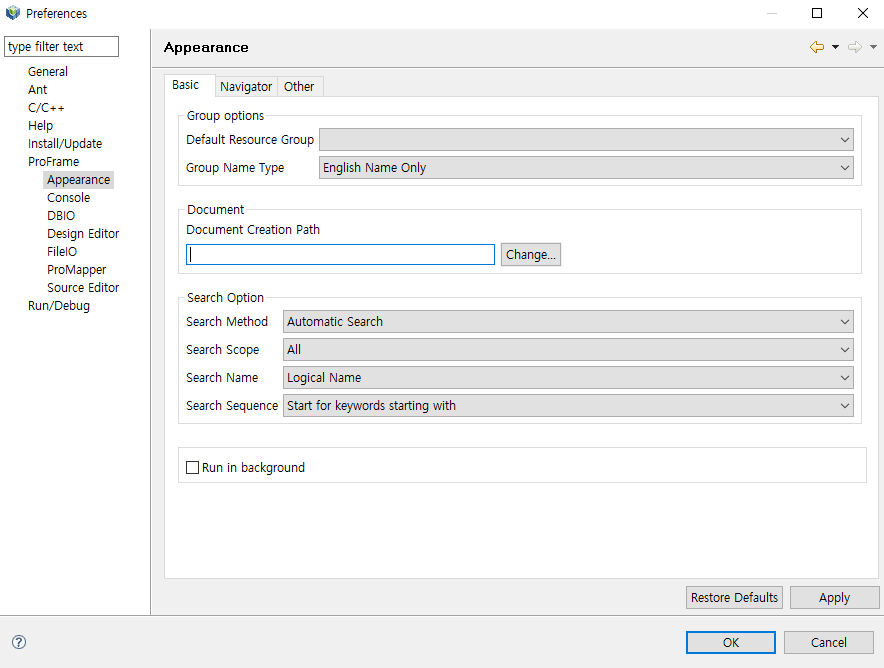
1.1. Basic
Sets the default group options, Document Creation Path, and Search Option. Click [OK] when each item is entered.
-
Group Option
Item Description Default Resource Group
Sets as the default group to which the user belongs, and when a new resource is created, the group in which the resource group is set is automatically set.
Group Name Type
Sets the type of group name. It can be selected from 'English name' and 'English name + Korean name'.
-
Document
Item Description Document Creation Path
Sets the path to save when creating a document.
-
Search Option
Item Description Search Method
Sets the search method.
-
Automatic Search: Search results are automatically displayed a few seconds after entering a search word.
-
Search Manually: Search results are displayed only when clicking [Search].
Search Scope
Sets the search scope.
-
All
-
Users
Search Name
Selects whether to search by logical name or physical name.
Search Sequence
Selects whether the keyword is a starting word or an inclusion word.
-
-
Button
Button Description [Restore Defaults]
Sets the setting value to the default value.
[Apply]
Applies the changes.
[OK]
Closes the screen when the operation is complete.
1.2. Navigator
Sets the group and font displayed in the navigator. Click [OK] to reflect the changes.

-
Item
Item Description Group Filter
Sets the group to be displayed in the navigator. Multiple groups can be filtered using a comma (,).
Navigator text font
Sets the font displayed in the navigator. The recommended font in the navigator is 'Gullim-regular-8'. (Default: 'Arial-Regular-8')
-
Button
Button Description [Restore Defaults]
Sets the setting value to the default value.
[Apply]
Applies the changes.
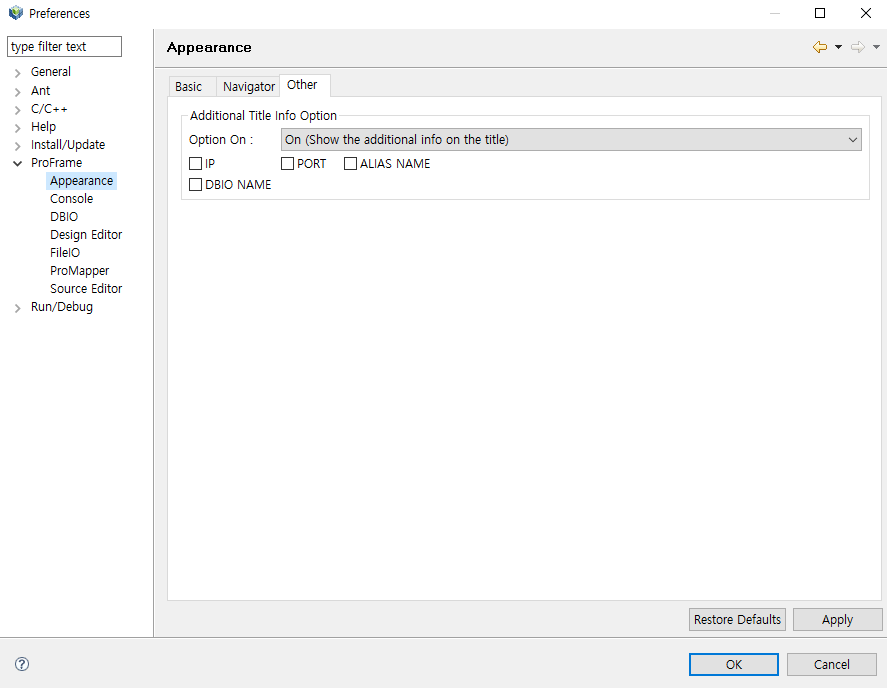
1.3. Other
Sets the access information in the title bar at the top of the studio. Enter each item and click [OK].
-
Item
Item Descrition Option On
Sets whether to show access information on the title bar at the top of the studio.
IP
Sets whether to show IP information on the title bar at the top of the studio.
PORT
Sets whether to show PORT information on the title bar at the top of the studio.
ALIAS NAME
Sets whether to show ALIAS NAME information on the title bar at the top of the studio.
-
Button
Button Description [Restore Defaults]
Initializes the setting values to the default values.
[Apply]
Applies the changes.
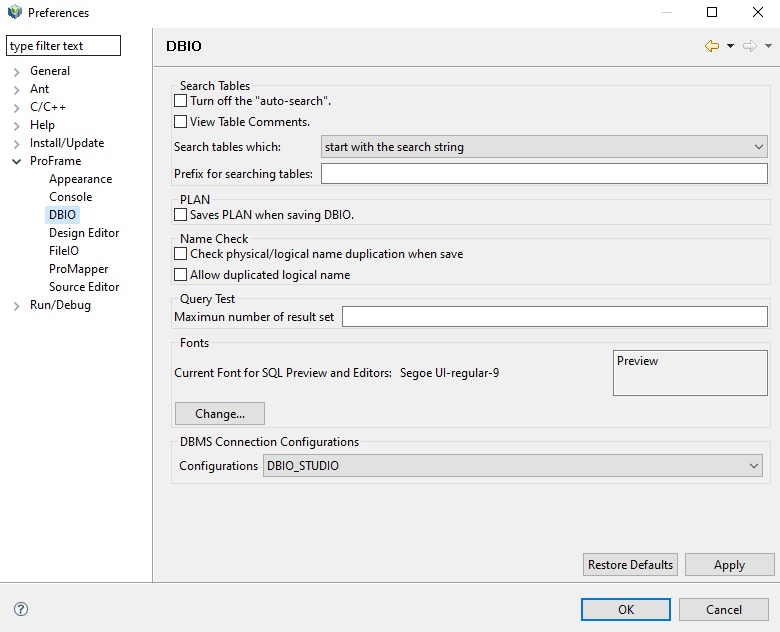
2. DBIO
Sets connection information for DBIO, table search, and whether to save plan. Enter each item and click [OK].
-
Item
Item Description Search Tables
Sets the properties of the table required when creating a DBIO query.
PLAN
Saves the plan information automatically in DEV_DBIO_PLAN table when saving a DBIO query.
Name Check
Sets whether the same logical/physical name exists for the DBIO module name and whether to allow duplicate logical names.
Query Test
Sets the maximum number of ReusltSet to show when testing the written DBIO query.
Fonts
Sets the font of DBIO editor.
DBMS Connection Configurations
If there are multiple configuration groups of which the database access account set in WebAdmin, they are all displayed in the combo box.
-
Button
Button Description [Restore Defaults]
Initializes the setting values to the default values.
[Apply]
Applies the changes.
|
For more information on DBIO, refer to ProFrame DBIO Developer Guide. |
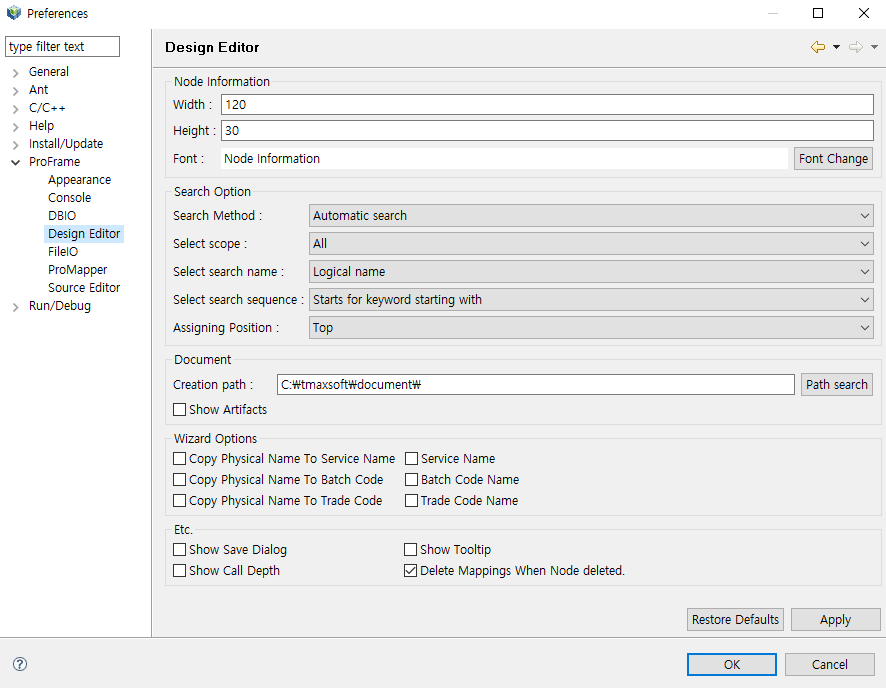
3. Design Editor
Provides preferences related to the design of the EMB module. Users can set the node setting displayed on the design screen, options when searching in the resource pool, product path setting, and options related to module creation. Enter each item and click [OK].
-
Node Information
Item Description Width
Sets the width of node displayed in EMB Designer.
Height
Sets the height of node displyed in EMB Designer.
Font
Sets the font of node displayed in EMB Designer.
-
Search Option
Item Description Search Method
Sets the search method.
-
Automatic search: Search results are automatically displayed a few seconds after entering a search word.
-
Search manually: Search results are displayed only when clicking [Search].
Select Scope
Sets the search scope.
-
All
-
Users
Select Search Name
Selects whether to search by logical name or physical name.
Select Search Sequence
Selects whether the keyword is a starting word or an inclusion word.
Assigning Position
Selects whether to add an item at the top or at the bottom in adding process.
-
-
Document
Item Description Creation Path
Specifies the path where the document is created.
Show Artifacts
Determines whether to show the document after it is created.
-
Wizard Options
Sets the desired items among settings related to physical name, service name, batch code name, and transaction code name when creating a new module.
-
Etc.
Item Description Show Save Dialog
Sets whether to display the message window after saving.
Show Tooltip
Sets whether to display simple information of the node when the mouse cursor is placed on each node.
Show Call Depth
Determines whether to output the function call depth at the top right of the node. The module call depth means the number of consecutive calls of the Call module.
Delete Mappings When Node Deleted
Determines whether to simultaneously delete the mapping information of the module when a mapping module is deleted.
-
Button
Button Description [Restore Defaults]
Initializes the setting values to the default values.
[Apply]
Applies the changes.
|
For more information on Design Editor, refer to ProFrame EMB Developer Guide. |
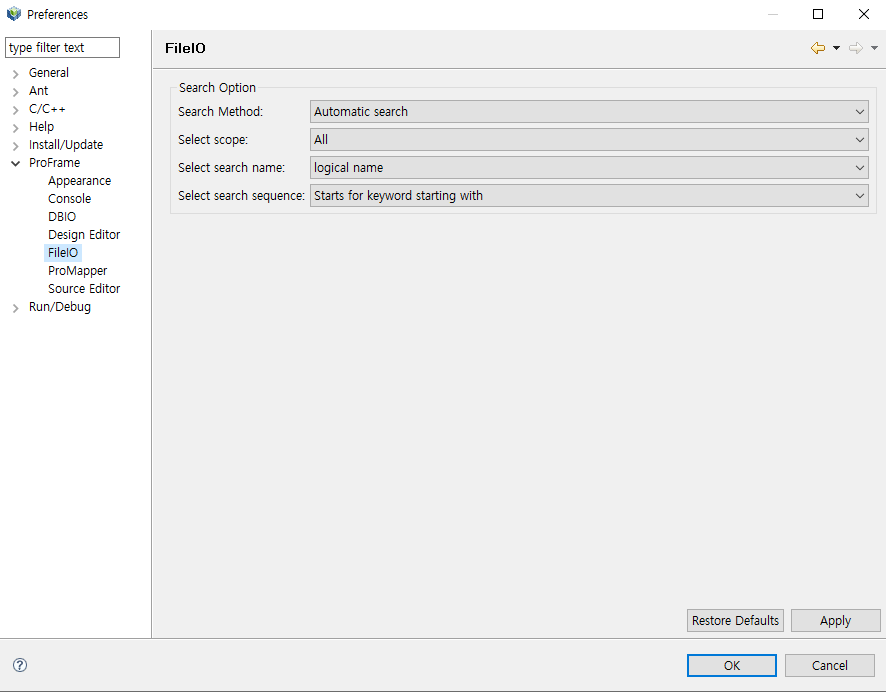
4. FileIO
Studio provides preferences related to FileIO. Users can see the menu only after installing the separately provided FILEIO plug-in. Enter each item and click [OK].
-
Search Option
Item Description Search Method
Sets the search method.
-
Automatic Search: Search results are automatically displayed a few seconds after entering a search word.
-
Search Manually: Search results are displayed only when clicking [Search].
Search Scope
Sets the search scope.
-
All
-
Users
Select Search Name
Selects whether to search by a logical name or a physical name.
-
Logical name
-
Physical name
Select Search Sequence
Selects whether the keyword is a starting word or an inclusion word.
-
Starts for keyword starting with: Search from the beginning of the word
-
Keyword containing: Search including the entered word.
-
-
Button
Button Description [Restore Defaults]
Initializes the setting values to the default values.
[Apply]
Applies the changes.
|
For more information, refer to ProFrame FileIO Developer Guide. |
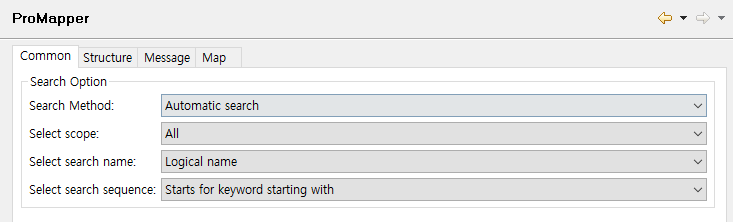
5. ProMapper
Sets the necessary settings when developing structures, texts, maps, etc. using ProMapper. ProMapper consists of [Common], [Structure], [Message], and [Map].
[Common]
Sets the search option.
| Item | Description |
|---|---|
Search Method |
Sets the search method.
|
Search Scope |
Sets the search scope.
|
Select Search Name |
Selects whether to search by a logical name or a physical name.
|
Select Search Sequence |
Selects whether the keyword is a starting word or an inclusion word.
|
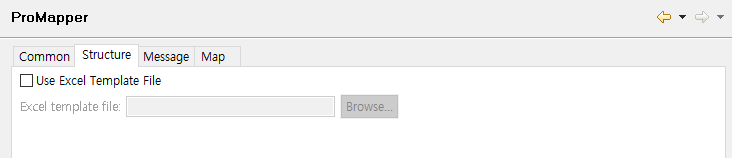
[Structure]
Configures settings related to structure creation. When using an Excel template file, users need to specify the path to the template file.
[Message]
Sets the trim method when creating a message.
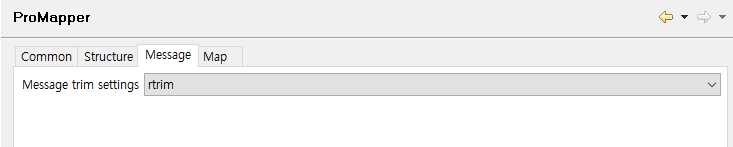
Choose one of the following items.
| Item | Description |
|---|---|
rtrim |
Trims right space. (default) |
ltrim |
Trims left space. |
Irtrim |
Trim left or right space. |
none |
Do not trim. |
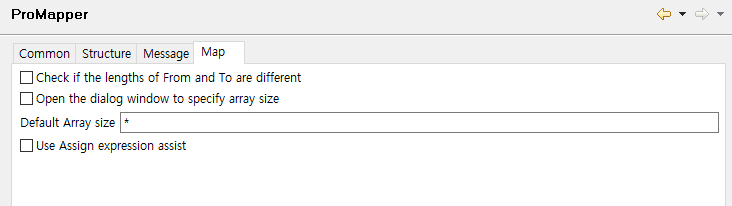
[Map]
Sets the basic action to be performed when mapping Assign.
| Item | Description |
|---|---|
Check if the lengths of From and To are different |
Notifies the lengths between fields are different in the map editor if the field lengths of Source and Target are different when mapping between fields. |
Open the dialog window to specify array size |
Opens a dialog box of the array size when inputting the array size in the map editor. |
Default Array size |
Sets the default array size if including sub-structures. |
Use Assign expression assist |
Determines whether Expression Assist is enabled or disabled in the map editor. |
|
For more information, refer to ProFrame ProMapper Developer Guide. |
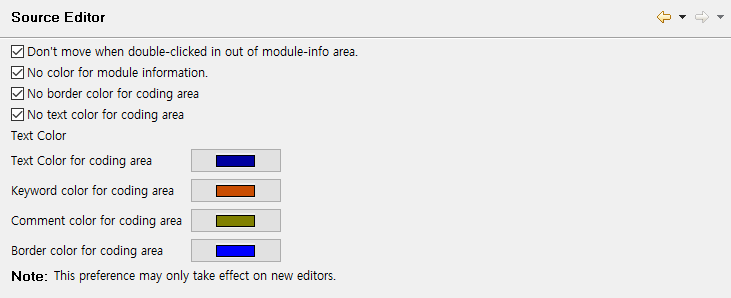
6. Source Editor
Sets the module information comments and the color of coding area on the source.
| Item | Description |
|---|---|
Don’t move when double-clicked in out of module-info area |
Moves to the corresponding node in the design editor when double-clicking the module information comment area with the mouse. |
No color for module information |
Displays a rectangular box and color in the module information comment section. |
No border color for coding area |
Displays the color of upper and lower comments in coding area. |
No text color for coding area |
Changes the code color within the coding area according to the information set in the menu. |
Text color for coding area |
Sets text color for coding area. |
Keyword color for coding area |
Sets keyword color for coding area. |
Comment color for coding area |
Sets the color of annotations in the coding area. |
Border color for coding area |
Sets the color of the upper and lower annotation text in the coding area. |
|
For more information on Source Editor, refer to ProFrame EMB Developer Guide. |
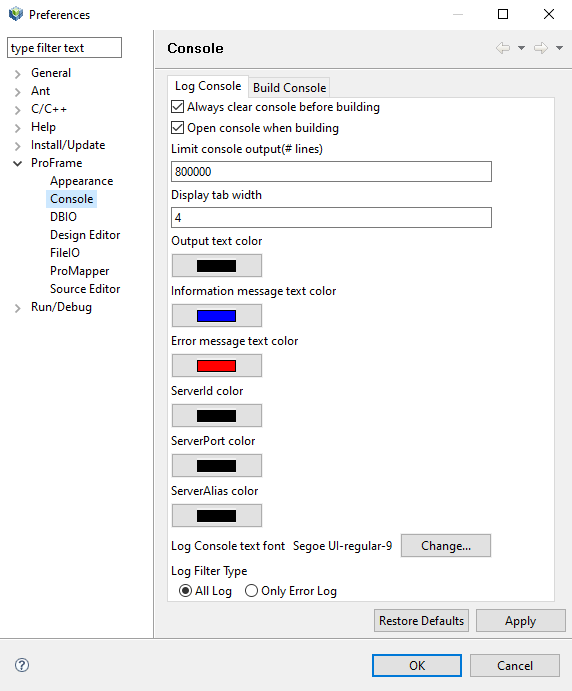
7. Console
Sets the log displayed on the console screen. A console is consists of [Log Console] and [Build Console].
[Log Console]
Sets the log displayed on the console when performing unit tests of service module and business module.
| Item | Description |
|---|---|
Always clear console before building |
Clears all contents on the console before outputting the building related log. |
Open console when building |
Shows the console view on top when building. |
Limit console output (# lines) |
Enters the maximum number of lines that can be output to the console. |
Display tab width |
Sets the length of indentation when the log is output from the console. |
Output text color |
Selects the text color for general contents among the contents of the log output to the console. |
Information message text color |
Selects the text color for the notification message among the contents of the log output to the console. |
Error message text color |
Selects the text color for the error message among the contents of the log output to the console. |
Log Console Text Font |
Selects the size, font type, and characteristics of the text of the log output to the console. The recommended font setting is 'Gullim-regular-8'. |
Log Filter Type |
Sets to output all logs or only the error log among the logs by selecting the format of the log output to the console. |
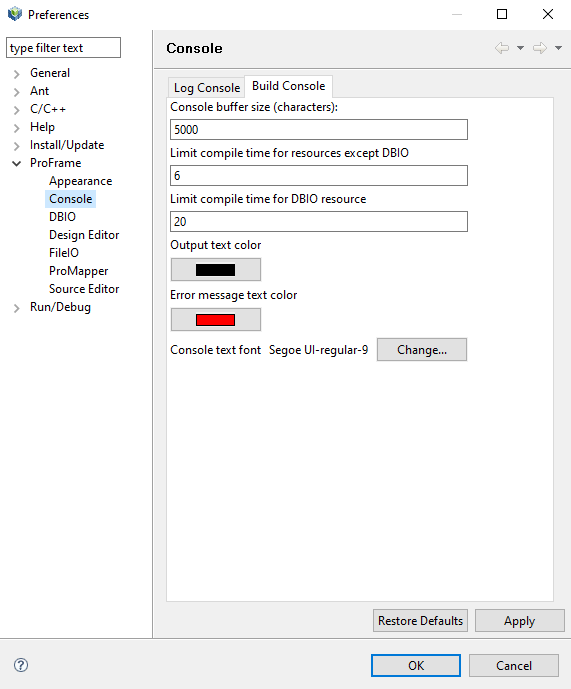
[Build Console]
Sets the contents output to the console when compiling and Dlupdate for resources.
Compile timeout can be set in seconds. If compiling is not completed within the specified time, a timeout error occurs and the mouse lock is released. The reason for distinguishing the maximum compile time for DBIO and non-DBIO resources is that DBIO takes more time in compiling because source creation and compiling are performed at the same time, which is different from other other resources' operation method.
| Item | Description |
|---|---|
Console buffer size (characters) |
Enters the maximum number of lines that can be output to the console. |
Limit compile time for resources except DBIO |
Sets the response time from the server when building is performed for resources other than DBIO. After the set time has elapsed, an error message is output. |
Limit compile time for DBIO resource |
Unlike other resources, DBIO takes longer to build. Therefore, the compile time of DBIO and other resources other than DBIO can be set differently. Here, users set the compile time for DBIO. |
Output text color |
Selects the text color for general contents among the contents of the log output to the console. |
Error message text color |
Selects the text color for error messages among the contents of the log output to the console. |
Console text font |
Selects the size, font type, and characteristics of the text of the log output to the console. The recommended font setting is 'Gullim-regular-8'. |